
 MVP Profile
 Try my app HoloATC!
  HoloLens 2
 Magic Leap 2
 Android phones
 Snap Spectacles
 Buy me a drink ;)
 BlueSky
 Mastodon
 Discord: LocalJoost#3562
Controlling a Lens Studio UIKit button’s Interactable behavior
In ye olden days - in Lens Studio time units, this is about 8 weeks ago - we used a PinchButton from the Spectacles Interaction Kit to create a button on some kind of menu. This was - and still is - a pretty full-featured component, but all those options made it sometimes a bit hard to use. Enter UIKit, which makes it a lot simpler. You just, for instance, add a UIKit RectangleButton, RoundButton, or CapsuleButton script to a SceneObject, add a text or an icon to it, and you’re done. One button, ready to run.
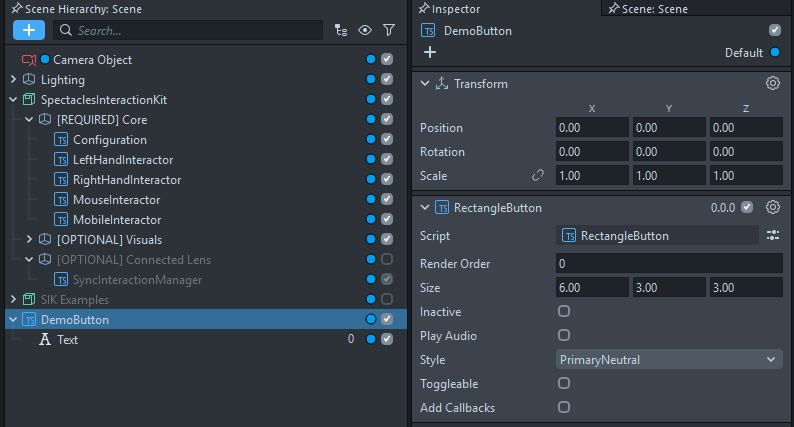
Unfortunately, we also lost a bit. For instance, we lost sound effects. In addition, the PinchButton contained an Interactable, which allowed us to control the button’s behavior in quite some detail:

However, it turns out that the UIKit button scripts are quite busybodies. If you select the “Inspect Preview” button on your preview panel, you’ll see what’s actually going on behind the scenes:
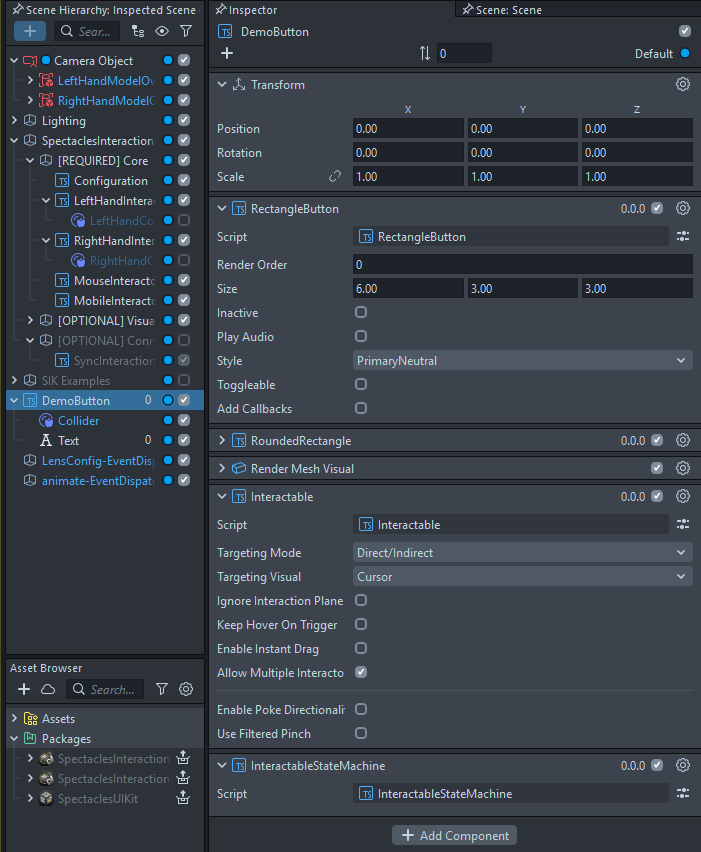
Aha! In fact, most of what the three UIKit buttons do is create all the components you need to make a functioning button on the fly, including an Interactable, to save you a lot of work. This, now, we can use to our advantage!
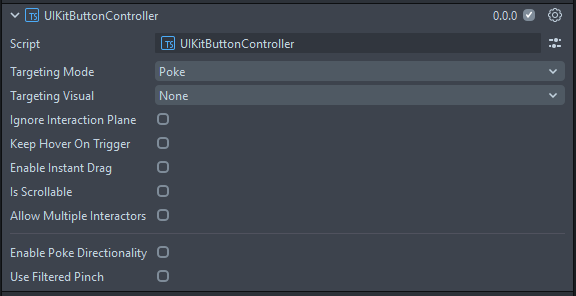
As you can see on the MyButton prefab I made in the demo project for the scrollable menu, there is an UIKitButtonController script added below the RectangleButton. Not coincidentally, this has exactly the same properties as an Interactable.
This is a little script I created. Actually, most of it I just nicked from Interactable itself: all the properties and UI widget declarations. The only part I added was this:
onAwake() {
    this.tryGetInteractable();
}

private tryGetInteractable(attempts: number = 0): void {
    const interactable = this.getSceneObject().getComponent(Interactable.getTypeName()) as Interactable;

    if (interactable) {
        this.updateInteractableProperties(interactable);
    } else if (attempts < 10) { // Max 10 attempts
        const delayedEvent = this.createEvent("DelayedCallbackEvent");
        delayedEvent.bind(() => this.tryGetInteractable(attempts + 1));
        delayedEvent.reset(0.1); // Wait 100ms between attempts
    } else {
        print("UIKitButtonController: Failed to find Interactable component after 10 attempts");
    }
}

private updateInteractableProperties(interactable: Interactable): void {
    interactable.targetingMode = this.targetingMode;
    interactable.targetingVisual = this.targetingVisual;
    interactable.ignoreInteractionPlane = this.ignoreInteractionPlane;
    interactable.keepHoverOnTrigger = this.keepHoverOnTrigger;
    interactable.enableInstantDrag = this.enableInstantDrag;
    interactable.isScrollable = this.isScrollable;
    interactable.allowMultipleInteractors = this.allowMultipleInteractors;
    interactable.enablePokeDirectionality = this.enablePokeDirectionality;
    interactable.acceptableXDirections = this.acceptableXDirections;
    interactable.acceptableYDirections = this.acceptableYDirections;
    interactable.acceptableZDirections = this.acceptableZDirections;
    interactable.useFilteredPinch = this.useFilteredPinch;
}
After onAwake, it tries ten times within a second to see if the button script has already finished creating the Interactable, and if so, it transfers all the properties you set in the Inspector to the actual Interactable. Not quite rocket science, but very useful.
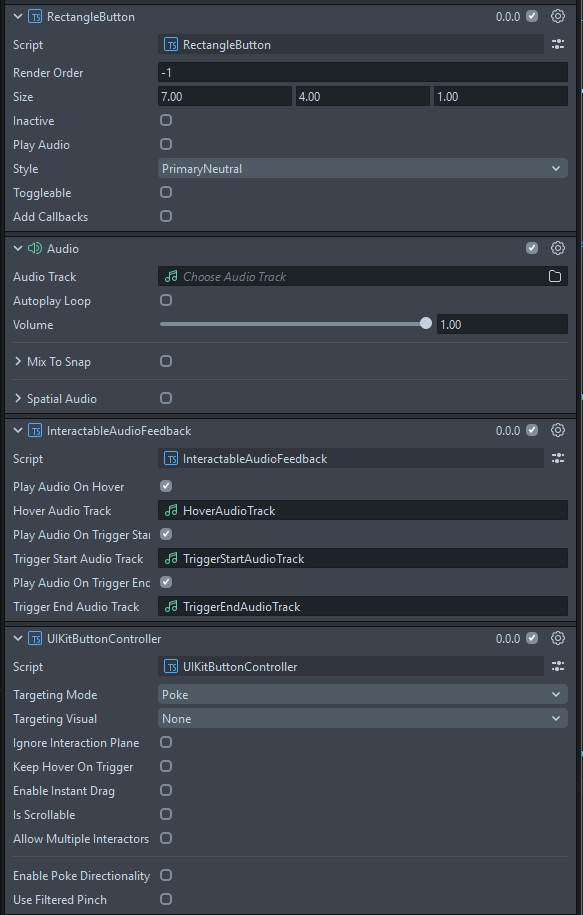
And by the way, if you want to have the sound effects back that you got using the SIK buttons, just add an Audio component and a properly configured InteractableAudioFeedback below the button script, and it will be picked up automatically by the Interactable that will be created at runtime by the UIKit button scripts, like this:
All code and samples are already in the demo project used in my previous two posts, so I’m not going to add a specific new project for this. You can simply nick the UIKitButtonController script from there.