
 MVP Profile
 Try my app HoloATC!
  HoloLens 2
 Magic Leap 2
 Android phones
 Snap Spectacles
 Buy me a drink ;)
 BlueSky
 Mastodon
 Discord: LocalJoost#3562
Lens Studio Cube Bouncer for the confused Unity developer: add a hand menu
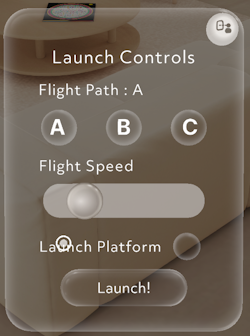
If you have tried the final version of Cube Bouncer already, you might have noticed this hand menu. You pull up a hand, palm towards you, and this menu shows up. Now if you come from MRTK and HoloLens development, this is a very natural interaction method, and I decided to re-create it for Spectacles, if only because I had no idea how I otherwise should get an easy-to-use settings menu.
So I am going to explain to you, the confused Unity developer, how to build a hand menu. Although “build” is a bit of a stretch, at least where the visuals are concerned.
Building the visuals
Part 1: Why build if you can steal borrow
Not being very gifted in the UI design department and being a lazy ** to boot, I always check first if I can swipe something existing. So I took a look at the Starter Project. There is a menu called “RocketLaunchControls” that has a lot of stuff I don’t need, but looks like a nice starting point.
So I duplicated that in the starter project (CTRL-D), renamed it to “HandMenu”, and started slashing.
Part 2: slash and burn
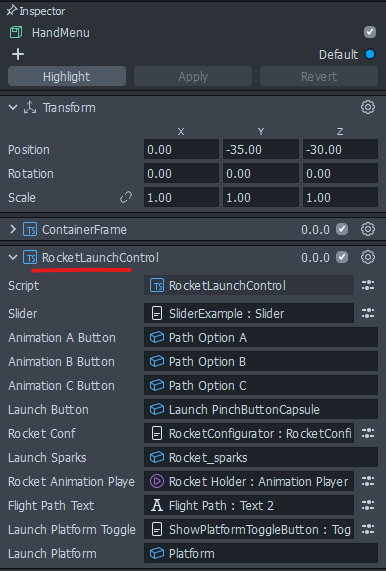
First order of business: remove the script “RocketLaunchControl” from the root object:
 .
.
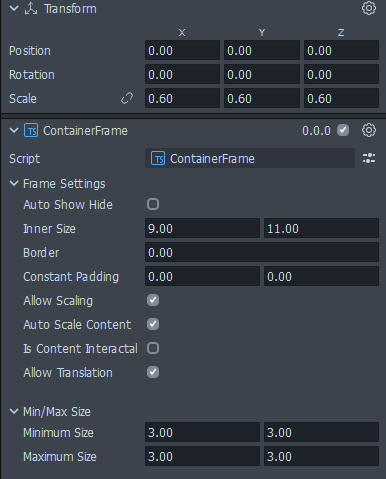
Then, on the ContainerFrame, uncheck these three checkboxes:
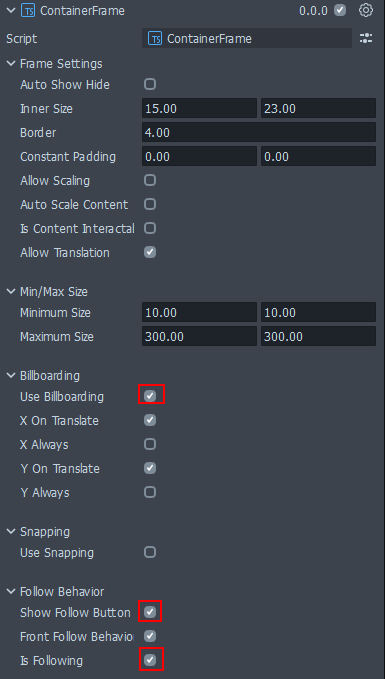
and click “Apply” on top. This removed the auto following of the menu and the close button. Next order of business: remove almost everything from the hand menu but the “Launch” button. Select all components but the top and the bottom one of your HandMenu-under-construction:
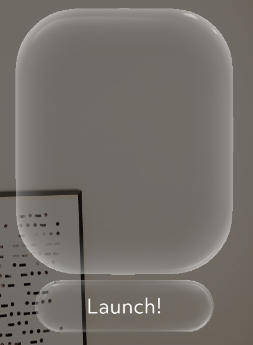
Hit Delete, and click Apply again. The only things left now are this

Part 3 - building it up again
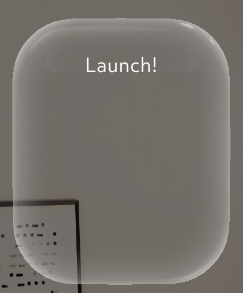
Now I can set the settings for size and button locations, and that is always a bit of fiddling around. I went back to the HandMenu Transform and ContainerFrame, and changed the settings to this:
That kind of starts to look right…
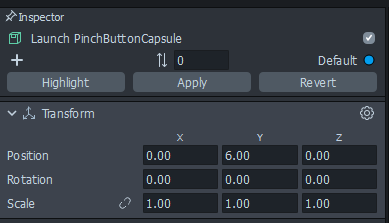
We only now actually need three buttons instead of one, fitting actually in the box instead of floating below it. You have to take it from me that you just need to make these settings in the transform of the button to make it appear in the right place:
See? ;)
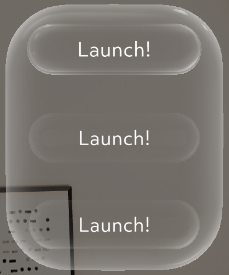
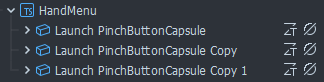
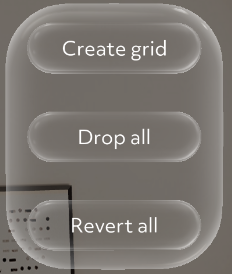
As you saw on the little movie on top, we actually need three buttons. By now your confusion as a Unity developer should be diminished to the point that you actually would pretty much know what to do: duplicate that button twice (CTRL-D). Set the 2nd button’s transform Y value to 0, and the third button’s transform Y value to -6, and hey presto:
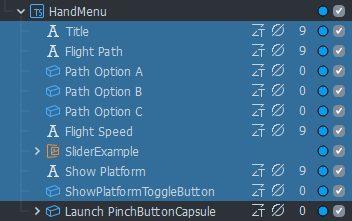
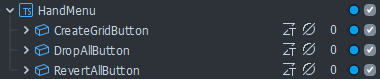
The hand menu itself is now a bit of a mess as far as names are concerned
So I have tidied a bit up to reflect the things they are going to do:
If you expand the first button, you will see a Text element called “Launch Text”.

I renamed that to just “Text”. You can choose to do that, or leave it as it is. However, what you do want to do is change the actual displayed text. In the Inspector on the right, change this text field
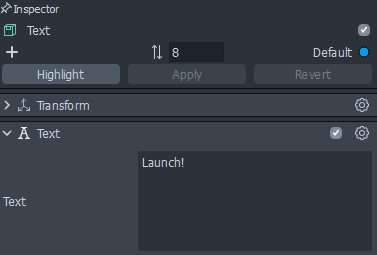
Into this

I presume by now the confused Unity developer is getting a bit more comfortable with the basic graphic edits, so for the texts and the labels of the next two buttons, I am just going to say “rinse and repeat”. Provided you always hit apply after changing a component, your end result should be this:
Part 4 - wrap up and copy
Drag your HandMenu scene object into the Asset Browser below, to change it into a prefab. Then right-click on the HandMenu prefab in your Asset browser, click “Open in Explorer” and there’s your menu, all ready to copy over and adapt for your needs.
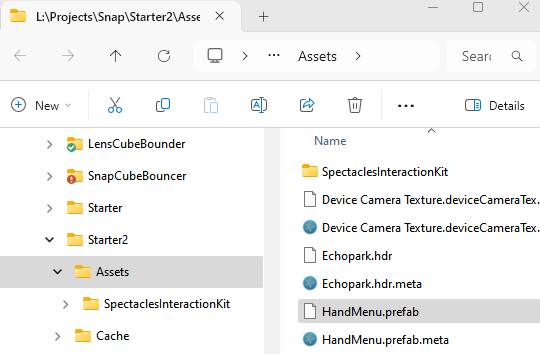
So we copy the prefab file and the meta file over to the prefab folder of our actual working project, and we are ready to make it into a real hand menu.
Handfollower - showing the hand menu
The idea of an MRTK hand menu is: you hold up your palm, and then a menu appears next to it. I went for a pretty primitive and simple approach:
- I get the camera vector forward
- I get the index knuckle transform forward
- If the angle between those is less than 20°, I assume the hand palm is held up towards the user (i.e. the camera) and the menu is displayed.
The handfollower script is not really hard to understand - I hope not even for the confused Unity developer now - because it uses a lot of the same APIs used by the HandSmasher script from my previous post, and the (world) camera we already used in the post before that.
As always, we start with the imports, with their weird relative syntax:
import { VectorUtils } from "./VectorUtils";
import { HandInputData } from "../../SpectaclesInteractionKit/Providers/HandInputData/HandInputData";
import { HandType } from "../../SpectaclesInteractionKit/Providers/HandInputData/HandType";
import TrackedHand from "../../SpectaclesInteractionKit/Providers/HandInputData/TrackedHand"
import WorldCameraFinderProvider from "../../SpectaclesInteractionKit/Providers/CameraProvider/WorldCameraFinderProvider"
Then, the component definition with fields and properties:
@component
export class HandFollower extends BaseScriptComponent {
    @input private handFollowObject: SceneObject;
    @input private distanceToHand: number = 5

    private handProvider: HandInputData = HandInputData.getInstance()
    private leftHand = this.handProvider.getHand("left" as HandType);
    private rightHand = this.handProvider.getHand("right" as HandType);
    private camera = WorldCameraFinderProvider.getInstance();
    private noTrackCount = 0;
I assume by now I don’t have to go into much detail about the syntax here, or the part where we are getting references to the hands and the camera. Noteworthy is the handFollowObject: that’s where we will drag the HandMenu prefab in later. distanceToHand is the distance from the hand, or rather - the pinky knuckle, where the menu will appear. Finally, noTrackCount is a counter for keeping track of how many frames the hand was not tracked in the right position (that is, palm turned to the camera) - it can be used to hide the menu after a certain number of tracking failures.
For actually tracking the hands in the update loop, we once again have to trap the UpdateEvent itself. I have explained the weird way of doing this before, so I hope you don’t see any surprises here.
onAwake() {
    this.createEvent("UpdateEvent").bind(() => {
        this.update();
    })
    this.handFollowObject.enabled = false;
}

update() {
    if (this.tryShowHandMenu(this.leftHand) ||
        this.tryShowHandMenu(this.rightHand))
    {
        this.handFollowObject.enabled = true;
        this.noTrackCount = 0;
    }
    else
    {
        this.noTrackCount++;
        if(this.noTrackCount > 10)
        {
            this.handFollowObject.enabled = false;
        }
    }
}
The update method itself then simply tries to see if one of the hands could actually be tracked in the right position, and if so - display the hand menu. If not, start the counter, if we did not see either hand in the right position for 10 frames or more, then stop showing the hand menu.
private tryShowHandMenu(hand: TrackedHand): boolean {
    if(!hand.isTracked() )
    {
        return false;
    }
    const currentPosition = hand.pinkyKnuckle.position;
    if(currentPosition != null) {

        const knuckleForward = hand.indexKnuckle.forward;
        const cameraForward = this.camera.getTransform().forward;
        const angle = Math.acos(knuckleForward.dot(cameraForward) /
          (knuckleForward.length * cameraForward.length)) *  180.0 / Math.PI;
        if(Math.abs(angle) > 20)
        {
            return false;
        }
        var directionNextToKnuckle = hand.handType == "left" ?
               hand.indexKnuckle.right :
               hand.indexKnuckle.right.mult(VectorUtils.scalar3(-1));

        this.handFollowObject.getTransform().setWorldRotation(
            hand.indexKnuckle.rotation);
        this.handFollowObject.getTransform().setWorldPosition(
            currentPosition.add(directionNextToKnuckle.mult(
            VectorUtils.scalar3(this.distanceToHand))));
        return true;
    }
    return false;
Okay, so first we check if the hand is tracked at all, and then we attempt to get the position of the pinky knuckle. If we get that, we proceed also to get the index knuckle and camera forward, calculate the angle (thank you GitHub CoPilot) and if that’s bigger than 20, the hand is tracked but not in the right position, so we return false and quit.
Then we check what hand we tracked - for the left hand, we want the menu to the right of the hand, for the right hand to the left. Then we set the rotation of the menu to be equal to that of the index knuckle, and place the menu “distanceToHand” next to the pinky knuckle.
Final steps (for now)
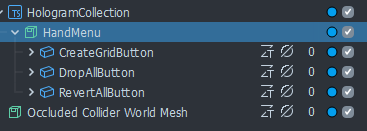
- Drag the HandMenu prefab into the HologramCollection Scene object:
- Click the HologramCollection object, and in the Inspector, click “+ Add Component”, and select the HandFollower script.
- Click the text “Choose Scene Object” next to “Hand Follow Object”
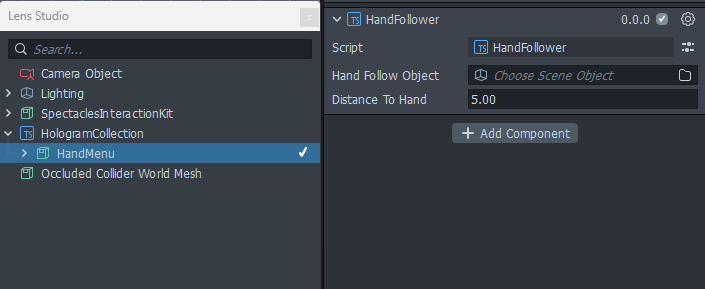
And select the HandMenu prefab in your scene. If you have done everything right, you will get a hand menu next to your hand when you turn your palm to the camera. It takes a preference for the left hand (so you can operate it with your right hand), but if you keep your left palm up, it will just as well work hanging next to your right hand, while you operate with your left.
Concluding words
You might wonder where I did get the wisdom for how to build the menu, what values to put where, what they mean and what they result in. Seemingly, the arrangement of the knuckles, what is forward and how to get the right place next to the hand. The simple answer is trial, error, and a lot of words not repeatable in print. I just experimented till it works. That is basically a lot of the things I write: I found something that works, then I explain it to the world - as well as to myself - what the heck worked, sometimes not even quite understanding why, but at least I - and the rest of the world - have something to go by and reference.
If you wonder what the hand menu now actually is for - well, the buttons kind of give it away, but none of that is implemented. That is for next time, when we will implement the methods for Drop All and Revert, incidentally messing around with gravity, learning how to lerp move stuff - and call all that from the hand menu.
I trust by now you are the Less Confused Unity Developer. In any case, you can find the progress so far and the new stuff introduced in this blog on GitHub, branch “blog3”.