
 MVP Profile
 Try my app HoloATC!
  HoloLens 2
 Magic Leap 2
 Android phones
 Snap Spectacles
 Buy me a drink ;)
 BlueSky
 Mastodon
 Discord: LocalJoost#3562
Microsoft Entra authentication using Device Code Flow for Snap Spectacles
While Snap Spectacles are clearly targeted towards consumers, and Snap have partnered with Supabase as a preferred cloud backend, there are of course always nitwits who are going against the grain and try to use a consumer device to talk to enterprise-grade backends. This tendency is especially present in a particularly rare subclass of those nitwits who actually come from an enterprise programming background and kind of accidentally stumbled into Mixed Reality. This here nitwit set out to make Snap Spectacles authenticate with Microsoft Entra as a kind of what he thought to be a fun experiment, succeeded at doing so, and then of course publishes it in case there are other nitwits around who would like to do the same thing.
Entra authentication, the general idea
For normal authentication, the flow is usually:
- You or your app pops up a window or a browser that requires you to enter credentials. This can be either username and password (followed by some 2FA prompt on your phone - you have set that up right?), a passkey, or a Windows Hello recognition.
- If satisfactory credentials are supplied, you get a package of data that includes your name, ID (usually email address), and most importantly: an access token and a refresh token.
- The access token can be used as a bearer token to access secure resources, for instance some API.
- The refresh token can be used to get a new access token when the old one expires.
Device Code Flow
This all works fine on a computer or a phone, but on Spectacles we don’t have popup browser windows, passkeys, or Windows Hello, and although the virtual keyboard is pretty decent and you can type in usernames and passwords using your phone as well, anyone who has done so repeatedly (like me) can tell you it’s a pretty tedious PITA to do it that way. The ETF OAuth working group, who created standards around OAuth, fortunately saw this as well and defined something: OAuth 2.0 Device Authorization Grant. It’s essentially a way to do authentication for what they call so beautifully an ‘input-restricted device’. The Microsoft implementation is commonly referred to as Device Code Flow. This works as follows:
- The device calls a particular API provided by the identity authority (in this case by Microsoft).
- The API returns a data structure containing, amongst other things, a code and a verification URL.
- The device instructs the user to go to a particular website (in Microsoft’s case this is usually https://login.microsoft.com/device) on any device they see fit. I usually just take a browser on a computer, as typing on a keyboard while wearing a see-through device is perfectly possible.
- You log in normally there, using whatever authentication you or your admin has set up.
- The device, in the meantime, has been polling the verification URL every few seconds. While the user has not logged in on the computer, it gets a 400 error and should retry after a couple of seconds. As soon as the user has logged in, it gets a 200 status plus a data structure containing user data as well as an access token, an expiration date, and a refresh token. The access token you can add as a normal bearer token to your HTTP request to a secured resource; the refresh token can be used to get a new token when the old one expires, as I wrote before.
The login procedure looks like this:
This kind of login is used for Xbox for instance, but also for things like streaming services, as no one ever liked entering passwords with a TV remote. Because it keeps your token and refresh token, you (fortunately) don’t have to log in every time you use those devices. I have implemented this for Spectacles and Entra using - of course - a service.
Basic usage
The service needs to be initialized with a tenant ID, a client ID, an ITokenStore implementation for token persistence (I will explain that later), and an option to get verbose logging. And believe me, verbose it is when you ask it to be so. Getting an Azure tenant ID, setting up a client in Azure to get an ID, and deploying a secured resource to test access with is outside of the scope of this article, but rest assured: if you ask one of the AI chatbots of today, it will guide you through the process pretty easily.
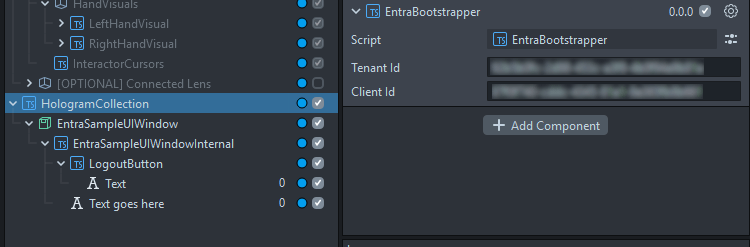
But enfin, the initialization, in the EntraBootstrapper component:
var serviceManager = ServiceManager.getInstance();
var entraService = new EntraDeviceCodeFlowAuthenticationService(
    this.tenantId, this.clientId, new PersistentStorageTokenStore(), true);
serviceManager.register(IEntraDeviceCodeFlowAuthenticationService, entraService);
Service bootstrapper I explained before in my original article about services in Lens Studio. If you look it up in the scene, you see two text boxes where you can configure the Azure tenant ID and your Azure client app ID.
The service has a very simple interface:
interface IEntraDeviceCodeFlowAuthenticationService {
    authenticate(): Promise<AccessToken>;
    UserActionRequiredEvent: Event<string>;
    logout(): void
}
You get yourself a reference to the service:
this.entraService = ServiceManager.getInstance().get(IEntraDeviceCodeFlowAuthenticationService);
You subscribe to the service’s UserActionRequiredEvent, and when it’s triggered, call a method that shows a message to the user indicating what to do or what happened:
this.entraService.UserActionRequiredEvent.add((message: string) => {
    this.showMessage(message);
});
Call authenticate and wait for a token to appear - or an error to occur:
try {
    var token: AccessToken = await this.entraService.authenticate();
    this.showMessage(`Welcome ${token.userName}`);
} catch (e) {
    this.showMessage(`Authentication failed: ${e}`);
    return;
}
And then you call a test URL:
// this needs to be in the declaration part of your calling class
private readonly http: InternetModule = require("LensStudio:InternetModule");

const httpRequest: RemoteServiceHttpRequest = RemoteServiceHttpRequest.create();
httpRequest.method = RemoteServiceHttpRequest.HttpRequestMethod.Get;
httpRequest.url = this.testApiUrl;
httpRequest.setHeader("Authorization", `Bearer ${token.accessToken}`);
this.http.performHttpRequest(httpRequest, (resp) => {
    this.showMessage(`Test URL status code: ${resp.statusCode}`);
});
Finally, if you want the app to forget about you, simply call the service’s logout method.
And that’s about it. How it actually works is a little bit more complicated. Although the basic service is simple enough, there are some nasty hairy bits. It also seems simpler than it is because by now I am building on top of quite a number of nifty utility classes that make things a lot simpler. I won’t explain every little detail because that would take an even longer article (and this one is already absurdly long and will most likely only be read by LLM training scrapers in its entirety), but at least I will take you through the flow of the code. But be sure to follow up the code into its veins because there’s some handy stuff in here, other than the Entra authentication alone.
Start of the service
The top of the service class contains all the stuff we need, including some things Microsoft requires us to use and know. Don’t worry too much about the why - this is what you need and how it’s done. The constructor just takes the arguments we have seen, fills in some derivatives, and then waits for the user to start an authentication flow.
export class EntraDeviceCodeFlowAuthenticationService implements IEntraDeviceCodeFlowAuthenticationService {
    private static readonly OAUTH_PATH: string = "oauth2/v2.0";
    private static readonly ENTRA_HOST: string = "https://login.microsoftonline.com";
    private static readonly CONTENT_TYPE_FORM: string = "application/x-www-form-urlencoded";

    private readonly http: InternetModule = require("LensStudio:InternetModule");
    private readonly verbose: boolean;
    private readonly clientId: string;
    private readonly authority: string;
    private readonly scope: string;
    private active: boolean = false;
    private backoff: number = 5;
    private awaitableSleep: AwaitableSleep = new AwaitableSleep();
    private readonly tokenStore: ITokenStore;

    constructor(tenant: string, clientId: string, tokenStore: ITokenStore, verbose: boolean = false) {
        this.clientId = clientId;
        this.verbose = verbose;
        this.authority = `${EntraDeviceCodeFlowAuthenticationService.ENTRA_HOST}/${tenant}/${EntraDeviceCodeFlowAuthenticationService.OAUTH_PATH}`;
        this.scope = `api://${clientId}/user_impersonation offline_access`;
        this.tokenStore = tokenStore;
    }
Note, though, this.authority. This is the base URL where we are going to request device codes and tokens, using the service’s postAsync method.
A little aside
I would like to draw your attention to AwaitableSleep. Coming from Unity and C#, I really like to use something like Task.Delay to wait without having to deal with the TypeScript promises baloney, so I made something that works like this.
export class AwaitableSleep {
    waitToken: CancelToken | null = null;
    public sleep(durationSeconds: number): Promise<void> {
        return new Promise<void>((done) => {
            this.waitToken = setTimeout(() => done(), durationSeconds * 1000);
        });
    }

    public cancel(): void {
        if (this.waitToken !== null) {
            clearTimeout(this.waitToken);
            this.waitToken = null;
        }
    }
}
If I want to wait for 5 seconds, I can simply do
await this.awaitableSleep.sleep(5);
and cancel it as well, from another thread, if that needs be.
The heart of the matter: authentication
It looks simple enough:
public async authenticate(): Promise<AccessToken> {
    let currentToken = this.tokenStore.getToken();
    if (currentToken) {
        this.trace("Existing token found, checking expiration");
        if (!currentToken.isExpired) {
            this.trace("Using cached access token");
            return currentToken;
        }
        else {
            currentToken = await this.refreshToken(currentToken.refreshToken);
            if (currentToken) {
                this.tokenStore.setToken(currentToken);
                return currentToken;
            }
        }
    }
    this.trace("No valid token available, starting new device code flow authentication");
    const deviceCodeResponse = await this.requestDeviceCode();
    this.trace(`User code: ${deviceCodeResponse.user_code}`);
    this.UserActionRequiredEvent.invoke(`Please go to ${deviceCodeResponse.verification_uri} and enter code: ${deviceCodeResponse.user_code}`);
    currentToken = await this.pollForToken(deviceCodeResponse.device_code);
    this.tokenStore.setToken(currentToken);
    return currentToken;
}
- Does the token store have a token and is it not expired? We are done! Return the token.
- If there is a token in the store but it is expired, refresh it and return it (and store it for next time).
- If there was no token, get a device code.
- Start polling for a token.
- If we get a token, we store it, then return it.
Requesting a device code
The first time, there won’t be a token at all, of course. So we end up at the bottom of authenticate and have to get a device token first:
private async requestDeviceCode(): Promise<IDeviceCodeResponse> {
    const result: IHttpResult = await this.postAsync("devicecode", {
        client_id: this.clientId,
        scope: this.scope,
    });

    if (result.statusCode !== 200) {
        throw new TokenRequestError(
            `Device code request returned HTTP ${result.statusCode}`,
            result.body
        );
    }

    const parsed = JSON.parse(result.body) as IDeviceCodeResponse;
    this.trace(`Received user code: ${parsed.user_code}`);
    return parsed;
}
Curiously we do this by HTTP POST (while we are basically getting something, but this is apparently how it’s done). It returns a structure containing a device_code and a verification_code, which we need in the next step.
Polling for token
So hurray, we have a device code. The user has been informed to go somewhere and log in with this code and their Entra credentials. Now we have to poll to see if Microsoft is giving their blessing and will grace our code with an actual access token. This also happens via an HTTP POST:
private async pollForToken(deviceCode: string): Promise<AccessToken> {
    this.active = true;
    this.backoff = 5;

    const tokenParams: FormParams = {
        client_id: this.clientId,
        grant_type: "urn:ietf:params:oauth:grant-type:device_code",
        device_code: deviceCode,
    };

    while (this.active) {
        this.trace("Polling for token...");
        const result: IHttpResult = await this.postAsync("token", tokenParams);
        const payload = JSON.parse(result.body);

        if (result.statusCode === 200) {
            this.halt();
            var tokenResponse = payload as ITokenResponse;
            return AccessToken.create(tokenResponse);
        }

        const tokenError = payload as ITokenError;

        switch (tokenError.error) {
            case "authorization_pending":
                this.trace("Waiting for user to authorize...");
                break;
            case "slow_down":
                this.backoff += 5;
                this.trace(`Increased polling interval to ${this.backoff}s`);
                break;
            default:
                this.handlePollingError(tokenError);
        }

        await this.awaitableSleep.sleep(this.backoff);
    }
    throw new TokenRequestError("Polling was cancelled");
I basically poll every five seconds, or slower when requested. If we actually get a result, it’s an ITokenResponse, that contains these fields:
export interface ITokenResponse {
  token_type: string
  scope: string
  expires_in: number
  access_token: string
  refresh_token?: string
  id_token?: string
}
You might notice, by the way, there’s never an implementation of ITokenResponse (or any other of the responses). Apparently this is possible in TypeScript and, as far as I understand, the ‘canonical way to do it’.
Creating a token from the token
Anyway, ITokenResponse’s access_token field contains some encoded data we want to know as well, like the user’s ID (usually the email address) and the actual name, so we can welcome them. Also, we want to know when the token expires.
import StringUtils from "LocalJoost/Utils/StringUtils";
import { ITokenResponse, ITokenData } from "./TokenResponses";

export class AccessToken {
    public accessToken: string;
    public refreshToken: string;
    public expiration: number;
    public userName: string;
    public oid: string;

    public static create(tokenResponse: ITokenResponse): AccessToken {
        const token = new AccessToken();
        token.accessToken = tokenResponse.access_token;
        token.refreshToken = tokenResponse.refresh_token;
        token.expiration = Date.now() / 1000 + tokenResponse.expires_in;
        var tokenData = this.getTokenDataFromAccessToken(tokenResponse.access_token);
        token.userName = tokenData.name;
        token.oid = tokenData.oid;
        return token;
    }

    public static fromJSON(json: object): AccessToken {
        const token = new AccessToken();
        Object.assign(token, json);
        return token;
    }

    public get isExpired(): boolean {
        return Date.now() / 1000 >= this.expiration;
    }

    private static getTokenDataFromAccessToken(accessToken: string): ITokenData {
        const splitToken: string[] = accessToken.split('.');
        const correctedBase64: string = StringUtils.base64UrlToBase64String(splitToken[1]);
        const decoded: string = StringUtils.base64Decode(correctedBase64);
        const tokenData: ITokenData = JSON.parse(decoded);
        return tokenData;
    }
}
The whole prying apart happens in getTokenDataFromAccessToken and that goes into all kinds of Base64 decoding and taking into account the fact that JWT access tokens are not encoded in standard Base64 but slightly differently - this method transforms it into standard Base64 so it can be decoded. StringUtils contains some nice methods for encoding and decoding strings, which are also useful in other scenarios. The fromJSON method is used to be able to retrieve it from storage, more about that later.
Anyway, at the end of pollForToken we have a token we can use, but that might expire. This is where the refreshToken method comes in, which is fairly simple:
private async refreshToken(refreshToken: string): Promise<AccessToken | null> {
    this.trace("Refreshing access token");
    const result: IHttpResult = await this.postAsync("token", {
        client_id: this.clientId,
        grant_type: "refresh_token",
        refresh_token: refreshToken,
        scope: this.scope,
    });

    if (result.statusCode !== 200) {
        this.trace(`Token refresh failed with HTTP ${result.statusCode}`);
        return null;
    }

    this.trace("Access token refreshed successfully");
    const tokenResponse = JSON.parse(result.body) as ITokenResponse;
    return AccessToken.create(tokenResponse);
}
It posts a refresh token request, gets a new token back - with a new refresh token and everything. It’s like you re-login but without you needing to do something. The fun thing is, you can just keep calling authenticate every time you need to access the secured API, because it will automatically retrieve a stored token, prompt the user for credentials to create a token, or refresh it -all the song and dance around the actual authentication happens behind the curtain.
Some helper methods
To make communication with the Entra authentication API a bit easier, this postAsync method was created.
private postAsync(endpoint: string, params: FormParams): Promise<IHttpResult> {
    const httpRequest: RemoteServiceHttpRequest = RemoteServiceHttpRequest.create();
    httpRequest.method = RemoteServiceHttpRequest.HttpRequestMethod.Post;
    httpRequest.url = `${this.authority}/${endpoint}`;
    httpRequest.body = FormParamUtils.serializeForm(params);
    httpRequest.setHeader("Content-Type", EntraDeviceCodeFlowAuthenticationService.CONTENT_TYPE_FORM);

    return new Promise<IHttpResult>((resolve) => {
        this.http.performHttpRequest(httpRequest, (resp) => {
            resolve({ statusCode: resp.statusCode, body: resp.body });
        });
    });
}
This saves the calling code a lot of plumbing for creating three HTTP POST requests (device code, poll, and refresh) and the interpretation of the result. It also uses the FormParams type and a helper method to make it easier to build an HTTP body payload.
export type FormParams = Record<string, string>;

export class FormParamUtils {
    public static serializeForm(params: FormParams): string {
        const parts: string[] = [];
        for (const key of Object.keys(params)) {
            parts.push(`${key}=${encodeURIComponent(params[key])}`);
        }
        return parts.join("&");
    }
}
Persistence and storage
Of course, if you have to log in this way every time you start the lens, it kind of defies the purpose. So once you have logged in, there needs to be a form of persistence. This is where an ITokenStore comes into play. The EntraDeviceCodeFlowAuthenticationService simply defers storing and retrieving to an object that implements a very simple interface:
interface ITokenStore {
    getToken(): AccessToken | null;
    setToken(token: AccessToken): void;
    clearToken(): void;
}
To demonstrate the principle, I have created a very simple implementation that stores the AccessToken as JSON in Spectacles’ persistent storage system:
import { AccessToken } from "./AccessToken";
import { ITokenStore } from "./ITokenStore";

export class PersistentStorageTokenStore implements ITokenStore {
    private store: GeneralDataStore = global.persistentStorageSystem.store;
    private readonly tokenKey: string = "access_token";

    getToken(): AccessToken | null {
        const token = this.store.getString(this.tokenKey);
        if (token) {
            return AccessToken.fromJSON(JSON.parse(token));
        }
        return null;
    }

    setToken(token: AccessToken): void {
        this.store.putString(this.tokenKey, JSON.stringify(token));
    }

    clearToken(): void {
        this.store.remove(this.tokenKey);
    }
}
This works fine, but you have to take one important issue into consideration. As long as the refresh token is valid, the lens will log in with your credentials, regardless of who wears the device, until you log out. And Spectacles itself does not have login or authentication we can use to protect it. So if your Spectacles get nicked, the thief can use the lens on your behalf and access your data. This is no different than someone stealing your Xbox where you logged in to. For an actual enterprise deployment, it behooves to think a bit about securing the login in a simple way, like with a PIN code or something. And store the data encrypted, although I wonder how useful that is, because as far as I know, there is no way to access the data in a lens’ persistent storage by anything but the lens itself. However, your Compliance Officer might get very nervous about it. I might write a better ITokenStore fix in a follow-up post - this one is long enough as it goes.
Demo code
I have added an EntraSampleUIWindow prefab that is a very simple UI and some code to actually start the authentication, to prove that it works. It can be configured with a simple test API URL that proves that it can actually call the secured URL.
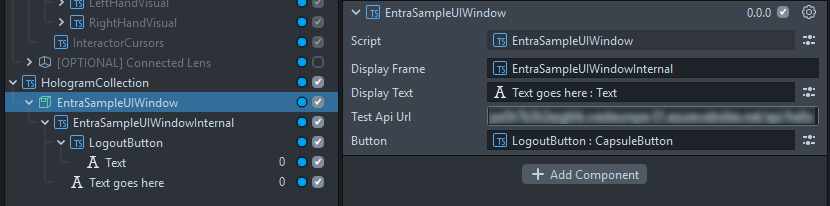
To show it all works, I have written the following demo code in the equally named EntraSampleUIWindow component that shows the following things happening in your lens:

The code looks like this:
private async demoAuthentication(): Promise<void> {
    try {
        this.entraService.UserActionRequiredEvent.add((message: string) => {
            this.showMessage(message);
        });
        var token: AccessToken = await this.entraService.authenticate();
        this.showMessage(`Welcome ${token.userName}`);
        await this.awaitableSleep.sleep(4);

        this.showMessage(`Token valid until ${new Date(token.expiration * 1000)}`);
        await this.awaitableSleep.sleep(4);

        const httpRequest: RemoteServiceHttpRequest = RemoteServiceHttpRequest.create();
        httpRequest.method = RemoteServiceHttpRequest.HttpRequestMethod.Get;
        httpRequest.url = this.testApiUrl;
        httpRequest.setHeader("Authorization", `Bearer ${token.accessToken}`);
        this.http.performHttpRequest(httpRequest, (resp) => {
            this.showMessage(`Test URL status code: ${resp.statusCode}`);
        });
        await this.awaitableSleep.sleep(4);

        // Intentionally expire the token to demonstrate refresh flow
        token.expiration = Date.now() / 1000;
        var newToken = await this.entraService.authenticate();
        this.showMessage(`Token refreshed. New expiration time: ${new Date(newToken.expiration * 1000)}`);
        await this.awaitableSleep.sleep(4);

        httpRequest.setHeader("Authorization", `Bearer ${newToken.accessToken}`);
        this.http.performHttpRequest(httpRequest, (resp) => {
            this.showMessage(`Test URL status code after refresh: ${resp.statusCode}`);
        });

        this.button.sceneObject.enabled = true;
    } catch (e) {
        this.showMessage(`Authentication failed: ${e}`);
        return;
    }
}
- First, it subscribes to the
UserActionRequiredEvent. - Then it waits for authentication, using the whole rigmarole of code we have just seen.
- It shows a welcome text with the user’s name that we have plucked out of the access token.
- 4 seconds later it tries to call the test API and shows the result.
- Then it intentionally messes up the token’s expiration date to force a refresh. If you have the debug on in the editor, you can actually see this working.
- It calls the test API again to check that still works.
- In the final step, it enables the logout button.
If you now stop the lens, and start it again (whether on Spectacles or on Lens Studio) you will not see the device flow prompt, but it will immediately welcome you, because it pulled the token from the persistent store. However, if you press the logout button, it will clear the token persistent store. The very simple code for that sits in the onAwake method of the EntraSampleUIWindow component:
this.button.sceneObject.enabled = false;
this.button.onTriggerDown.add(() => {
    this.entraService.logout();
    this.demoAuthentication();
});
It starts the authentication again after logging out, thus showing you the device code prompt again, proving you have indeed logged out.
Conclusion
Although it’s not quite the intended use case for Spectacles, I am pretty sure lots of enterprises are keeping a keen eye on whatever Snap is doing. As Snap founder Evan Spiegel indicated on stage at Lens Fest 2025 during Q&A: Snap regularly gets (and denies) requests for Spectacles bulk purchasing from companies, but he was not surprised by getting those requests, because “there are not very many compelling devices on the market, and most of them are probably in this room”. This was a very valid point, and it became even more valid recently: we already knew HoloLens 2 is being deprecated without a successor, but now also Magic Leap has thrown in the towel for Magic Leap 2. So this makes me wonder what will happen when the 2026 commercial version of Spectacles will come to market. I know it’s possible to integrate Spectacles with enterprise services - and so do you now.
“Spiegel” means “mirror” in Dutch. I wonder what future for XR Mr. Spiegel has seen in his (magic) mirror. We will learn soon enough later this year.
Code, as always, can be found at GitHub