Running .NET 8.0 isolated functions and Azurite Storage in Docker on a Raspberry Pi 5
Regular readers might be a bit confused reading this title: why would someone whose shtick is Mixed Reality development suddenly be interested in Docker? Well, first of all, any Mixed Reality app worth its weight has a backend - and my HoloATC backend runs on Azure. And let me just say I had some reasons to check if it would be possible to ‘repatriate’ the backend of my HoloATC app, if I really needed to do that. One thing led to another. The short answer is - yes, because it only runs on Azure functions that use some storage for caching, and it’s not like I have 100s of consecutive users. The long answer…
Setting up your development environment
I develop on Windows 11, so before I even can think about deploying anywhere, I need to have a Docker installation on my dev box as well to actually be able to develop and build my container using Visual Studio. Getting the environment for that ready was quite a yak shaving experience. Basically, it came down to this:
- I installed Docker Desktop, and had to choose between Hyper-V or Windows Subsystem for Linux for virtualization. I took the WSL because I assumed that would already be there.
- It was not, so I installed WSL. This is as easy as entering wsl –install into a Windows Terminal.
- However, that requires virtualization and WSL to be turned on in Windows features.
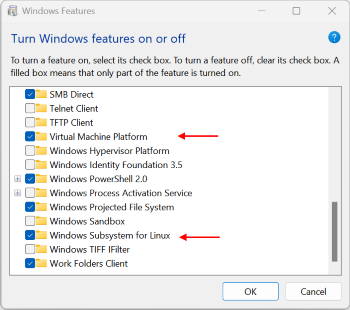
And for that to work, virtualization needs to be enabled in your BIOS. For some reason, that is usually turned off by default, and to make it extra fun, every motherboard designer seems to love hiding that under different menus, calling it differently, and of course, CPU manufacturers have different names for it as well, because branding. I have an ASUS motherboard with an AMD processor, and for some reason, virtualization is called “SVM Mode”, hidden under Advanced/CPU Configuration. Completely intuitive, right? Only thanks to this video I could find what I should do.
Anyway, if this all is done, make sure you can install and run Docker Desktop.
Setting up the Pi 5
I won’t go into assembling the hardware, just the actual setting up. Take an empty micro SD card, stick it into some card reader in your Windows computer, and download the Raspberry Pi imager.
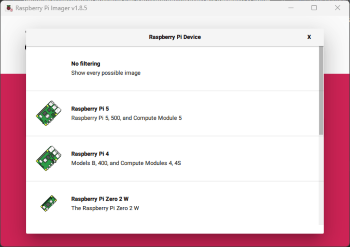
Choose the Raspberry Pi 5 device, obviously.
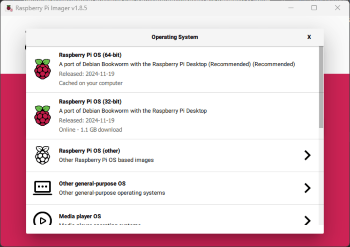
Choose the 64-bit Debian Bookworm OS. It will then show your storage card - select that.
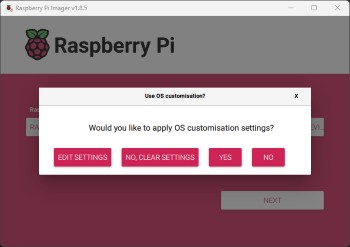
Yes, you want to edit settings, so click “Edit settings.”
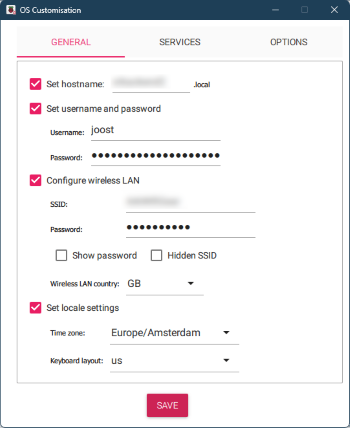
Choose a host name, a login and password, and if so desired, settings for your WLAN.
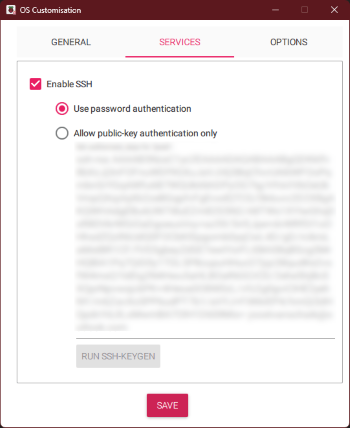
Under services, enable SSH and select your preferred method of authentication. Hit save, then yes. It will warn you all existing data will be erased - proceed, the card will be written. When it’s done, stick it into the Pi 5 and after that, connect it to the power supply. It will boot up and appear on your network soon.
Configuring the Pi 5
You should now be able to ssh into your Pi 5. Suppose you called your Pi 5 “xrbackend2”, used password authentication and indeed took “joost” as login (this is not mandatory ;) you can enter “ssh joost@xrbackend2.local”, hit enter - it might ask you a question about authenticity not being established the first time - then enter your password when being asked.
What I do next usually is enter
sudo raspi-config

- First, I select System Options, Boot / Auto login, Console. This does not boot up the GUI desktop but only a console, and since we intend to use this device as a server, we don’t need that anyway.
- Then I select System Options, Expand Filesystem. Because the OS we installed is an image, this comes with a predefined disk size, and of course, we want to use all of the SD card’s space.
Reboot the Pi 5 with this command:
sudo reboot
then login again. It should be back again online in like 30 seconds tops.
Then finally we do the thing you apparently always need to do on Linux: enter the command
sudo apt update && sudo apt upgrade -y
and wait while half a Tolstoy worth of text lines scroll by. This might take quite some time. Apparently, Windows is not the only operating system that needs quite some updates at times. Anyway, when it is done, reboot the Pi 5 again, then login again.
Installing Docker
According to RaspberryTips you only need these two commands:
curl -sSL https://get.docker.com | sh
sudo usermod -aG docker $USER
After that, we need to install docker-compose:
sudo apt install docker-compose
This also takes its sweet time. But finally, I make a folder where we can dump all the stuff we are going to need for deploy.
Setting up a demo functions project
Back to the PC. I created an Azure functions project, with these settings:
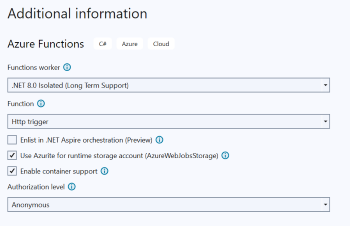
The sample uses Azure Tables, so I installed the Azure.Data.Tables NuGet package in it. It is very simple, it only supports one function CityWeather that allows you to write weather data in an Azure storage table:

or show everything from the table by not providing parameters:

I assume you know how to write an Azure function, so I won’t go into detail here, but you can look at the code if you like - it’s pretty trivial.
Building the container
I copied the default Dockerfile generated by Visual Studio in folder RaspberryFunction to Docker.X64. With the following command, you should now be able to build a docker file for your PC. You should run this from the root of your project:
docker buildx build -t raspberryfunction:latest -f RaspberryFunction/Dockerfile.x64 -o type=docker,dest=raspberryfunctionx64.tar .
and to make that easier, I added a simple batch file called “builddockerlocal.cmd” because I hate long commands that I have to run regularly. If it works, it should result in a file raspberryfunctionx64.tar. This can be deployed to docker locally. However, we are not interested in that - this was just to test if the container building works.
For the next step, I have taken the docker file generated by Visual Studio, and changed one line - the ‘base’. It used to be this
FROM mcr.microsoft.com/azure-functions/dotnet-isolated:4-dotnet-isolated8.0 AS base
And I changed that into
FROM mohsinonxrm/azure-functions-dotnet:4-isolated8.0 AS base
For some reason, Microsoft does not provide Docker images for .Net 8.0 isolated functions for ARM64 (not yet, at least), so a community member made those. I found them in a comment on an issue on the Azure function docker GitHub repo complaining about the absence of those images.
Building the container now works like this:
docker buildx build --platform linux/arm64 -t raspberryfunction:latest -f RaspberryFunction/Dockerfile -o type=docker,dest=raspberryfunction.tar .
or you just use the batch file “dockerbuild.cmd”
The docker compose file.
So now there is only one missing thing in the whole story: the docker compose file. This is a yml file that instructs docker to load a complete environment for one or multiple containers. In this case, two: our own self-made container, and Azurite for storage. It is called “dockercompose.yml” and I am going to dump it rather unceremoniously here:
version: "3.9"
services:
  azurite:
    image: mcr.microsoft.com/azure-storage/azurite
    command: "azurite --blobHost 0.0.0.0 --queueHost 0.0.0.0  --tableHost 0.0.0.0 --location /home/joost/docker"
    ports:
      - 10010:10000
      - 10011:10001
      - 10012:10002
    volumes:
      - ./azurite:/home/joost/docker
  function:
    image: raspberryfunction:latest
    pull_policy: never
    environment:
      AzureWebJobsStorage: "DefaultEndpointsProtocol=http;AccountName=devstoreaccount1;AccountKey=Eby8vdM02xNOcqFlqUwJPLlmEtlCDXJ1OUzFT50uSRZ6IFsuFq2UVErCz4I6tq/K1SZFPTOtr/KBHBeksoGMGw==;BlobEndpoint=http://host.docker.internal:10010/devstoreaccount1;QueueEndpoint=http://host.docker.internal:10011/devstoreaccount1;TableEndpoint=http://host.docker.internal:10012/devstoreaccount1;"
    ports:
      - 8080:80
    depends_on:
      - azurite
    extra_hosts:
    - host.docker.internal:host-gateway
Let’s unpack this a little, as far as I understand it. Mind you, up until a week before I write this, Docker was just a name for me, I had not touched it at all. I learned a bit from ChatGPT, although this article on good old Stack Overflow helped a lot more to get it actually to work.
The top part pulls and installs Azurite from a Microsoft image. The command line tells Azurite to accept remote requests for those ports (that is what the 0.0.0.0 does). It also instructs it to store the file-based storage Azurite apparently uses in /home/joost/docker.
Azurite normally exposes blob endpoints at port 10000, queue endpoints at 10001, and table endpoints at 10002. The port part of the Docker compose file basically says: expose port 10000 on 10010, 10001 on 10011, and 10002 to 10012. Think of it as redirecting the internal port to the outside world.
I have no idea what the volume key does, but apparently, it needs to be the same as the Azurite –location value.
The function part is what we made just yet. It tells to use container “raspberryfunction:latest” and never to pull an image for it - it should just be here, and that makes sense, as we did not publish this in any docker hub - it’s just a tar file we created. The connection string is the most tricky part. The key just comes from this document from the Azurite documentation. You can see that for instance the TableEndpoint is explicitly set to the port we exposed at the Azurite part: http://host.docker.internal:10012/devstoreaccount1; but it also has that funny host.docker.internal prefix - see below.
Our function normally runs at port inside the container 80 but we redirect that to 8080. We also tell docker it is dependent on Azurite, so that must be started first.
Finally, to make sure the function understands the connection, the extra host “host.docker.internal” redirects to the ‘host-gateway’. I nicked that from the comments of the Stack Overflow article I already mentioned.
Running and testing
Now, we need to transfer raspberryfunction.tar and docker-compose.yml to the Raspberry Pi 5. I generally use WinSCP for that. Transfer the files to the docker subfolder. Make sure its path from the root is the same as listed in the docker compose file.
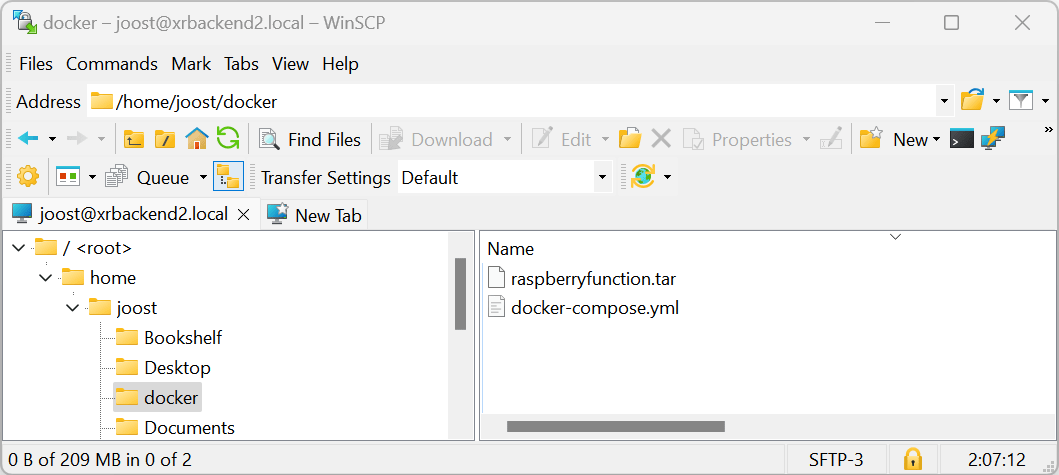
After all this work, we are just two lines away from finally getting to see some action:
Enter these lines
docker load -i raspberryfunction.tar
docker-compose up
A lot of output will be generated, but if you have done everything correctly, after it’s all done, you should be able to do this:

And you can even connect the Azure Storage Explorer to it:

However, there is apparently a weird bug in Azurite - I could not use the DNS name to connect, but I had to use the IP address. So basically you take the connection string from the docker compose file, replace host.docker.local by the actual IP address of your Pi 5
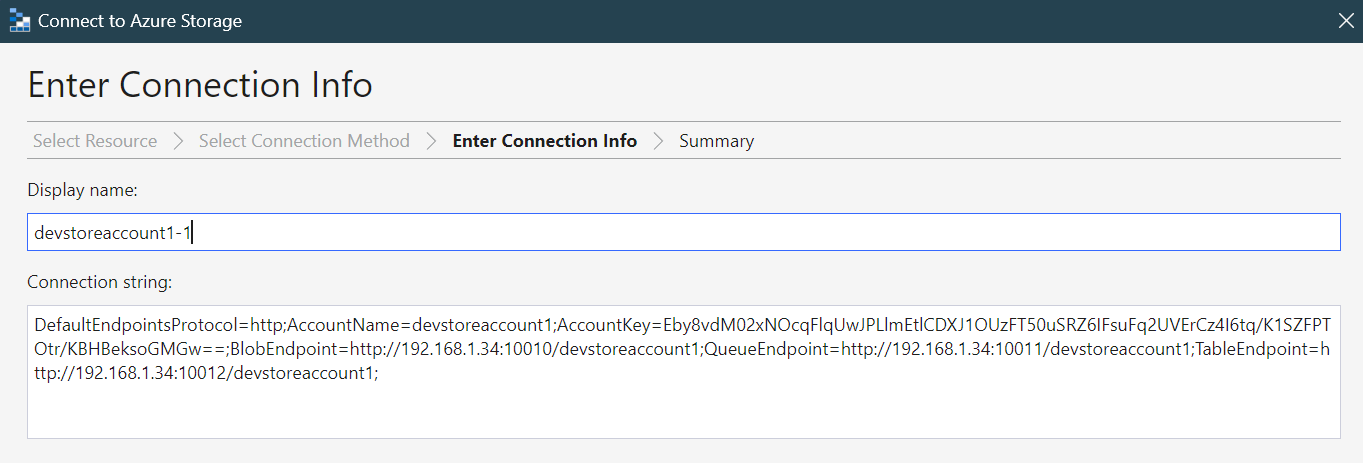
and you are ready to go.
You can also directly see the Azurite local storage, we defined that as a subfolder of our docker folder after all:
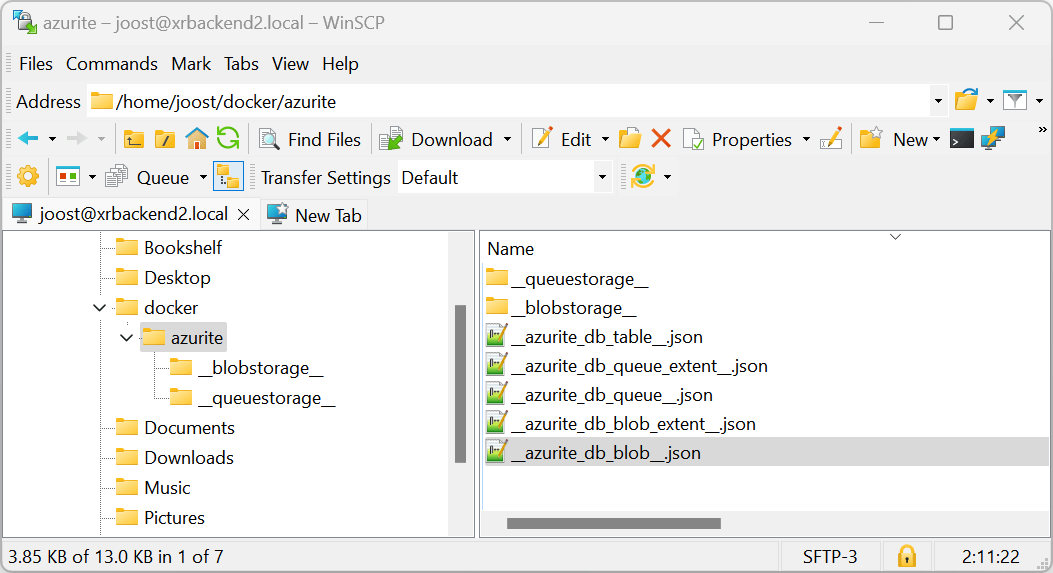
But it is kind of tricky to read yourself - the Storage Explorer does a better job.
Caveat Emptor
In the comment to the issue of missing ARM64 docker images on GitHub the developer who created the ARM64 I used explicitly states “Not to be used in any official or supported capacity, certainly not in production.”
By using the command “command: “azurite –blobHost 0.0.0.0 –queueHost 0.0.0.0 –tableHost 0.0.0.0 –location /home/joost/docker” to start up Azurite, you explicitly open and make those ports accept remote requests, so in the current config the blob, queue, and table storage are accessible to the world (this is also why the Azure Storage Explorer works with it). Microsoft warns this might make your system vulnerable.
You have also maybe seen the functions now run on http, not https, and that there is no authorization level whatsoever set. Also, a Raspberry Pi 5 is not quite a data center worthy machine, nor is it very scalable, and you are now yourself responsible for security and updating.
However, should you have a lightly used backend for an indie app, that does not need all the might and power of Azure itself and you don’t want to pay for that either, you can pretty easily ‘repatriate’ the app to self-host it. You might also use a more powerful Linux machine instead of just a Raspberry Pi 5. At the very least, you have a potential fallback now.
And so do I.
Demo project with docker files and docker-compose file can be found on GitHub, as usual.

 MVP Profile
 Try my app HoloATC!
  HoloLens 2
 Magic Leap 2
 Meta Quest
 Android phones
 Snap Spectacles
 Buy me a drink ;)
 BlueSky
 Mastodon
 Discord: LocalJoost#3562