Starting Spectacles development with Lens Studio for the confused Unity developer
This blog post is intended for seasoned Unity developers who would like to tinker with Lens Studio to make a Spectacles 2024 app, have read the nice page explaining Lens Studio to Unity developers made by Snap, and are still pretty much confused after that. In other words, exactly where I was. This is typically the kind of blog post that I wish someone else had written before I started toying around, but then again, that goes for most of my blog posts, and what made me get started in 2007(!).
This will be the second article in a row that won’t come with a GitHub repo - it’s more like getting a few confusing things sorted out before the actual development begins.
Starting off
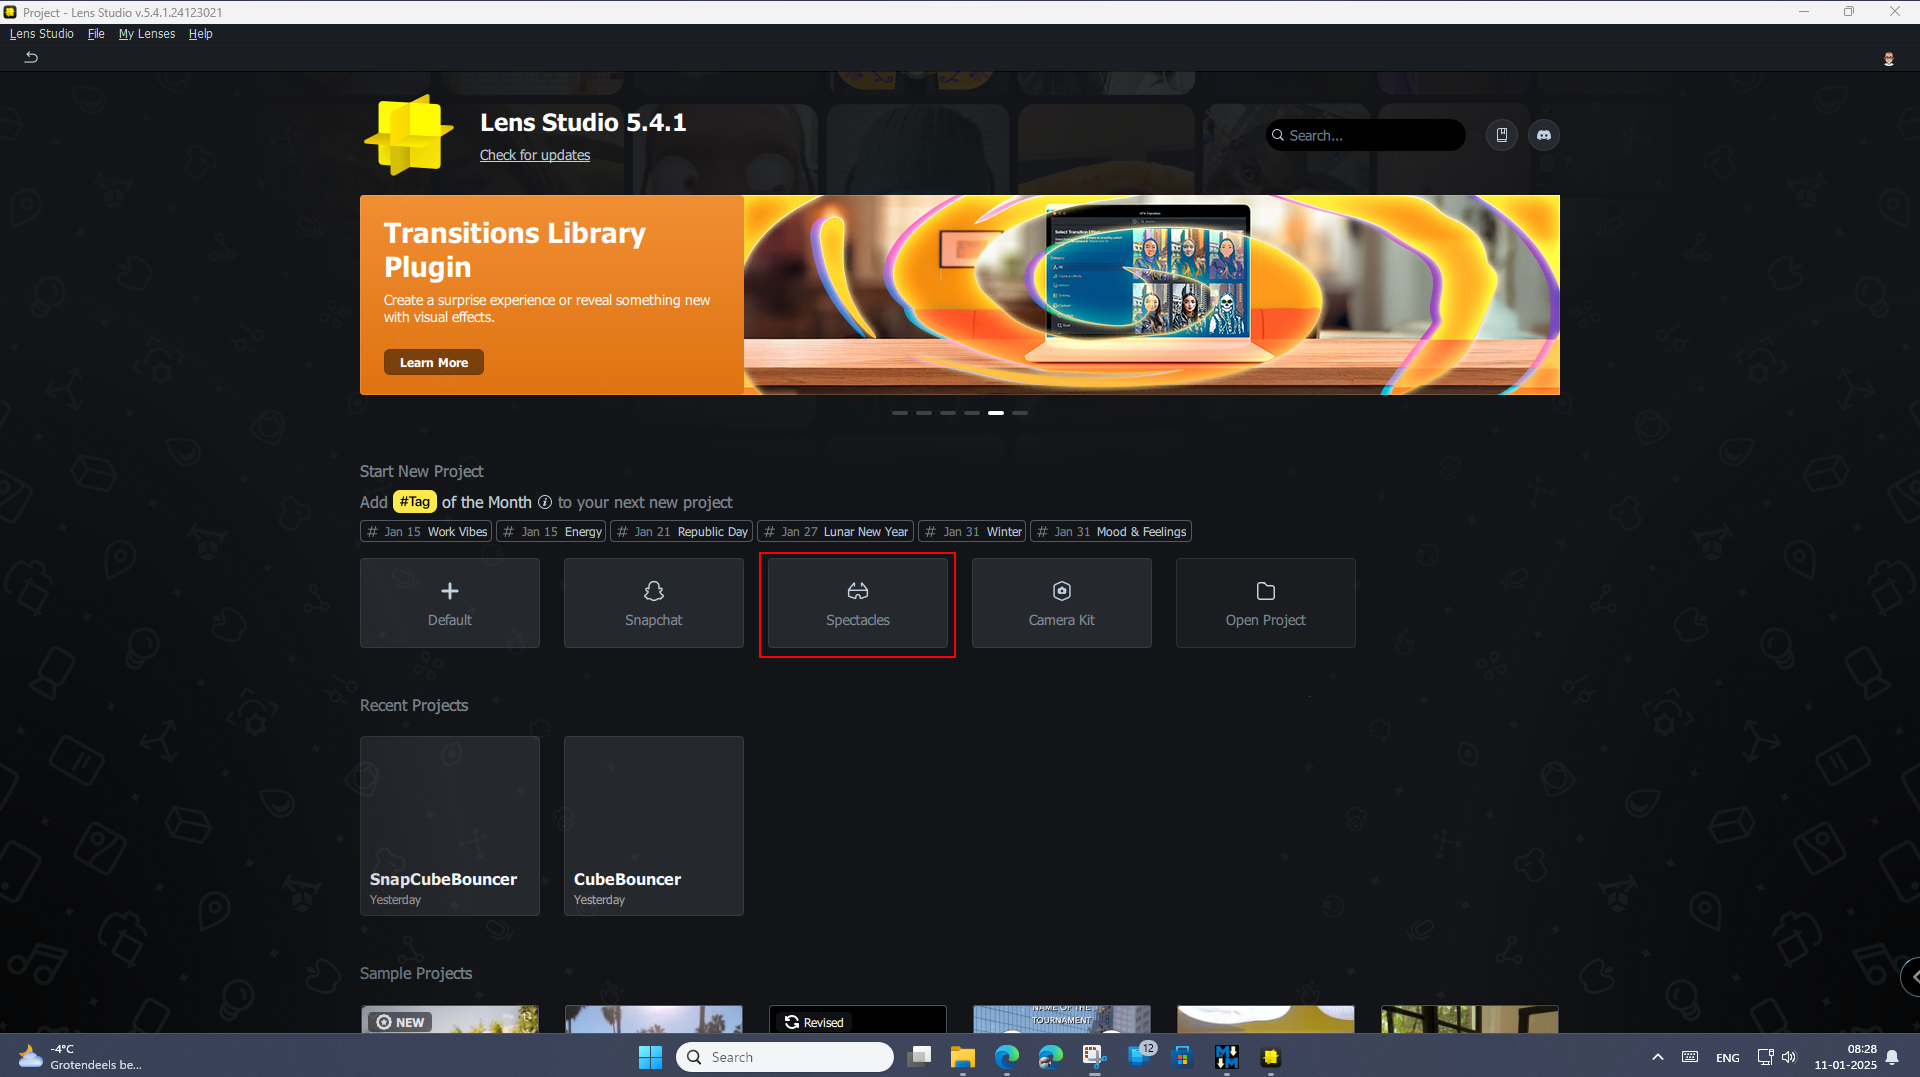
The best thing to do initially is to create a starter project. You do that by clicking the large “Spectacles” button that’s more or less in the center of the screen, which I’ve marked with a red square

The general UI layout
The starter project shows itself like this. I have added some labels to show what corresponds to what

The “TypeScript compilation” pane is completely useless, as the Console, pardon, Logger tells you the same. I always close that immediately.
Adding stuff
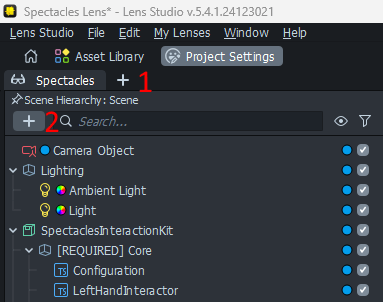
In the UI, you find two plus buttons and a button “Asset Library”.

The Asset Browser button takes you to the Asset Browser (duh) which I think of like the Package Manager. As for the numbered buttons:
- The button labeled 1 allows you to add “Workspaces”. I think of these as kind-of-like Unity Layouts.
- The button labeled 2 allows you to create objects in the scene. Think of right-clicking on your hierarchy in Unity and creating, for instance, a cube (called “Box” here).
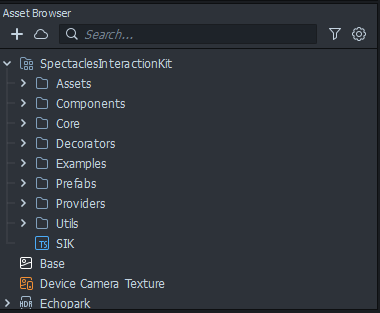
Then we have this plus button here:

That allows you to add stuff to your project. Think of right-clicking on your project browser in Unity, then selecting “Create” and create whatever you like.
Preview aka Game view
This was very confusing to me. For starters, if you have opened Lens Studio before, you might have been looking fruitlessly for a “Play” button. Well, there isn’t any. Basically, Lens Studio runs play mode all the time. As soon as you open a project with valid code, it runs your app. As soon as you change something, the app is restarted. Only if you break something or explicitly pause it, it stops.
To complicate things, we have three preview modes

From left to right:
- Multimedia preview (default, and the most useless IMHO)
- Webcam preview
- Interactive preview
These buttons have the following functions:
- Multimedia preview shows the lens in front of this girl, but apart from clicking on things with the mouse that happen to be in view, I have not been able to do anything useful with it.
- Webcam preview uses your webcam and projects 3D objects over it. This is great for, for instance, testing hand tracking - your actual hands are tracked. You can also click on things and manipulate things with your mouse, but not control your position or rotation with mouse or keyboard.
- Interactive mode gives you a full virtual environment, which you can control with WASDQE keys, and you can rotate with the mouse, move forward/backward with your scroll wheel, and or manipulate things with your mouse. In addition, spatial tracking and mapping work, so you can simulate the presence and use of that. But you can’t really control hands, apart from doing some gestures. For selecting a gesture, you can use this button bottom right

But to be honest, I found its use pretty limited.
One of the things you will notice as being absent: Scene view and your Scene hierarchy will not reflect anything that’s happening on your Preview. With there not being a play mode, this is kind of logical, but it’s also something I am missing dearly sometimes. However, there is something that helps a bit, and that’s this “Inspect Preview” button:

This pauses the lens, but then objects in your Scene hierarchy show values corresponding to what’s happening in the preview, like their actual position and rotation. It’s not as helpful as the play mode scene view in Unity - it can only do snapshots, and every time you switch it on or off it loses selection, so you have to constantly select your object again - but it’s better than nothing, and it helps with debugging stuff. The final button on this little bar, witht the pause button on it is - you guessed it - for pausing/continuing your lens.
To the right op the Preview pane there’s another little bar:

The middle button is for ‘resetting’ your lens. That is particularly useful in full interactive mode if you have moved your point of view to somewhere you don’t like - this will set it all back. Never use the left button - that will switch to a back camera, your PC might have one if it’s a laptop, the use for that in Lens development is very limited.
The gears button goes to a settings menu. You can change what kind of device you use, and things like FPS settings. Keep in mind Lens Studio was originally designed for SnapChat lenses (for example, making people look like a talking potato) so lots of options might not make any sense if you are developing a Mixed Reality application.
AI search
I have not marked this in my Lens Studio overview image because it’s something that simply does not exist in Unity. In the pane where the Previews appear, there’s a GenAI tab. Think of this as a GitHub CoPilot tailored to specific Lens Studio questions. Like any AI, it works most of the time, although I have caught it several times telling me verifiable nonsense, giving me incorrect or outdated code, making up API calls, and it keeps going back to giving me JavaScript code while I want to develop in TypeScript. But unlike GitHub CoPilot, it’s free, and like we frugal Dutch say: never look into the mouth of a free horse ;). That goes for Lens Studio as a whole, by the way, unlike the $$$ (or €€€) Unity charges.

It can generate icons for you (I had limited success with that) and even add stuff to your Scene. I prefer to have things being explained to me instead of an AI poking things in my Scene and project in a way I possibly don’t want - and decide if, how, and where I add things, but you, of course, can do whatever floats your boat.
Last things to do before starting to code
If you double-click a script file in your Asset Browser, the Script Editor comes up in a tab in the same pane as the Scene view. The best thing you can do now is look at it once, close the pane, and make sure you never see it again. I mean, it works, it’s got syntax coloring and all, but things like intellisense are very limited, none of your keyboard shortcuts work… and there is something much better: Visual Studio Code. So click “Lens Studio/Preferences” and select “Editors”

And tick both boxes. Of course, you make sure Visual Studio code is the default associated application in File Explorer for your TypeScript or JavaScript files. But better still is to just open the root folder of your project in Visual Studio code, that gives you a comfortable feel of having a Unity-like experience (it does for me ;) and you have a full overview of your project’s structure). Lens studio automatically puts a StudioLib.d.ts in your project so Visual Studio Code will have full code completion, and with GitHub CoPilot on top of that, the world is your oyster.
A few things to remember before you start building things
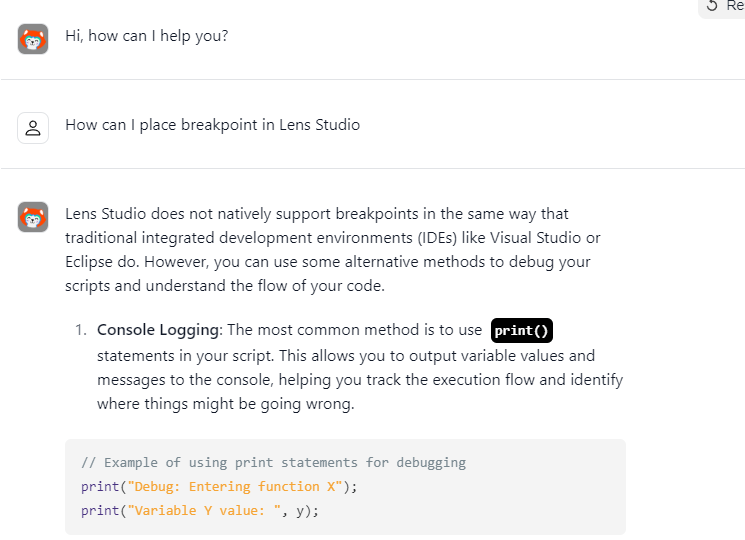
First of all: breakpoints in your code? Nope. We are back to good old print statements. There is a Visual Studio Code extension that promises breakpoints but that’s released on February 28th, 2023, got its third release barely two months later, and after that… nothing. And it does not seem to work. The Snap “AI search” seems to agree on that:

Second: units in Lens Studio are in centimeters. I have to keep reminding myself of this, as 1 = 1m is so ingrained into my brain, I keep forgetting it. If something appears in your face, multiply x 100, and you are done.
Third, and finally: in Unity, +X = right, +Y = up, +Z is forward. At least, that is how I always keep it in mind. In Lens Studio, they have decided that +Z is backward. I have no idea why. That one took me some time to figure out. I seem to recall 3D design applications like Blender have the same convention, and maybe Unity is the odd one out. I definitely remember having endless ‘fun’ with importing objects in Unity that have one or the other axis flipped.
A final tip
Save the starter project unchanged, and keep it on your disk. It’s great for nicking code from, I have done a lot of “search in files” using Notepad++ just to find ‘how stuff is done’ or what the actual syntax is - my TypeScript was a bit rusty after 8 years. For your own projects, make a new starter project, throw out everything you don’t want, but then you still have the standard starter project as a reference.
Conclusion
I guess all I wrote is in the documentation somewhere, but I felt it necessary to write a simple ‘how to get started’ specifically for Unity developers who cough like me cough are a bit too impatient to read much documentation. Which begs the question - who is going to read this, then, but at least I will have my own reference.
Also, for the record: I am not going to abandon Unity, nor am I trying to convert people, I am merely wanting to give a hand to people wanting to try the waters and, just like me, are not afraid to venture a bit out of their comfort zone of Unity and C# at times.
Have fun! Next time we are going to build something.

 MVP Profile
 Try my app HoloATC!
  HoloLens 2
 Magic Leap 2
 Meta Quest
 Android phones
 Snap Spectacles
 Buy me a drink ;)
 BlueSky
 Mastodon
 Discord: LocalJoost#3562