
 MVP Profile
 Try my app HoloATC!
  HoloLens 2
 Magic Leap 2
 Android phones
 Snap Spectacles
 MetaLense 2
 Buy me a drink ;)
 BlueSky
 Mastodon
 Discord: LocalJoost#3562
Using a Spatial Mesh with MRTK3 on Magic Leap 2
After successfully porting the MRTK3 version of HoloATC to Magic Leap 2, I wanted to try some other experiments on it as well. For one of those experiments, I needed to use the Spatial Map. How hard could that be? I just added an ARMeshManager to the XR MRTK Rig like I do for HoloLens, as per my own blog post, and…
nothing happened.
After some searching, I found a sample in this repository, but I couldn’t get it to work in my app (I must admit I found it a bit overcomplicated). I contacted some friends at Magic Leap and they advised me to turn to the Magic Leap forums - which I did. In one of the answers, I was directed to this example.
Following the instructions, I added a simple MeshingSubsystemComponent to my app. I think the name is slightly misleading, as it’s actually a behaviour, but anyway: this component takes a Spatial Mesh prefab that has exactly the same structure as the ARMeshManager needs for HoloLens 2. So that was easy, I thought. However, I decided to use the MRTK3 WireFrame Spatial Mesh prefab to make the Spatial Map visible. This resulted in a hard app crash. In fact, whatever wireframe material I used, I always got a hard crash. So then I used a simple semi-transparent material, and yeah, now I could see a spatial map indeed… but it was not quite what I expected.
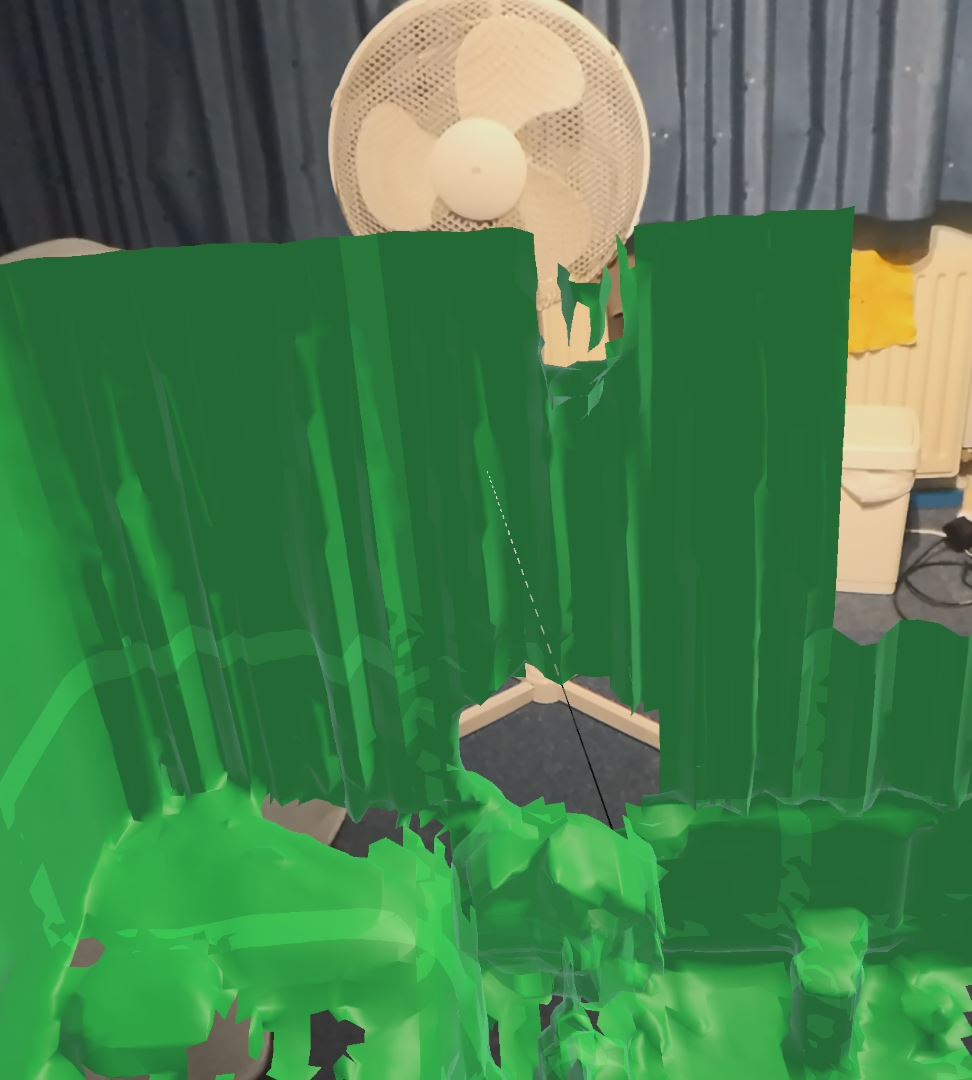
I could recognize the fan in my room, the walls, the trash can, as well as the guest bed - but they were all way below the floor.
The issue, apparently, is this:
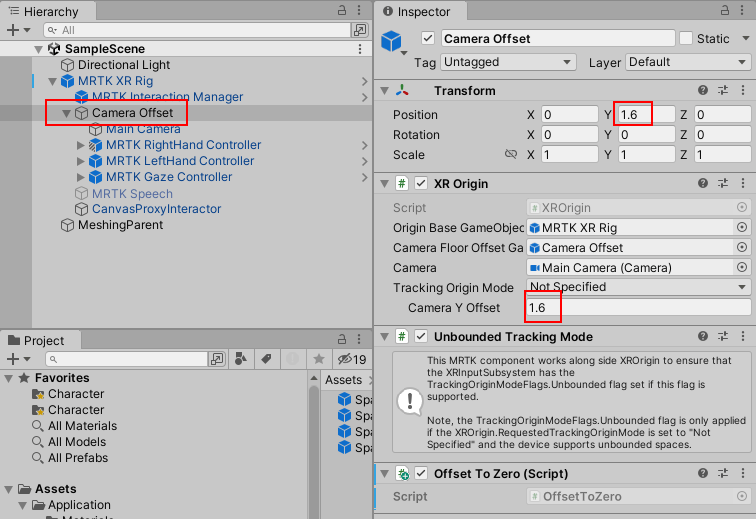
The MRTK3 specifies a Camera Offset, which is 1.6 m in both its position and Camera Y Offset. On none of the platforms I have used so far does this pose a problem, but on the Magic Leap 2, it apparently does. You can also see the solution already: I created a very simple script called OffsetToZero, which checks if the current device is, in fact, a Magic Leap, and then changes the offset to 0 in both cases. It’s almost too trivial to mention, but here it is:
namespace MRTKExtensions.MagicLeap.SpatialMap
{
    public class OffsetToZero : MonoBehaviour
    {
        void Start()
        {
            if (SystemInfo.deviceModel.Contains("Magic Leap"))
            {
                transform.position = Vector3.zero;
                GetComponent<XROrigin>().CameraYOffset = 0;
            }
        }
    }
}
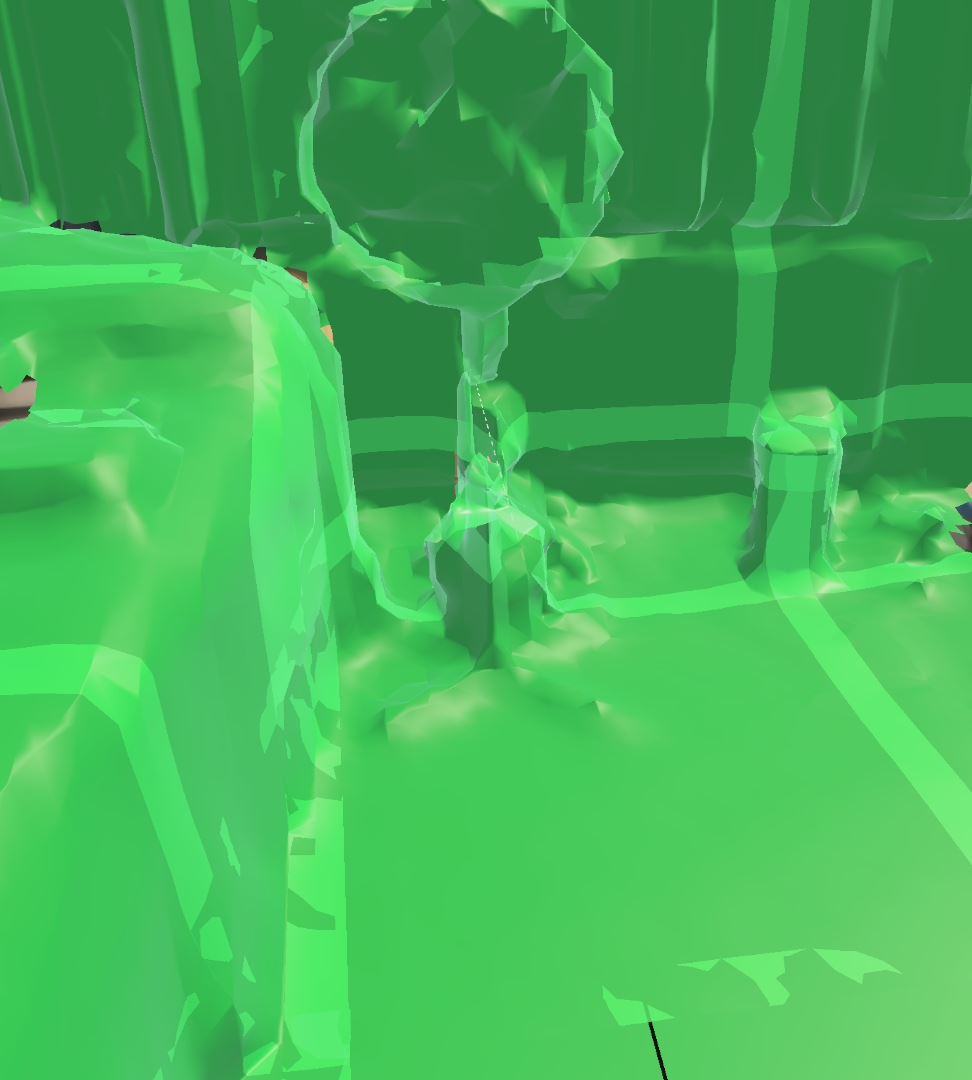
The result is what we would like to see:
There is another oddity to Spatial Maps on Magic Leap 2 - you specify the size of the ‘scanning range’ by the size of the transform that contains the MeshingSubsystemComponent. By that, I mean these numbers:
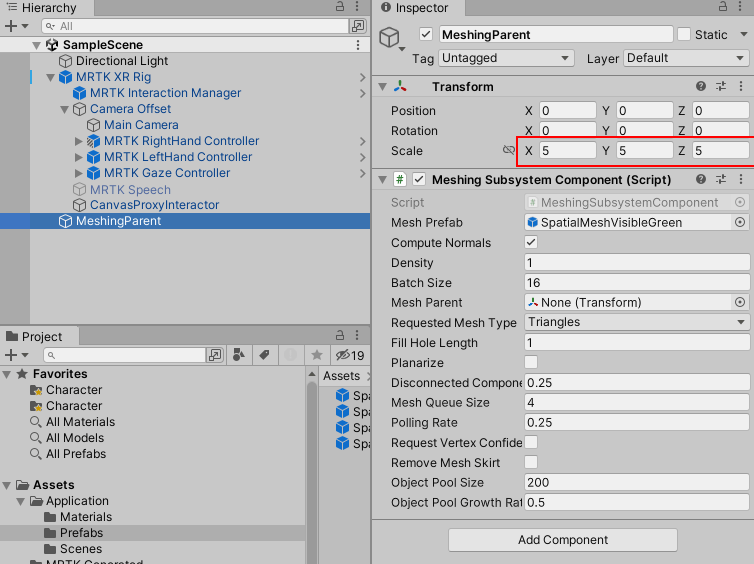
This limits the scanning size to 5x5 meters. This is actually mentioned in section 3 of the Magic Leap Basic Meshing setup sample, which I already mentioned, but it is easily overlooked - I did. You see, when you create a default empty game object in Unity, its size is always 0 and thus the scanning range is 0 - and you will get no Spatial Map to speak of.
Conclusion
Setting up the Magic Leap Spatial Mesh is not hard. Coming from other platforms, it’s just a bit odd. Why it crashes on WireFrame materials, beats me. It accepts any other kind of material, including invisible and occlusion materials. It’s unfortunate that Magic Leap didn’t just hide this MeshingSubsystemComponent behind their Unity plugin and make ARMeshManager work. Any barrier to cross-platform development makes your platform less attractive to developers (unless you’re Apple, I guess). This is especially weird as they actually have done that work for ARPlaneManager - which I used in my port for HoloATC to recognize the floor and whose usage in conjunction with MRTK3 I described before. I feel plane recognition is much more complicated than showing a Spatial mesh - and yet they implemented ARPlaneManager, but not ARMeshManager. Even weirder is that ARPlaneManager works fine without needing this offset correction trick.
However, with this little trick, it works, and it was something I needed for my next blog post ;). I hope other people using MRTK3 will now be able to avoid this pitfall. As usual, the demo project, although hardly worth the trouble from a coding perspective, can be downloaded here.