
 MVP Profile
 Try my app HoloATC!
  HoloLens 2
 Magic Leap 2
 Android phones
 Snap Spectacles
 MetaLense 2
 Buy me a drink ;)
 BlueSky
 Mastodon
 Discord: LocalJoost#3562
How to setup up MRTK3 to support HoloLens 2 and Quest 2 - including hand tracking
I recently showed off my AMS HoloATC app running on the Meta Quest 2. But to be honest - I copied over some settings from the Zappy project, but I had no idea how I should properly set up a project so it would support both HoloLens 2 and Quest 2 - with hand tracking on both. Fellow MVP Simon ‘Darkside’ Jackson was kind enough to educate me a little - he set up a bare bones project for me and gave me a (very) short rundown of how he did that. I decide to turn that rundown into a full-blown step-by-step blog post, including some things I had found out myself. So here it is - setting up an MRTK3 project supporting both HoloLens 2 and Quest 2 with hand tracking in both - in 12 easy steps ;)
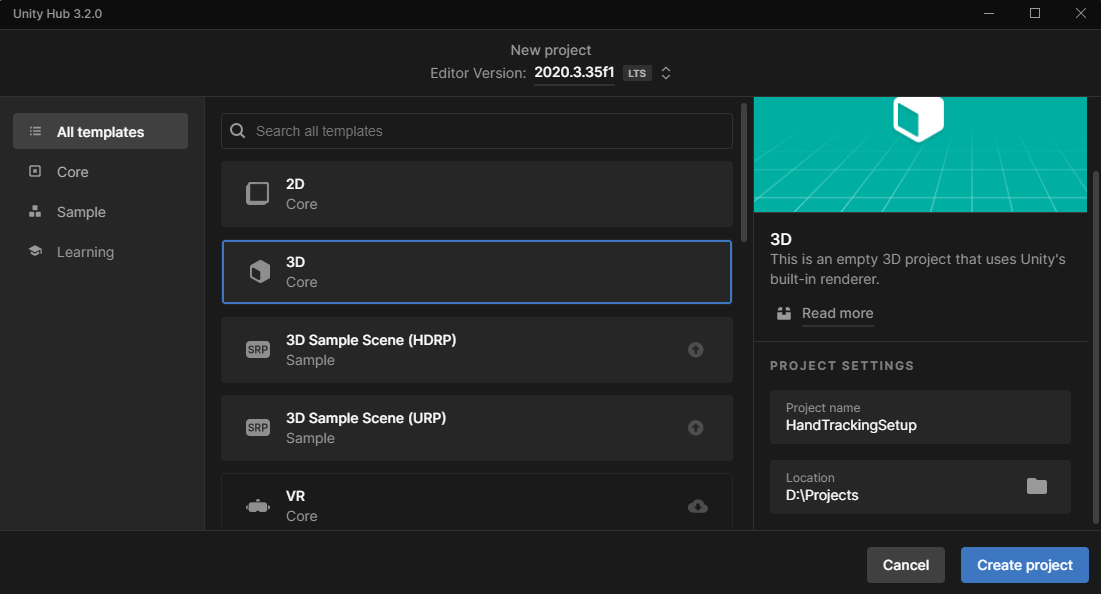
1. Create a new project
I used 2020.3.35f1 for this sample
2. Use the Feature Tool to import the MRTK3 references
Being a lazy [bleep], I simply select everything, although for a project as simple as this, we can probably dispense with a few packages. I leave that as exercise to the reader

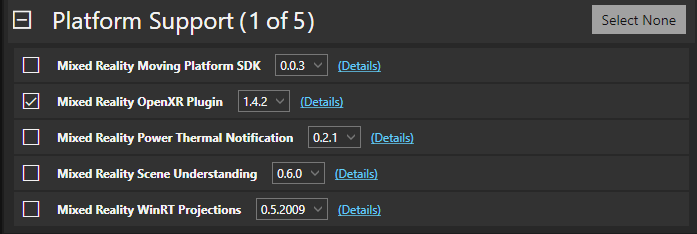
We also need the newest Mixed Reality OpenXR plugin
3. Process Unity messages
Unity says it want to use the new input system packages. To be really honest, I am not really sure what this means, but I always click yes.
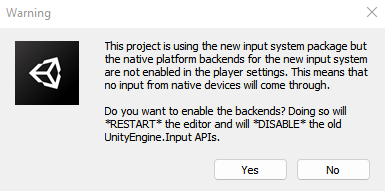
Unity restarts, then starts to complain about outdated APIs. I always click “I made a Backup, Go Ahead!” because at this point, nothing substantial has been created anyway.
3. Enable OpenXR for Standalone, UWP and Android
- Open project settings
- select “XR Plug-in Management”
- select the stand-alone tab (that’s the most left one with the monitor icon)
- check the OpenXR checkbox
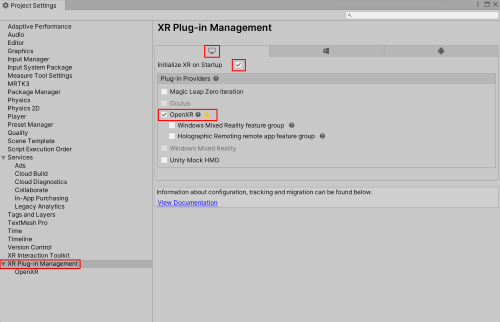
Repeat for UWP
Repeat for Android
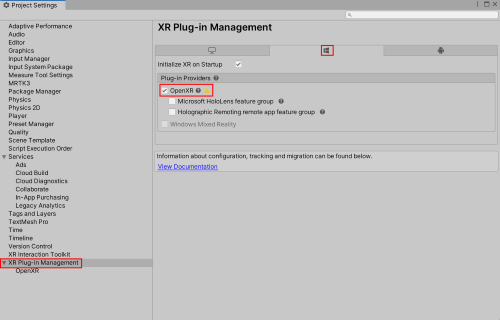
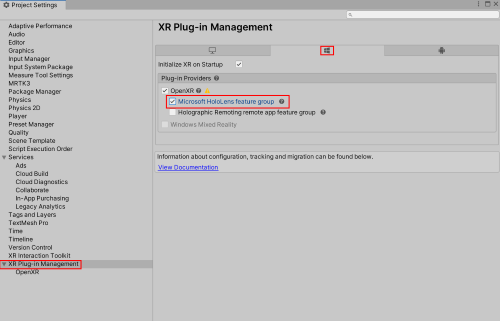
4. Enable “Microsoft HoloLens feature group” for UWP
- select “XR Plug-in Management”
- select the UWP tab
- check the Microsoft HoloLens Feature group
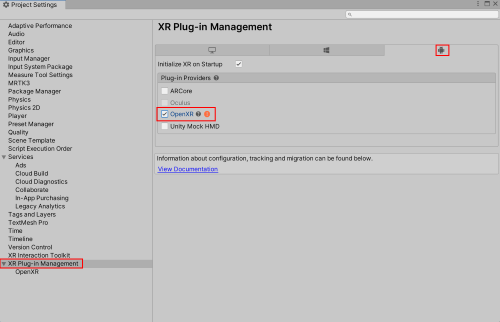
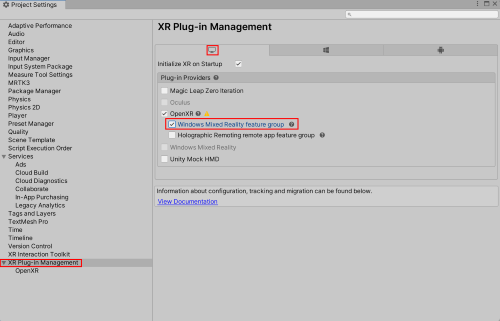
5. Add “Windows Mixed Reality feature group” to Standalone
- select “XR Plug-in Management”
- select the stand-alone tab
- check the Windows Mixed Reality feature group
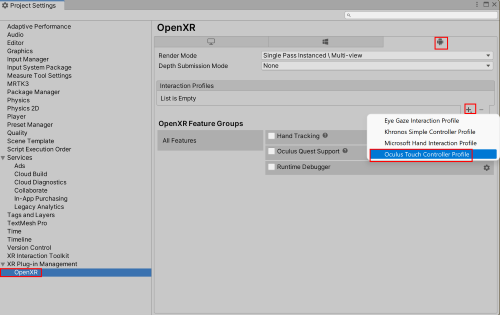
6. Add Oculus Touch controller profile for Android
- Select “OpenXR”, the node below “XR Plug-in Management” in project settings
- Select the Android tab
- Click the little plus sign all the right bottom in the empty “Interaction Profiles” list
- Select the Oculus Touch Controller Profile
7. Add interaction profiles to UWP and Standalone
- Select “OpenXR”, the node below “XR Plug-in Management” in project settings
- Select the UWP tab
- Click the little plus sign at the right bottom in the empty “Interaction Profiles” list
- Select the “Microsoft Hand Interaction Profile” and optionally the “Eye Gaze Interaction Profile”
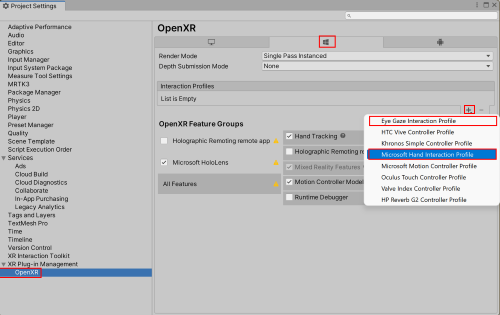
Repeat this for Standalone

8. Enable Hand Tracking and Oculus Quest support for Android
- Select “OpenXR”, the node below “XR Plug-in Management” in project settings
- Select the Android tab
- Select “Hand Tracking” and “Oculus Quest Support”
![]()
9. Fix UWP feature issues
If you select the UWP tab, you will notice a few yellow warning signs.
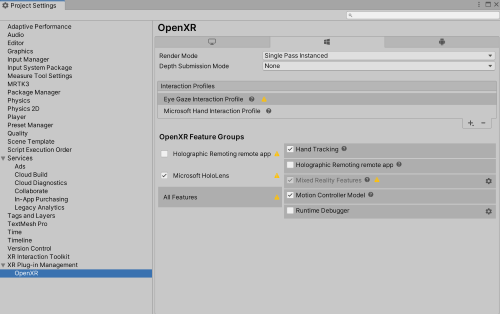
I always click the one behind “Eye Gaze Interaction Profiles”. This yields this list:
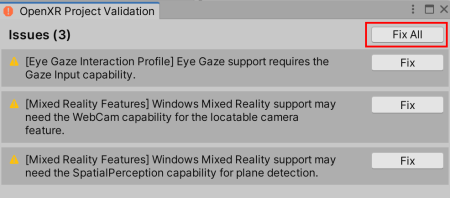
Hit “Fix all” and the problems are automatically fixed. Makes one wonder why you have to click a button at all and this can’t just happen behind the scenes, like so many other things. I guess there’s a reason, and anyway, it works.
10. Set profiles
The MRTK3 needs to have set it’s profile, manually, for all platforms. For standalone:
- Select MRTK3 in the left column
- Select the Standalone tab
- Click the circle icon to the right. A selection popup appears
- Click the crossed out eye icon all the way to the top right of the popup. MRTKProfile appears
- Select the profile

repeat these steps for the UWP and Android tab. A properly initialized system should look like this - on all three tabs:
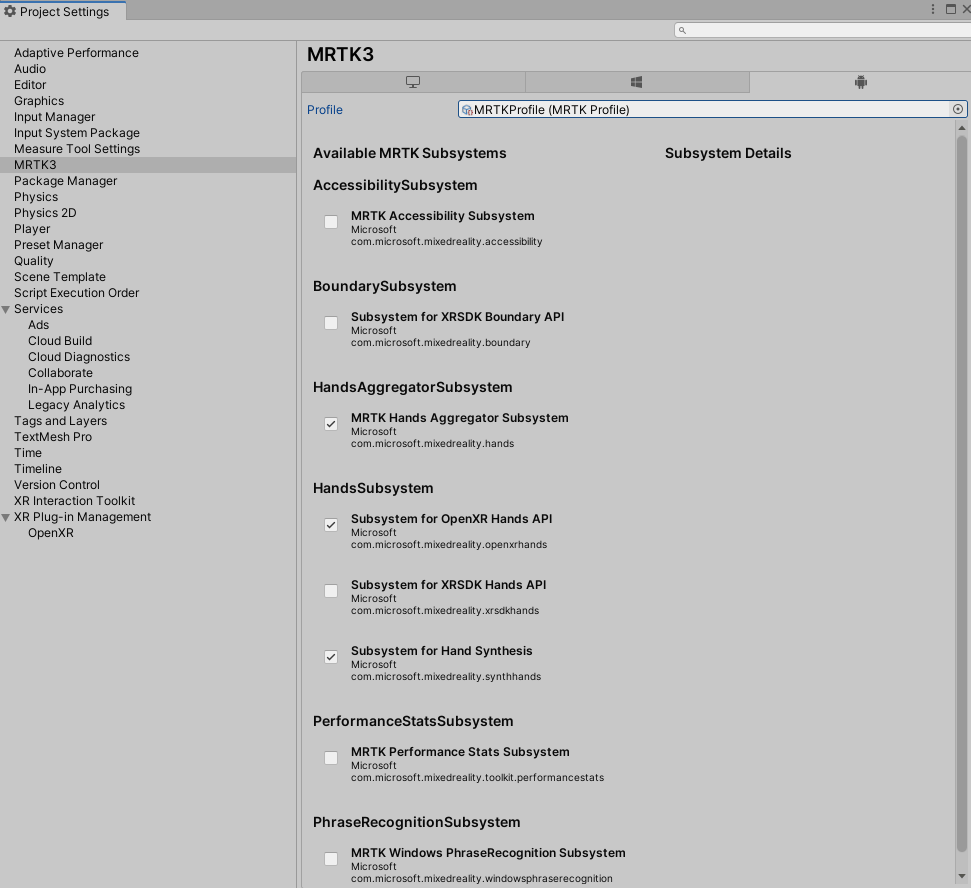
There are other subsystems you can activate if you need, but this is the minimal set.
11. Set player settings for UWP
These are the basic settings I use for an UWP app.

I also urge you to change default names and package names, as described here in an earlier post.
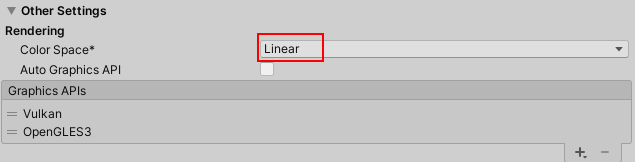
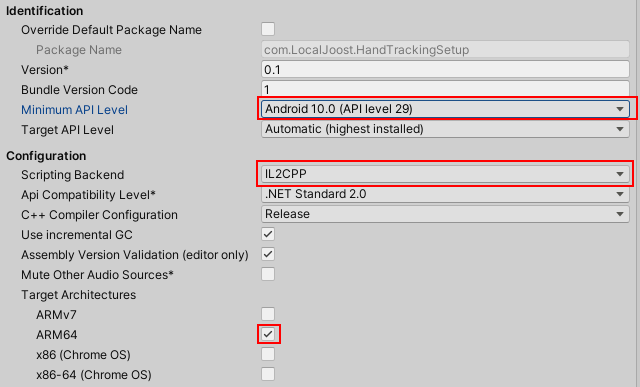
12. Set player settings for Android
In “Other settings/Rendering” I set the Color Space from “Gamma” to “Linear”. Unity warns that changing this can take a lot of time, but it does not - at least not on my computer. I have no clue what this is about, but if I don’t set it, I can’t build a package. It can be done though, as in the Zappy’s Playground app Gamma is used for color space. However, setting this option to “Linear” does not seem to have obvious detrimental effects, so I guess it’s all right to do so.
Further down “Other settings”, near the “Identification” I set Minimum API level to 29. I read somewhere this is a prudent thing to do, and Simon’s sample has the same setting. In addition:
- Set Scripting Backend to IL2CPP
- Set Target Architecture to ARM64
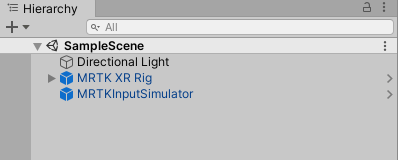
13. Minimal scene setup
- Remove the camera
- Drag in the MRTK XR Rig from MRTK3
- Optionally drag in the MRTKInputSimulator to the scene (in practice, you nearly always will)
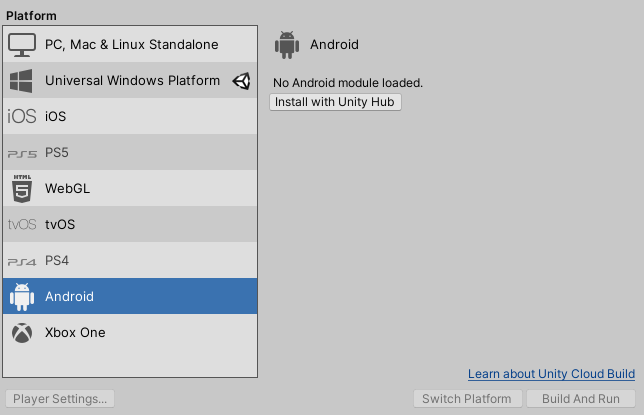
Bonus: installing the Android tools
Assuming you are like me - a HoloLens developer - you have probably never installed the Android tools. This is actually pretty easy. On your editor of choice, in the player settings, simply select the Android tab. That will show this install button:
Which, when clicked, will show this UI:
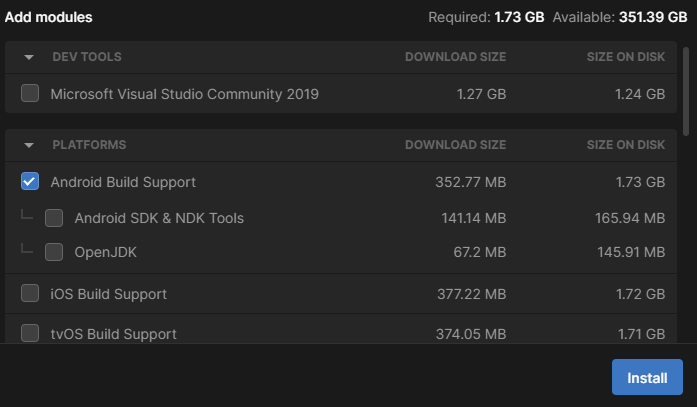
Simply check both check boxes, hit “install” and prepare to wait ;). Curiously, the install ended with an error (I don’t quite remember which one) but I after that, I was able to build Android APKs
Caveat Emptor
First of all, MRTK3 support for hand tracking on Oculus is still limited now. You don’t get any ‘hand rays’ like in HoloLens 2, and grabbing does not work either. It seems you can only poke at things. For now, full control is only available using the Quest 2 controllers - but I assume this will be fixed in the (near) future.
Second, don’t think these settings will gain you simple entry into the Oculus Store. I think there’s a whole lot more to do - setting permissions in a custom manifest, for instance - as well as set icons, and heaven knows what else. I haven’t come to that part yet. I guess that will be another blog post.
Conclusion
I am aware the procedure above can probably be done more efficiently than this jumping-from-one-tab-to-another-and-back-again workflow, but at least this one works. When we get to know stuff better, we instinctively learn what to do and then you will probably be more efficient. Just like it happened with MRTK2, which I remembered to be very intimidating at the start.
You can download the resulting project here. If you are really lazy, you might consider using it as a template project, just changing the name, author and package name (and upgrading the MRTK as it draws closer to a first full release).