Short Unity tip: conditional compilation with custom preprocessor directives
If you are developing Mixed Reality apps with Unity, you often create code that only works in the editor, to simulate test conditions - for instance, a keyboard press that simulate the pressing of a button. For fine tuning that’s way faster than building, deploying to HoloLens, test, rinse and repeat. This code should usually not make it into your actual app. You can do that simply by using this well-known processor directive:
#if UNITY_EDITOR
// this code won't be in de deployed app
#endif
But what if you want to show stuff in the app while testing - buttons to skip to a certain part of your app quickly, a floating debug window - that you want to see during development and test on your Mixed Reality device - but make sure never shows up in production builds? You could apply a behaviour like this to such UI elements
public class HideInProduction : MonoBehaviour
{
    private void OnEnable()
    {
#if PRODUCTION_CODE
        gameObject.SetActive(false);
#endif
    }
}
But where to actually set the PRODUCTION_CODE setting? Usually you do that in Visual Studio, but the Visual C++ application is generated by Unity for deployment - and does not contain anything recognizable anymore.
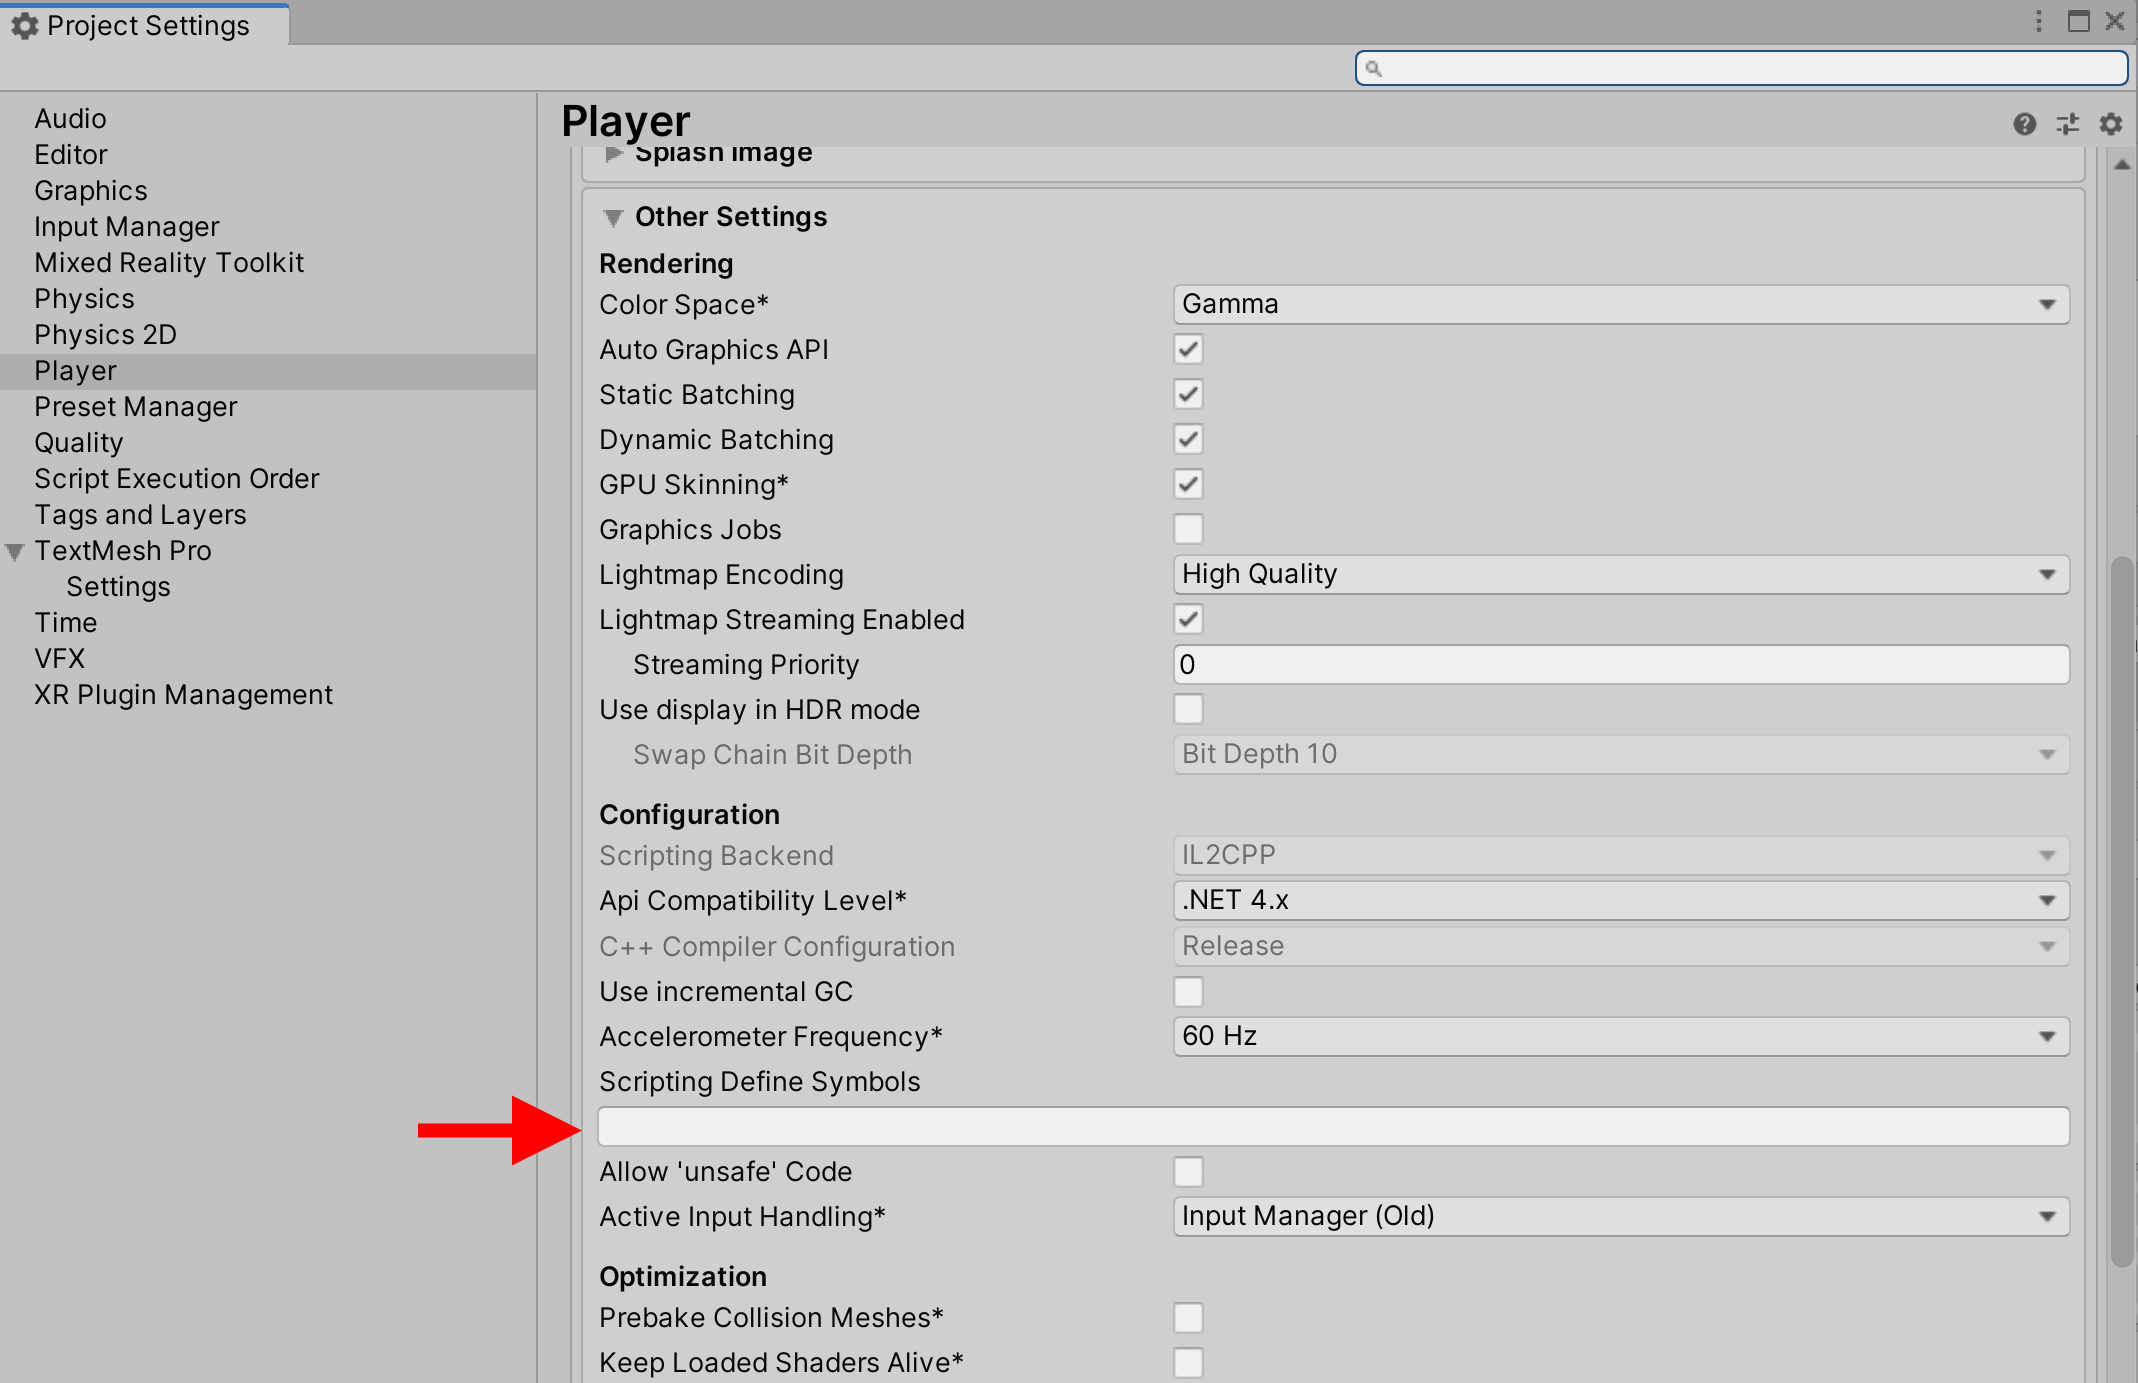
It’s possible, but quite well hidden. Assuming you have already selected UWP as build platform, you will find the place where you can apply the PRODUCTION_CODE setting by following these steps:
- First, you click File/Build Settings (or CTRL+SHIFT+B, as I usually do)
- Click the “Player Settings” button
- Scroll down to the “Other settings” and expand that panel
- Scroll down until you see the text box “Scripting Define Symbols”

If you type PRODUCTION_CODE in this text box and press enter that definition will be applied to the code that will be generated into the C++ application. That will therefore include whatever is between #if PRODUCTION_CODE and
#endif, thus enabling the code in the sample HideInProduction above. You can check if the setting is actually applied by looking in ProjectSettings.asset (located in the ProjectSettings folder in the root of your Unity project) where somewhere it will say
  webGLWasmStreaming: 0
  scriptingDefineSymbols:
    1:
    4:
    7:
    14: PRODUCTION_CODE
  platformArchitecture: {}
  scriptingBackend: {}
  il2cppCompilerConfiguration: {}
or if you have committed it to a GIT repository, this file will show as modified after you have applied this setting. So be aware this setting is stored in a file, thus it is sticky, and will be committed to your repository when you commit.
No code this time, as I feel you all will be quite able to copy the few lines of code in the very simple sample behaviour from this blog just fine ;)

 MVP Profile
 Try my app HoloATC!
  HoloLens 2
 Magic Leap 2
 Meta Quest
 Android phones
 Try my app Walk the World!
  Buy me a drink ;)
 BlueSky
 Mastodon
 Discord: LocalJoost#3562