
 MVP Profile
 Try my app HoloATC!
  HoloLens 2
 Magic Leap 2
 Android phones
 Snap Spectacles
 MetaLense 2
 Buy me a drink ;)
 BlueSky
 Mastodon
 Discord: LocalJoost#3562
Setting up unit tests in Unity to test your Model Driven Mixed Reality app
One benefit of writing model driven Mixed Reality apps, as I demonstrated in this and this post, is that you are using a consistent architecture that makes it easier to keep oversight of your Mixed Reality app’s internal working (at least, that is my opinion). Another benefit is that you can actually write unit tests for the models. While writing and running unit tests is more or less the same as in ordinary .NET code, Unity actually makes you jump through some rather curious hoops before you can actually get to writing unit test.
 I would describe this post as a yak shaving session, but needs must, noblesse oblige, so here we go:
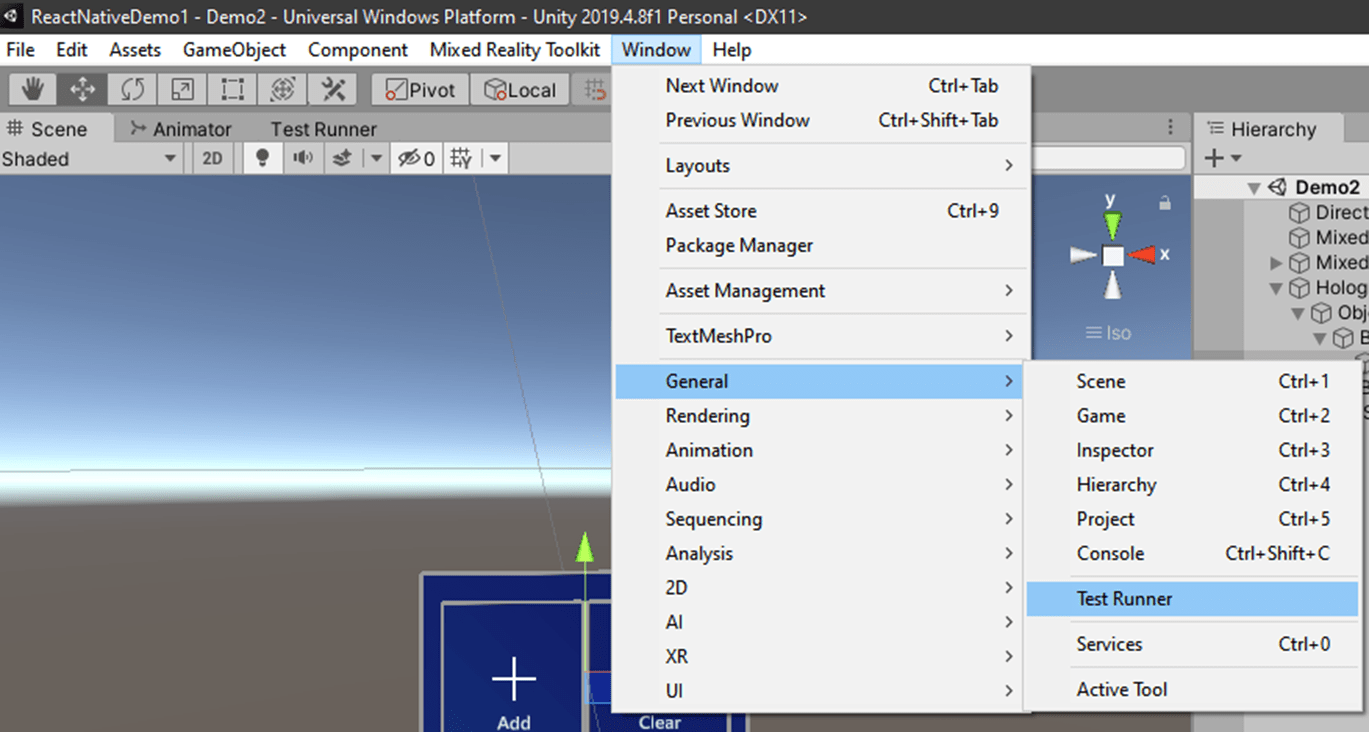
Test Runner window
The first step is easy. Find the Test Runner window and open it
Creating the test runner assembly
Just like in a normal .NET project, you write your unit test in a separate assembly. However, you don’t get to create projects in Unity - only scripts, Unity generates a solution and project files for you.
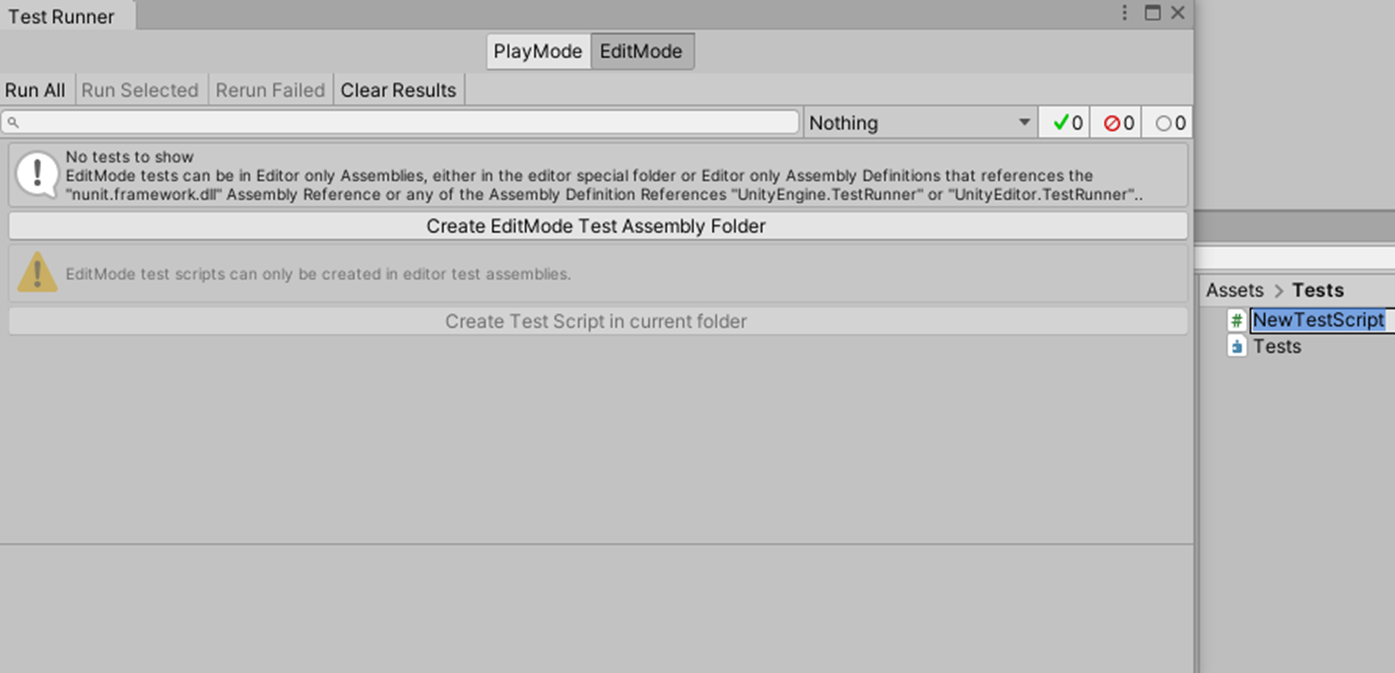
After you have opened the test runner window, you will see this:
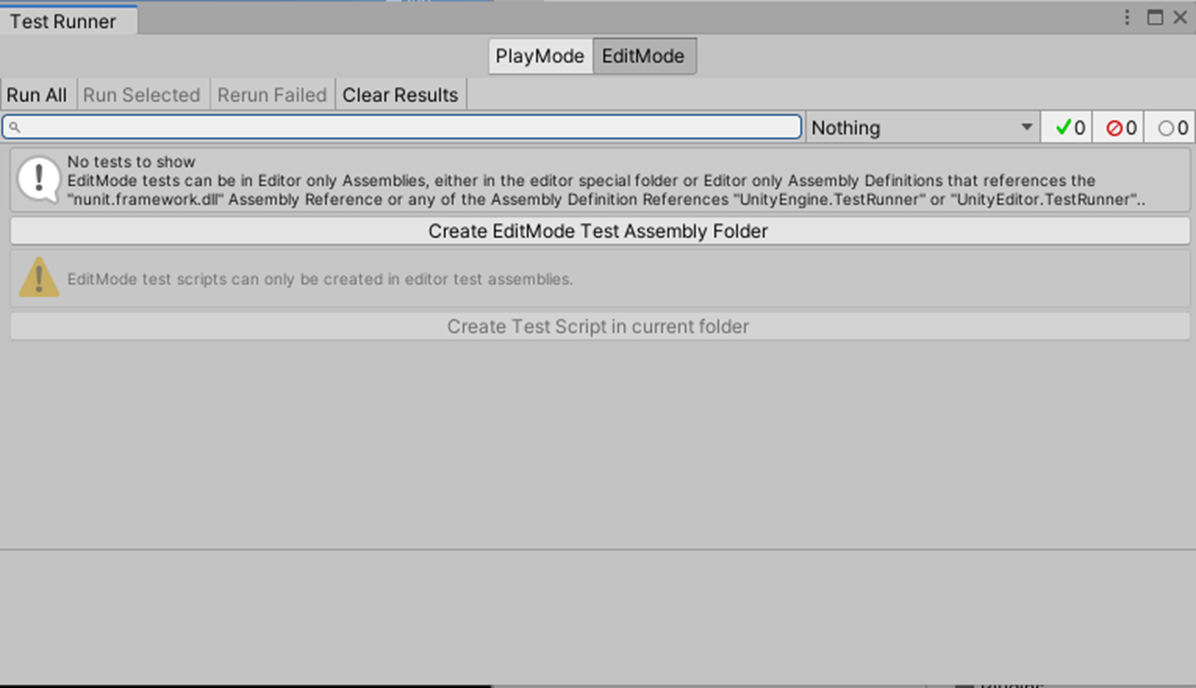 For the purposes of this blog posts, we will stick to edit mode tests as we will test the models only, which do not (or should not) require game objects. Think of play mode tests as test of running game objects - more like automated UI tests, IMHO.
If you click the “Create EditMode Test Assembly Folder” button, you will see this:
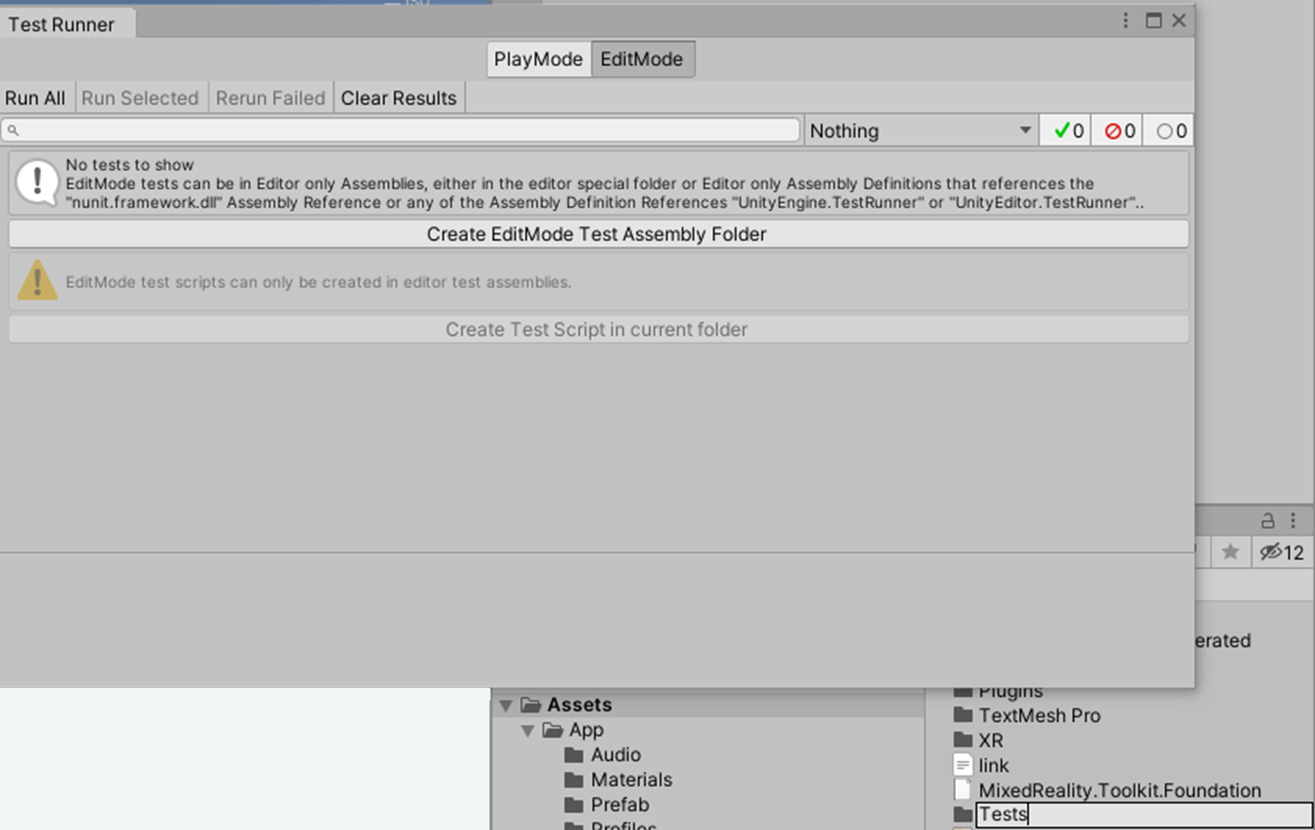 Give the folder any name you like - I called it “Tests”, for obvious reasons.
Creating your first test script
Open the Test folder by clicking on in the project
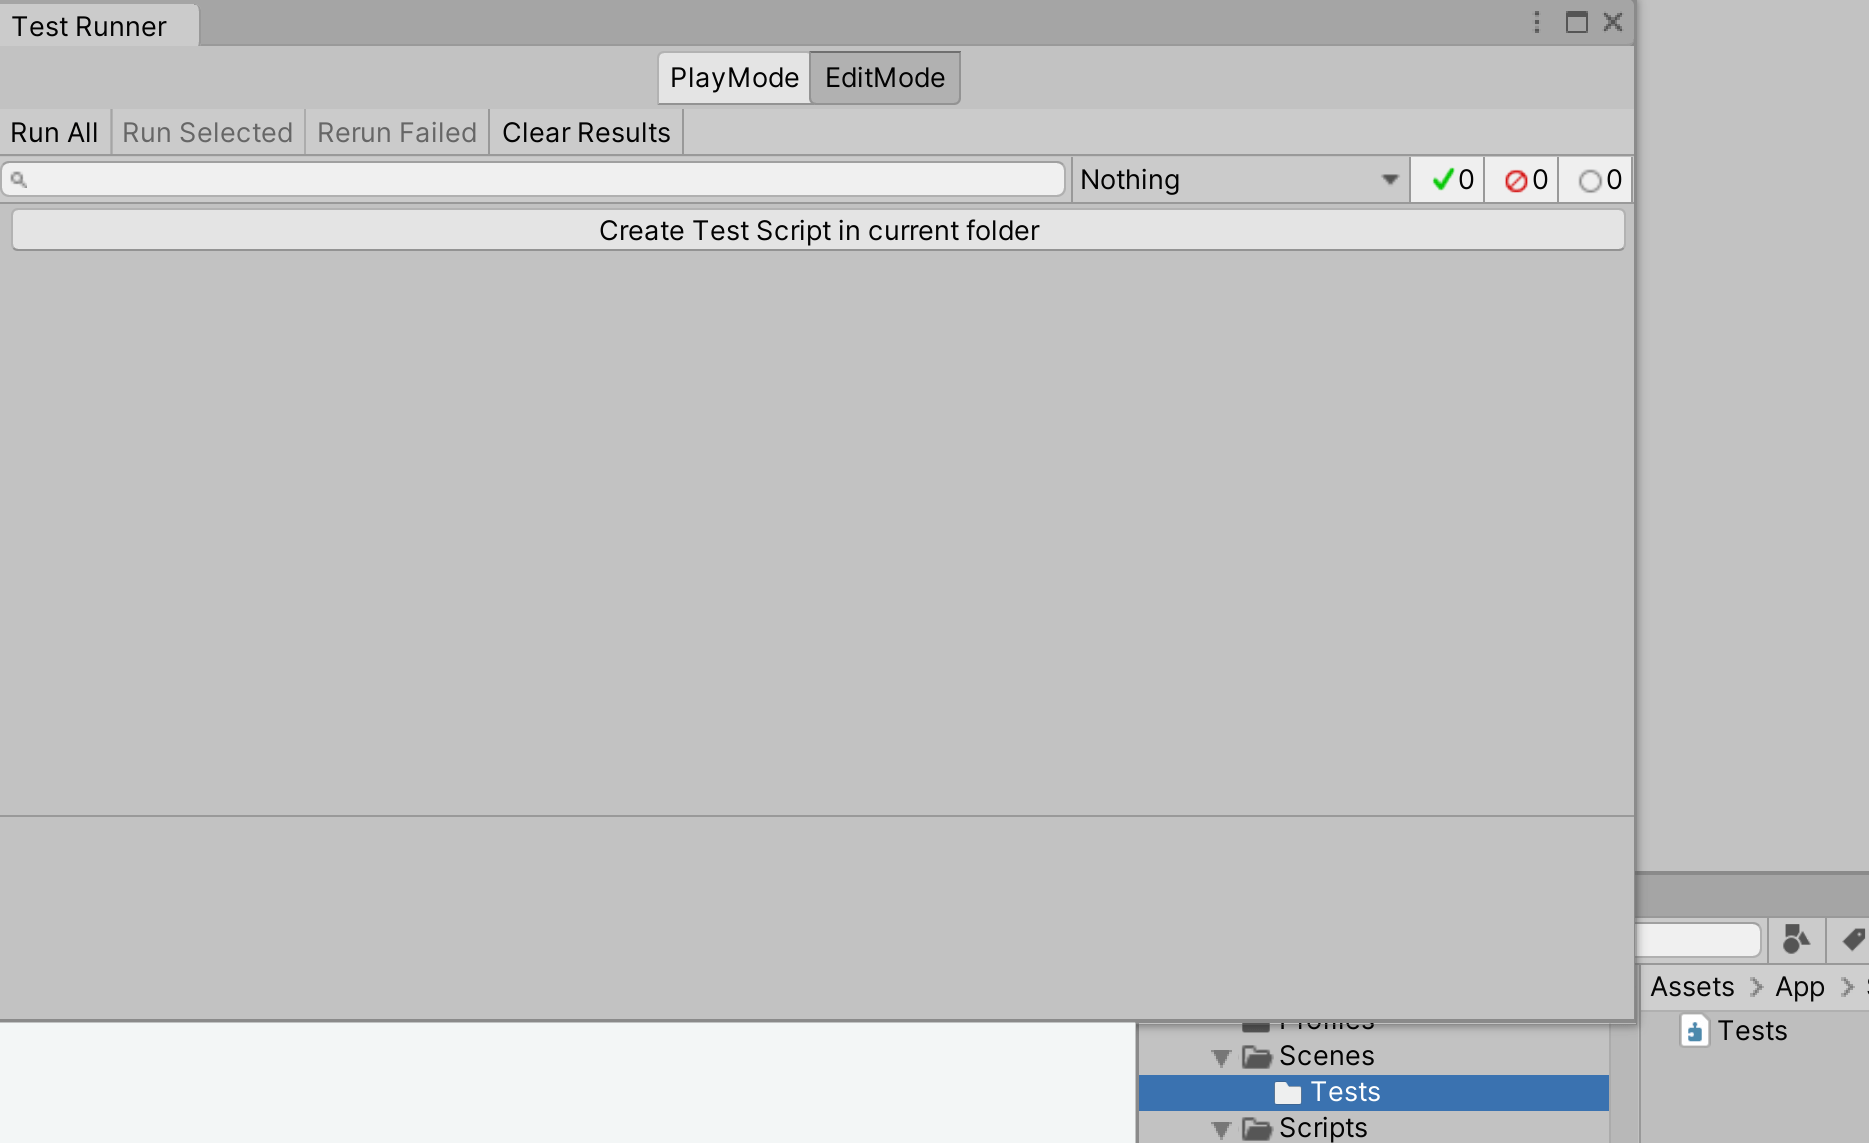
And it will show the “Tests” assembly definition, which we will see - and learn about - more pretty soon. You will also notice the Test Runner window has changed. The big button now says “Create Test Script in current folder”. So click that button and it will show “NewTestScript.cs” in the Tests folder
For reasons I have not been able to fathom, the test runner button text changes back into “Create EditMode Test Assembly Folder”, like you would want to create another test assembly inside this one.
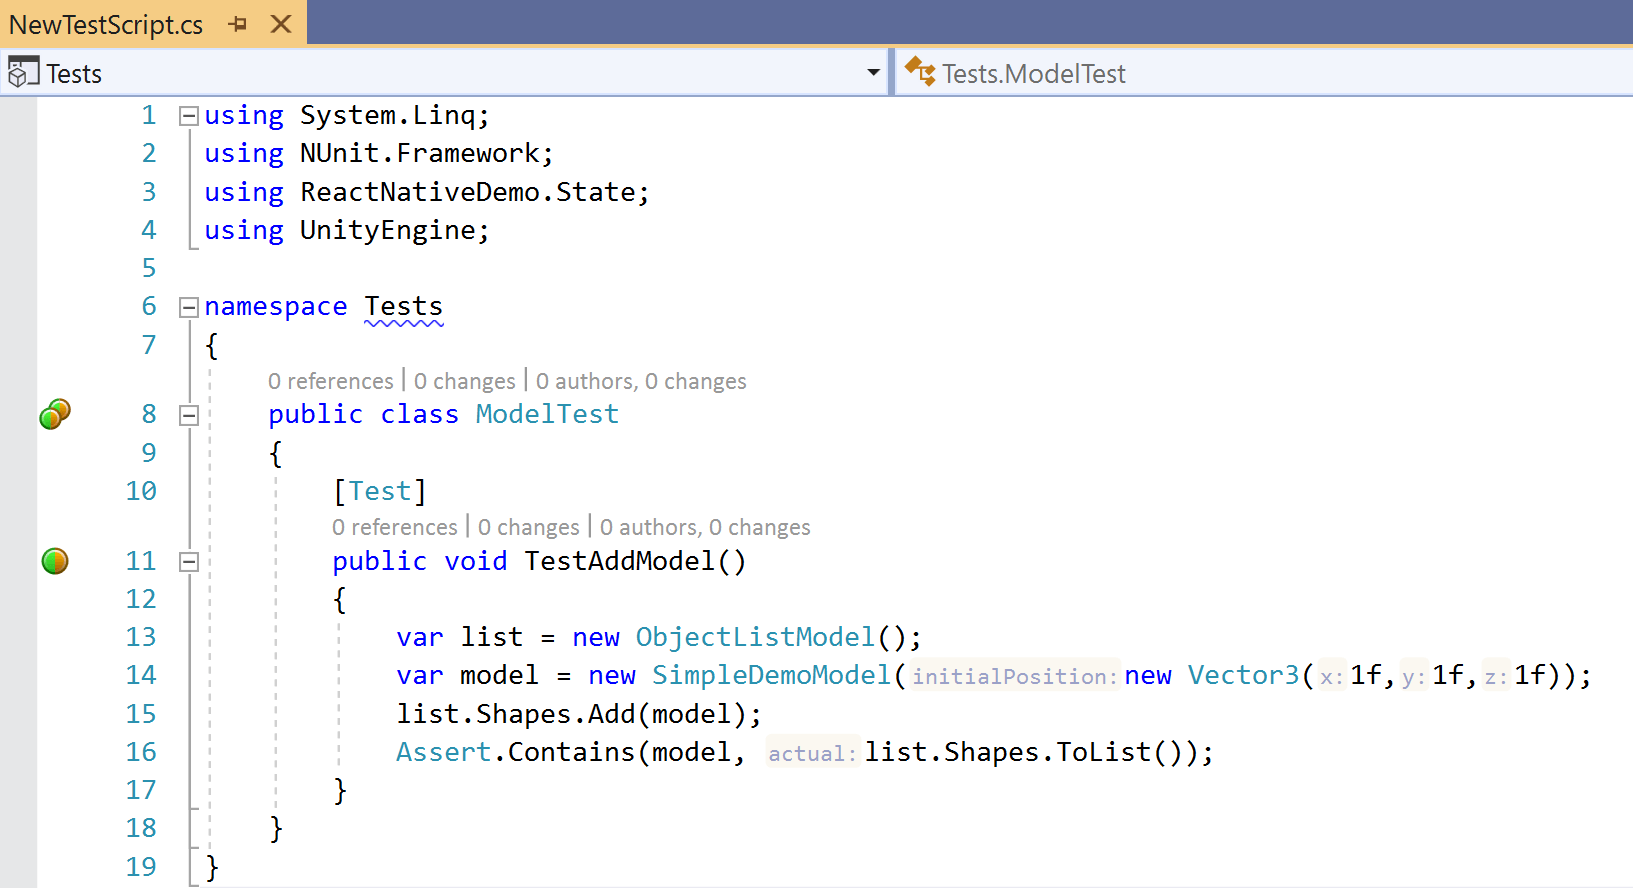
When you double-click the NewTestScript.cs, Visual Studio will open and you will be presented with some default sample code. Let’s delete that and add our own code, that does a trivial test of the model:
using NUnit.Framework;
using ReactNativeDemo.State;

namespace Tests
{
    public class ModelTest
    {
        [Test]
        public void TestAddModel()
        {
            var list = new ObjectListModel();
            var model = new SimpleDemoModel(new Vector3(1f, 1f, 1f));
            list.Shapes.Add(model);
            Assert.Contains(model, list.Shapes.ToList());
        }
    }
}
…. and you will see Visual Studio say “I beg your pardon?”. And Unity is complaining about the same error.
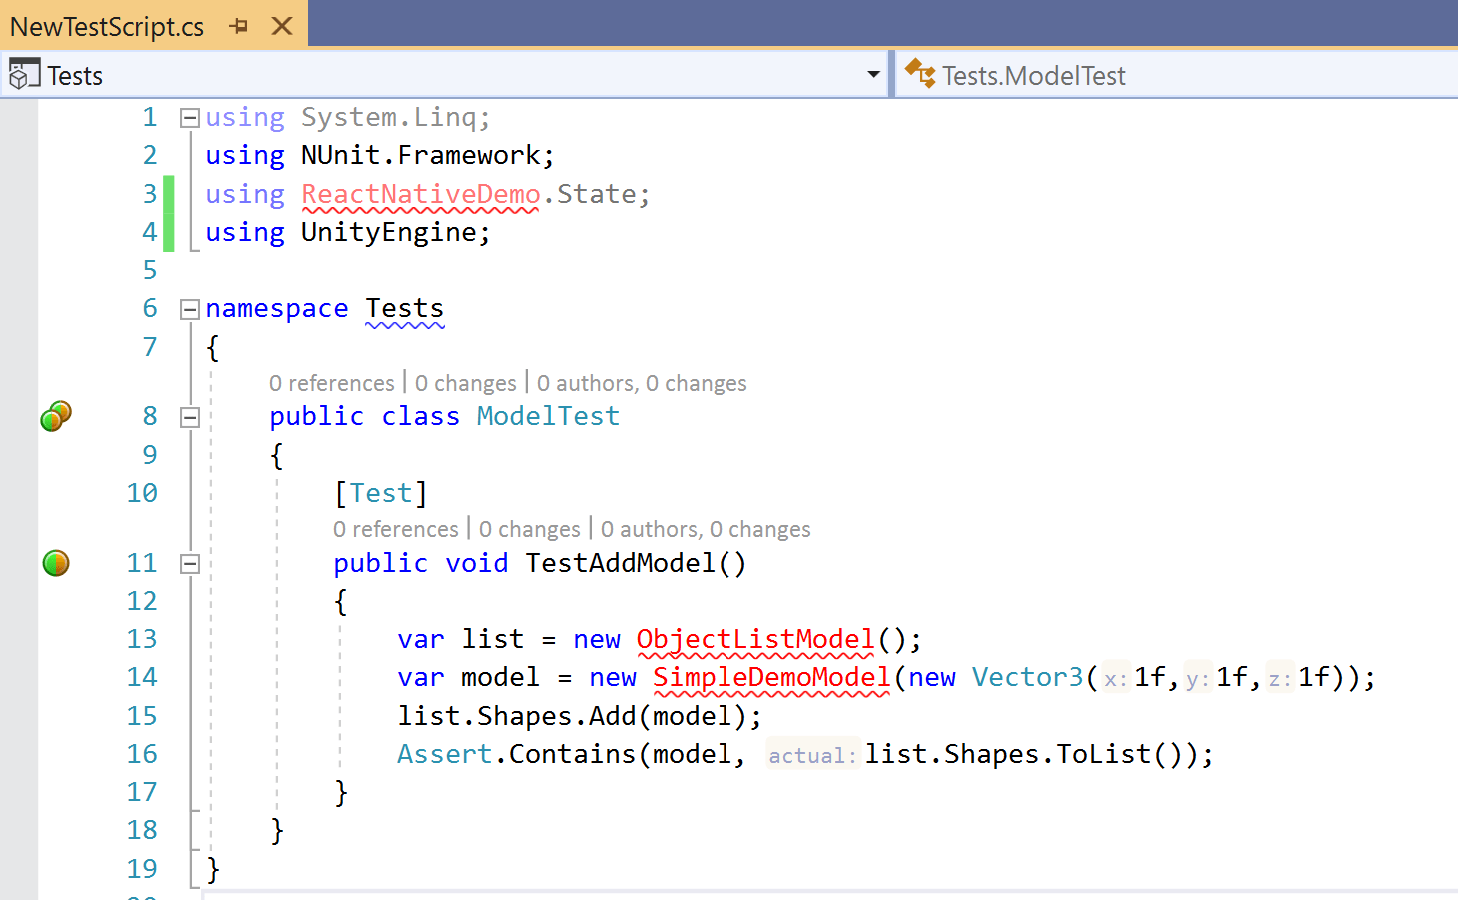
Buckle up friends, major yak shaving ahead.
Project setup & referencing mayhem
Making references, attempt 1
In normal Visual Studio projects, one would simply reference the project with the code to be tested from the test object, and be done with it. In Unity you essentially need to do the same… but things work in a rather different, roundabout - and generally weird way.
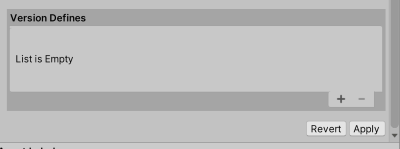
If you select the Test assembly definition file you will see this inspector screen
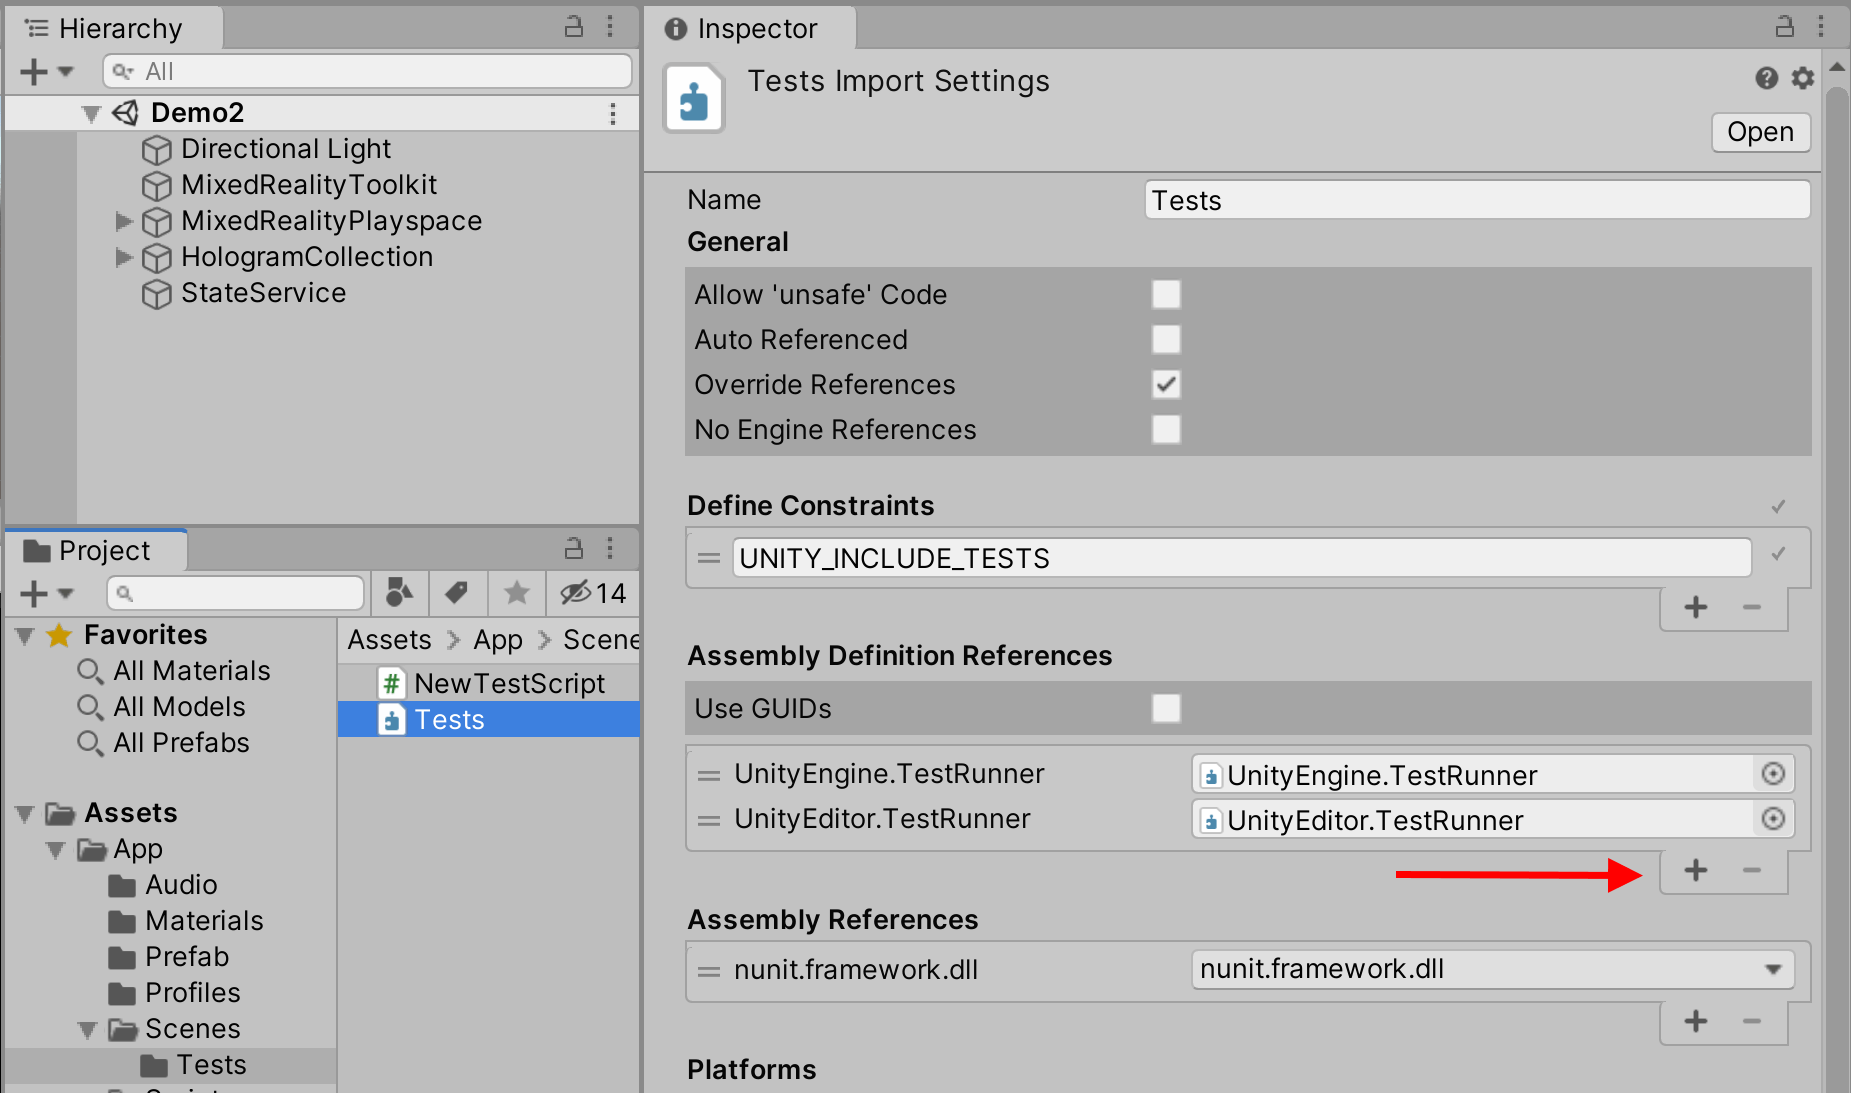
If you click the little plus button, an empty reference will be added:
![]()
And if you click the dot at the end, you can select from all the assemblies available in this project

They are alphabetically sorted, and this is at most about 25% of them. There is whole host of MRKT and Unity assemblies. You might also see there’s also one pretty notable exception.’
Assembly-CSharp, aka the project where your code lives in. Let’s shave the yak a bit more.
Defining your own code as assembly
All right, so Assembly-CSharp is not built into a reference-able assembly: lets make it one. So in the root of your assets folder, right-click, hit create and then Assembly Definition
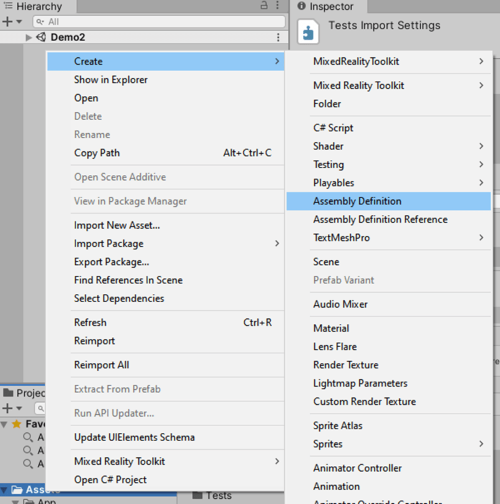
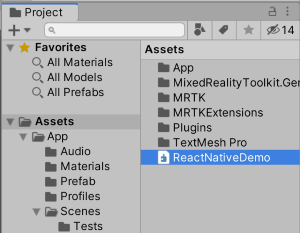
Name the file whatever you want. I called it “ReactNativeDemo”
The result: first we had three compiler errors, now we have well over fifty. All MRTK references are apparently gone, as are the UniRx references. The yak definitely still needs more attention.
Re-creating the references
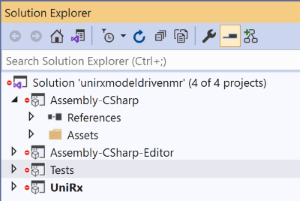
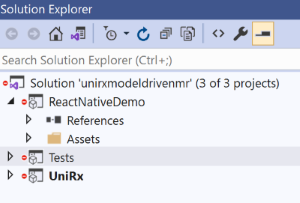
So what the bleep is going on here? Well, first of all, your Assembly-CSharp is gone, and all your (non-test) code is now sitting in a project called “ReactNativeDemo”
While this kind of makes sense, given we named the assembly as such, the fact all the references are gone does not quite make sense, IMHO. Apparently, when you ‘just write scripts’ in Unity, everything ends up in Assembly-CSharp, and Unity keeps you by the hand and automatically references all assemblies in the project. When you insist on naming your assemblies yourself, Unity is happy let go of your hand and lets your fall flat on your face - and you have to manually add the referenced assemblies by yourself. One by one. A task which is complicated by the fact the MRKT itself consists out of 40+ assemblies, then there’s UniRx itself, and a host of Unity assemblies you may or may not need. And the Unity editor only supports adding one assembly at a time 🙄
Splitting up code into multiple assemblies makes sense - when you change code, only the assembly with the changed code is recompiled, so that saves you time. But the MRKT went a bit overboard with the number of assemblies. Fortunately there is an easy solution for the lazy developer. The assembly definition file is a simple text file with an .asmdef extension. When you open it for the first time, it will only show this:
{
    "name": "ReactNativeDemo"
}
Now you can add references one by one via the Unity editor, or just paste them in like this:
{
    "name": "ReactNativeDemo",
        "references": [
        "Microsoft.MixedReality.Toolkit.Async",
        "Microsoft.MixedReality.Toolkit.Examples",
        "Microsoft.MixedReality.Toolkit.Extensions.HandPhysics",
        "Microsoft.MixedReality.Toolkit.Extensions.SceneTransitionService",
        "Microsoft.MixedReality.Toolkit.Extensions.Tracking",
        "Microsoft.MixedReality.Toolkit.Gltf",
        "Microsoft.MixedReality.Toolkit",
        "Microsoft.MixedReality.Toolkit.Providers.WindowsMixedReality",
        "Microsoft.MixedReality.Toolkit.Providers.WindowsMixedReality.Shared",
        "Microsoft.MixedReality.Toolkit.Providers.WindowsVoiceInput",
        "Microsoft.MixedReality.Toolkit.Providers.XRSDK",
        "Microsoft.MixedReality.Toolkit.Providers.XRSDK.WindowsMixedReality",
        "Microsoft.MixedReality.Toolkit.SDK",
        "Microsoft.MixedReality.Toolkit.Editor.ServiceInspectors",
        "Microsoft.MixedReality.Toolkit.Editor.Inspectors",
        "Microsoft.MixedReality.Toolkit.Services.BoundarySystem",
        "Microsoft.MixedReality.Toolkit.Services.CameraSystem",
        "Microsoft.MixedReality.Toolkit.Services.DiagnosticsSystem",
        "Microsoft.MixedReality.Toolkit.Services.InputAnimation",
        "Microsoft.MixedReality.Toolkit.Services.InputSimulation",
        "Microsoft.MixedReality.Toolkit.Services.InputSystem",
        "Microsoft.MixedReality.Toolkit.Services.SceneSystem",
        "Microsoft.MixedReality.Toolkit.Services.SpatialAwarenessSystem",
        "Microsoft.MixedReality.Toolkit.Services.TeleportSystem",
        "Microsoft.MixedReality.Toolkit.Tools.Runtime",
        "UniRx",
        "Unity.TextMeshPro",
        "Unity.Timeline",
        "Unity.XR.WindowsMR"]
}
This may be too much, but this copies in everything I needed. For your project, you might need to add more if you use more, but this is pretty much everything the MRTK offers, I think. Now we are back at the simple missing ReactNativeDemo name space error we had first
Making references, attempt 2
Now, if you go back to your Test assembly definition file in the editor, click the plus sign
and then the dot behind “empty reference”
![]()
You will find, about halfway, Hopper be praised, ReactNativeDemo
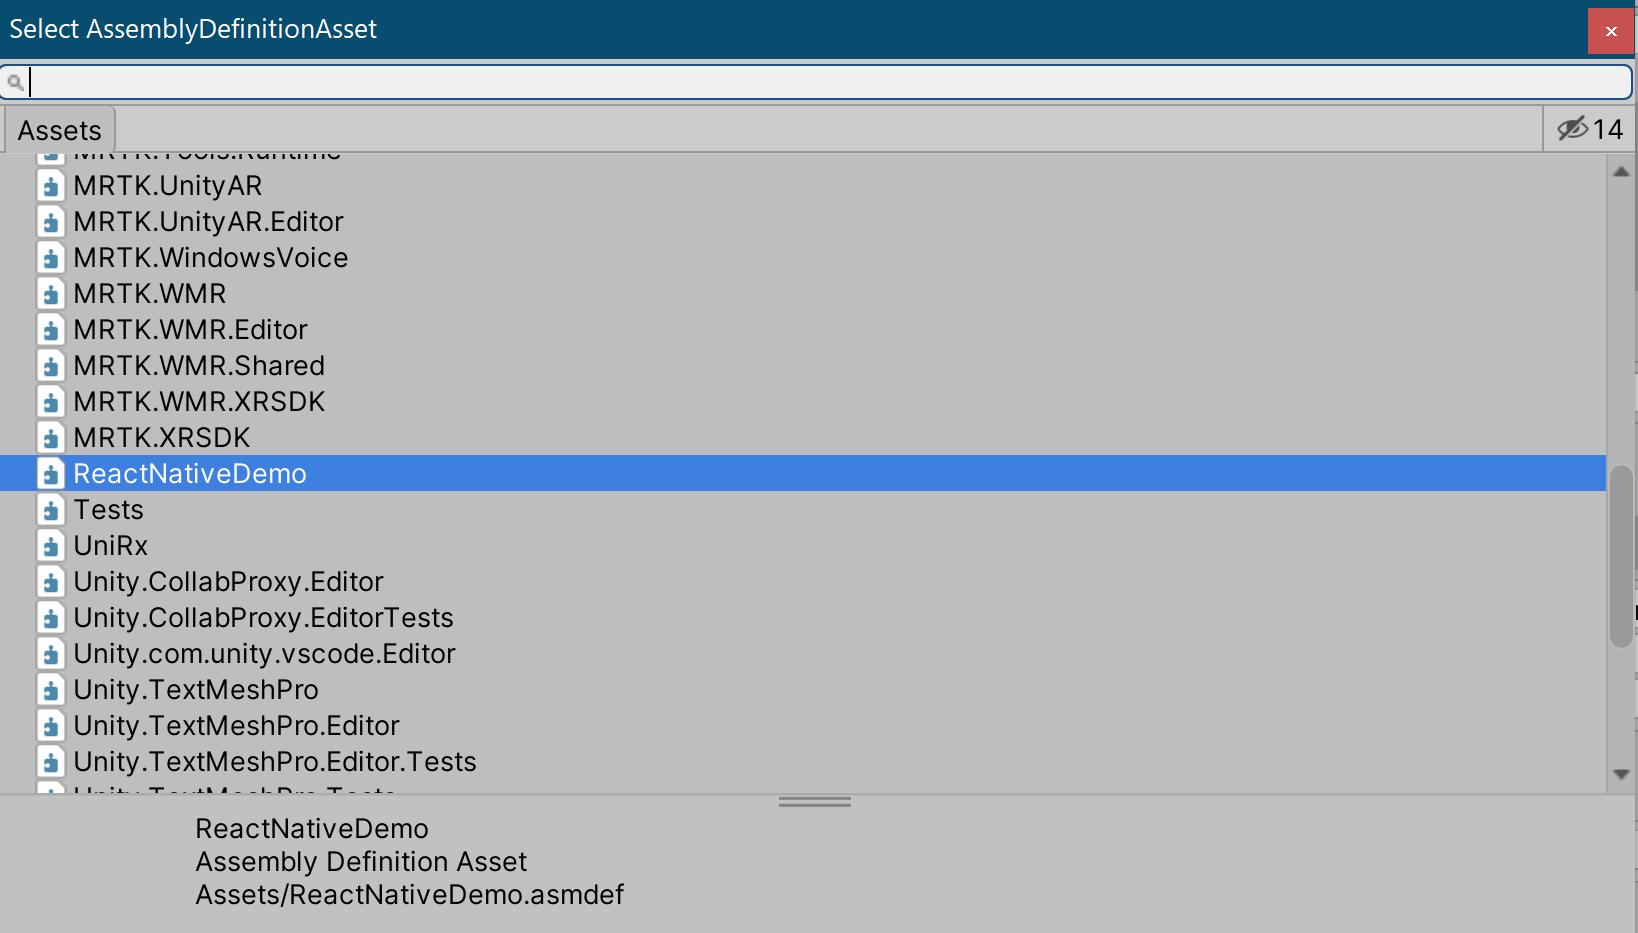
After you selected ReactNativeDemo:
- Add a reference to the UniRx assembly as well,
- scroll down in the Inspector,
- hit apply
And then finally….
Writing and running unit tests
We are about knee-deep in smelly yak fur by now, but believe it or not - we are done shaving. We can now actually, finally go about, and write and run unit tests. This is part is actually an anti-climax. I have added two more rather trivial tests to the test script you can run.
As you have seen before, a test is simply a public method decorated with a [Test] attribute.
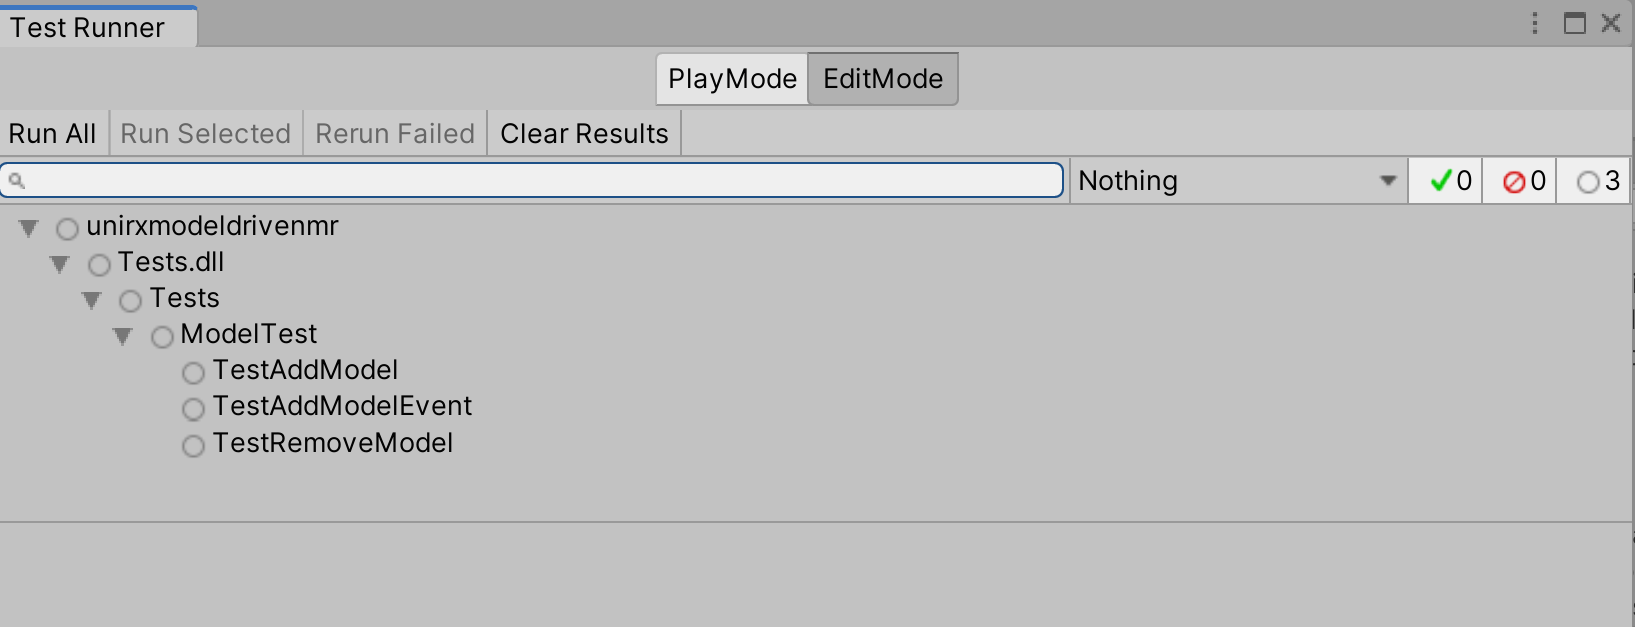
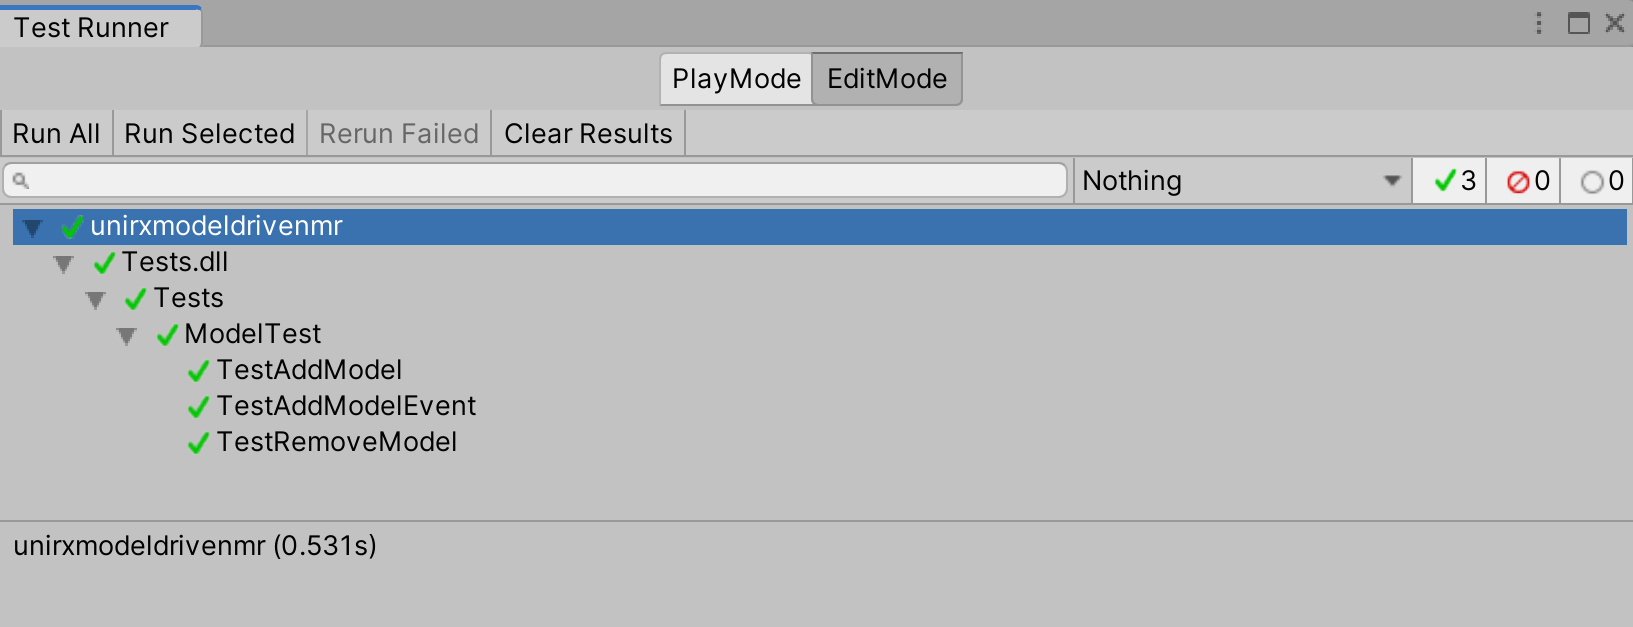
If test can be compiled, they now show up in the test runner:
If you right-click on some part of the tree, or an individual test, you will get a one-item context menu “Run”
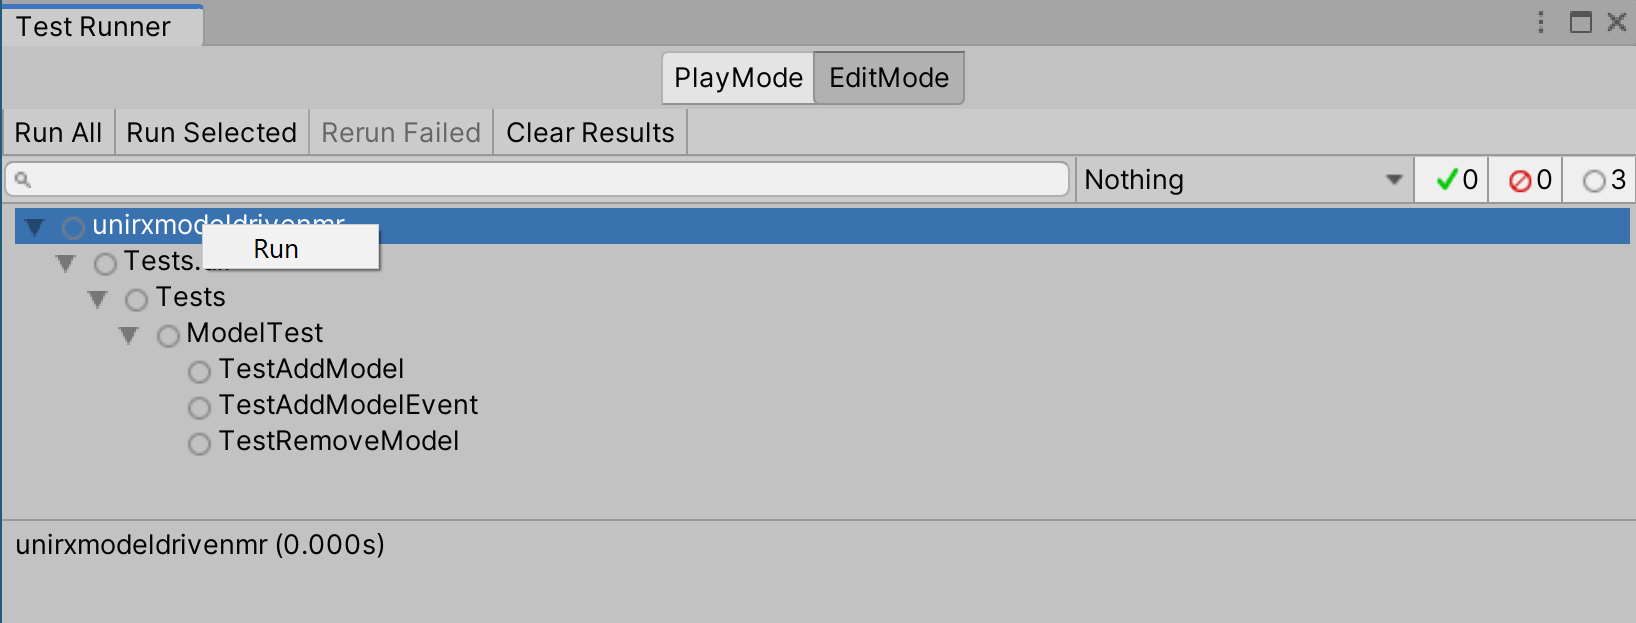
Which does exactly what you think it does:
Conclusion
Writing and running edit mode unit tests in Unity is rather trivial - setting things up requires quite some hoopla, and can be quite daunting at first. I would very much recommend keeping a reference to this sample .asmdef file for setting up testable projects if you don’t want to be stuck in referencing hell.
You can find the complete, finished project here in the main branch.
Special thanks to Clint Rutkas and his PowerToys community for the Image Resize tool - that makes my life so much easier, especially on this image-laden blog post