HoloLens CubeBouncer application part 1 - setting up the Unity part
Preface
Ever since I knew the HoloLens was coming to my company I have been digging into all the online resources I could find. And ever since the devices arrived on June 8th, I have been more or less pleading insanity with my wife, as I spent quite some spare time just trying to get ever deeper into HoloLens development with Unity3D and C#. What surprised me most was how easy it was to actually get started and get on with it, and get a pretty functional app within a quite short amount of time – with shockingly little code.I will write the way I created the app as a series of blog posts (and not a single one) to prevent individual posts from becoming too long. They will serve both as an educational piece for those interested in HoloLens programming (as working examples with explanations are still pretty rare) and for myself – to remember how I actually came to this.
- In this first part I will describe the app, write how to create an app in Unity3D, and how to design some basic characteristics of a 3D object
- In Part 2 I will describe the basic setup – how the grid is created with respect to user’s view angle
- In Part 3 I will add basic manipulation (air tapping the cubes and making them bounce) as well as the first spatial sound
- Part 4 will introduce speech recognition and he first two speech commands – “create new grid” and “go to start”
- Part 5 will describe the use of gravity via the speech commands “drop”, “drop all”; we will implement “total recall”, add missing sounds, and do some fit & finish.
Description and features of the app
The app creates a grid of cubes floating in the air. Up and sideways it’s a fixed number of cubes (4x4), the number in depth is determined by the space available between you and a wall or object you are gazing at. The grid is also rotated in space according to your head’s position, so if you tilt your head a and gaze up to the left, so will the grid be tilted and stacked up to the upper left. In other words – you will always look at a grid that is exactly aligned with your gaze – when the grid is created. After that you can walk around it and manipulate it to your hearts content:- Air tapping while the gaze cursor is on the cube will push it away from you as if you had poked it with a stick that comes directly out of your eyes. Cubes will move away from you, rotate and bounce off each other - and any physical objects HoloLens has detected. When they hit each other, the make a kind of clicking sound, when they hit a physical object, a kind of low boom sounds. And of course, all from the right direction. Spatial Sound FTW.
- When you gaze at a cube and say “go to start” it will move back to it’s original position, emitting a kind of whistling sound while doing so. And bump out of the way any other cubes being in the way ;)
- Gazing at a cube while saying “drop” will let the cube drop to the floor
- Saying “drop all” will make all cubes drop to the floor (you don’t need to gaze at a particular cube)
- Saying “total recall” will make all cubes return to their initial original position. More or less. Unless they hit each other on the way ;)
- Saying “create new grid” will create a new grid of cubes – once again it’s direction following your gaze.
I have shown some intermediate stages of the app – here it is in it’s final form.
And I am going to show you how to build it. It’s 90% Unity3D stuff, and very little custom code. And part of it is nicked from Microsoft, too. Actually I only wrote three classes all by myself.
Suggested material before starting
If you are totally new to Unity3D (like I was) I would strongly suggest doing some introductory stuff first. Otherwise, I will be talking mostly nonsense to you. Start out with the Creative Coding series by the brilliant Rick Barraza. I found it very enlightening, although it is slightly off target when you are a hard core coder like me – Rick is talking at length at things you will find elementary as a coder, while some Unity3D concepts go by at a speed that made me pause and go back a few times ;). But it is a very good series to make you feel comfortable with Unity3D editor and the basic concepts. I would also suggest a few lessons on the Holographic Academy to get you familiar with HoloLens interaction programming. I would particularly suggest lessons 101 and 101 (or 101E, if you don’t have a HoloLens). It’s rather amusing to see that the Academy series is heavily slanted toward coders, while Rick is more slanted toward designers, so together they make a good introduction.For editor layout, I took Rick’s suggestion of taking the “tall” layout (Window/layouts/tall) so that is what you will see in the screenshots. It is not the default Unity3D layout.
Create a new Unity3D project
The most important part – think of a good name, as it’s not easy to change it. I would strongly suggest following a few steps as described in my fellow MVP Morten Nielsen’s blog, most notably:- Creating a bare bones project with the right settings
- Installing HoloLens HoloToolkit into your Unity Project
- Using HoloLens’ Spatial Mapping to occlude objects
- Adding a Gaze Cursor to your HoloLens App
- With regards to the HoloToolkit, I only copy all the files under “Assets” from the zip file in a folder “HoloToolkit” under “Assets” in my Unity3D project as I like to keep the things I make and import as a whole differently.
- I put the cursor at root level, in stead of inside a ‘Managers’ game object (although I do create it, but for other purposes)
- I set the Near Clipping Plane of the Camera to 0.1, unlike Morten, but do whatever you like.
I also add a few things up front:
- To enable speech recognition, we have to enable the Microphone. That’s done by File/Build Settings/Player Settings, then opening the “Publishing settings”, scrolling all the way to the bottom to Capabilities, then checking “Microphone”
- To prevent a horribly magenta painted surroundings, I set the occlusion material of the SpatialMappingRender to, indeed. occlusion. I have described this procedure in an earlier blog post.
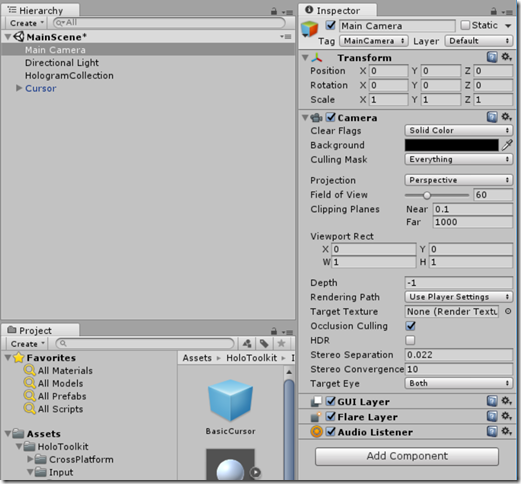
When you are done with this, hit “File/Save Scene” and choose a name you like. I tend to choose “MainScene”.
A little organization up front
I like to keep things a bit organized, so I keep stuff I made myself and/or is part of my app) apart from 'the rest', that is, the HoloLens toolkit. This makes updating easier. So I created a folder "Custom" in my assets and added a number of sub folders to it: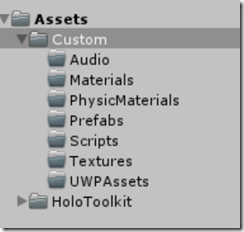
Creating the cube looks
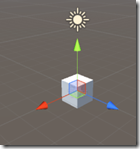 Click “HologramCollection” in the hierarchy pane, right-click, select 3D-object and then “Cube”. Done ;). You get a white 1x1 cube, that’s a bit big and a bit boring. So what we are going to do next is get a material for it that has a more interesting look. I guess I wanted to impress our CTO (hi Danny ;) ) so I took a Wortell company logo - that is conveniently square. But of course you can take any image you like. In Unity3D terminology, that’s a texture, so I dragged that image into my newly created textures folder. But you cannot directly use a texture on a 3D element – you need a material.
So inside our Assets/Custom/Materials folder we right-click, select Create, then click “Material”. In the top of the inspector, a drop down box is shown labeled “Shader”. Change that to Mobile/Bumped diffuse. The UI below it will change – you will see two grey areas. Hit the “select” button from the top one, select the image you want from the popup, and you are done. Alternatively, you can also drag it from the textures folder on top of the grey area. Either way, the net result should be this:
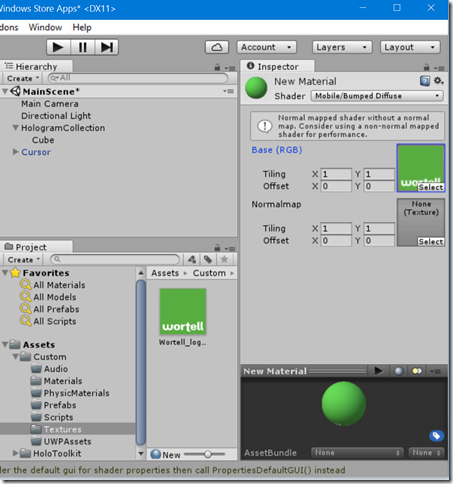
It gives some warning for better performance – people who understand Unity3D better than me will no doubt have suggestions to fix this. For now, it will work. But your material is now still called “New Material” – I renamed it to “WortellLogo”.
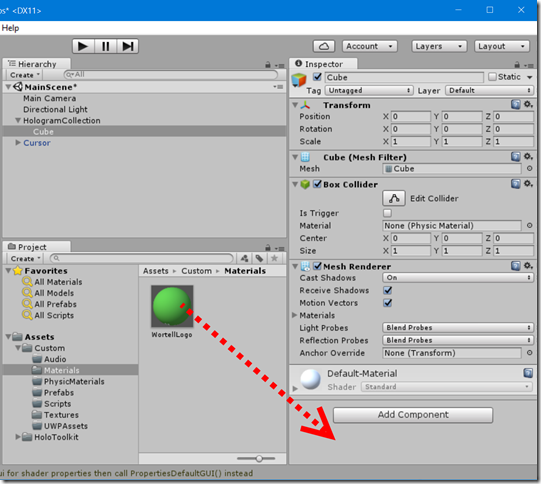
Now select the cube in the Hierarchy pane, open the Assets Custom/Materials folder and drag the new Material on top of the Inspector pane, just below the Material
Your result should be this (if you zoom in a little on the Scene)
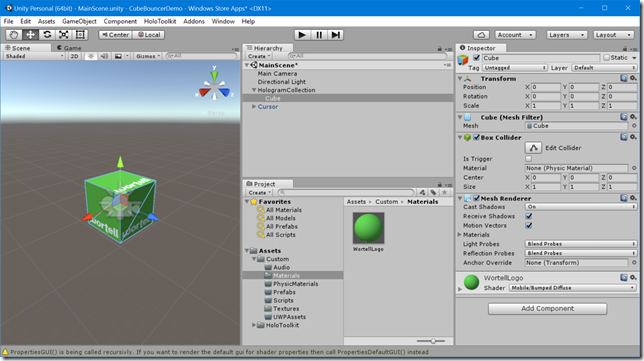
One cube, with logo, nearly done. We will need only need change one more thing – the cube is a wee bit big. Under transform (on top of the inspector) change the Scale to 0.1 for X, Y and Z.
Adding some physics (and other) components to the cube
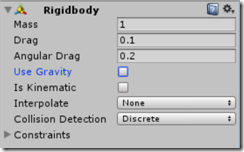
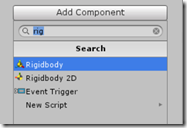 To be able to make the cube be moved and controlled by the Unity3D physics engine, we will need a component that describes it’s physical characteristics. That component is called a “Rigidbody”. So hit the “Add Component” button to the right in the cube Inspector, type “rig” in the search box to make finding the right component easier, and select Rigidbody. I have changed some default settings, but you are free to play with your own – the most important thing is to turn off “Use Gravity”
A second part of the physical characteristics is defined by the physical material. This, apparently, defines how things collide – how bouncy they are, and how smooth. You can image two ice cubes sliding over each other showing different behavior than two rugged wood cubes. Anyway – select folder “PhysicMaterials’', right-click, and select Physic Material. I have called it “BouncyStuff”, but you may call it whatever you like. I have given it the following settings:
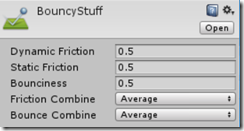
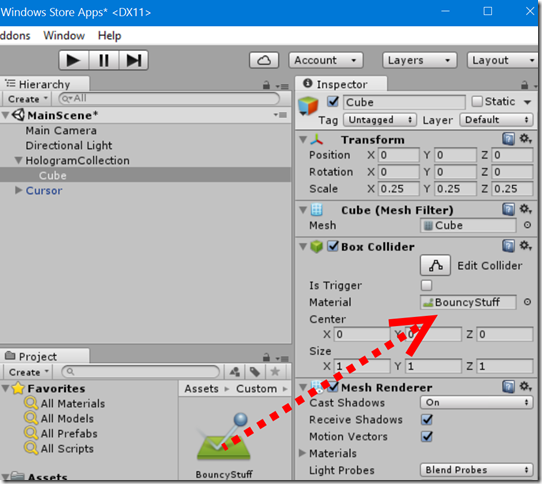
To apply this material, you will need to drag this material on top of the “Material” box of the “Box Collider” inside your cube, that was created by default.
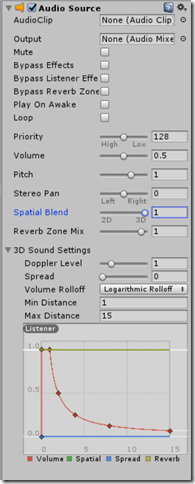
Finally, to make the cube be able to emit sound from the right direction we have to add an Audio Source. You can find an article here on enabling spatial sound in your project. I tend to do things a bit different in this project, because I found it sounded better in my case. Anyway – once more, hit “Add Component” and select “Audio Source”. Expand it, then change the settings as follows:
- Uncheck “Play on awake”
- Set “Volume” to 0.5
- Drag the slider “Spatial Blend” all the way to 3D
- Under “3D Sounds settings”, set Max Distance to 15
Our Cube is now done.
Looking at the result so far
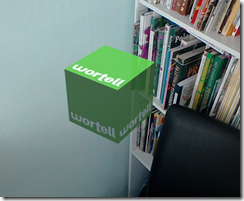
As you may have noticed, we still have not written a single line of code. Yet, we already have a working application. Hit File/Build Settings/Build, build the app and deploy to the HoloLens or an emulator. The “Made with Unity” logo will pop up, and then nothing. Or so it seems. We have positioned our cube at 0,0,0 which seems to be the location of the HoloLens as the application starts up. Anyway – get up, turn around, look to where your head was, and there it is….
Concluding remarks
The solution so far can be found here. If you are impatient, and want to play with the already finished app directly, download an app package here and install it on your HoloLens. Beware of the dependencies you will need to install as well!Apart from the people already mentioned in this article, I want to particularly say thanks to András Velvárt (aka vbandi) who, apart from being a smart, friendly and very accessible person, gave me some particular good advice on some issues with the spatial mapping, and the HoloLens environment scanning rate. He also pointed me to the Creative Coding series.

 MVP Profile
 Try my app HoloATC!
 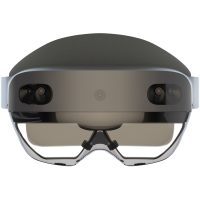 HoloLens 2
 Magic Leap 2
 Meta Quest
 Android phones
 Snap Spectacles
 Buy me a drink ;)
 BlueSky
 Mastodon
 Discord: LocalJoost#3562