
 MVP Profile
 Try my app HoloATC!
  HoloLens 2
 Magic Leap 2
 Android phones
 Snap Spectacles
 MetaLense 2
 Buy me a drink ;)
 BlueSky
 Mastodon
 Discord: LocalJoost#3562
Migrating to MRTK2: using a Spatial Mesh inside the Unity Editor
Intro
 If you are developing an app using the Mixed Reality Toolkit 2 that requires interaction with a Spatial Mesh, the development process can become cumbersome: add code or assets with Unity and Visual Studio, create IL2CPP solution, wait, compile and deploy, wait, check behavior - rinse and repeat. You quickly learn to do as much as possible inside the Unity editor and/or use Holographic Remoting if you want stay productive and make your deadline. But a Spatial Mesh inside the Unity Editor does not exist.
... or does it? ;)
Begun the Clone Wars have again
You guessed it - before we can see anything at all, a lot of cloning and configuring of profiles needs to be happening first.
- Clone the Toolkit Configuration Profile itself. I used DefaultHoloLens2CameraProfile this time.
- Turn off the diagnostics (as ever).
- Enable Spatial Awareness System
- Clone the MixedRealityAwareness profile
- Clone the MixedRealityAwarenessMeshObserver profile (the names of these things become more tongue-breaking the deeper you go)
- Change the Display option (all the way down) to "Occlusion"

And now the interesting part
On top of the Spatial Awareness System Settings there's this giant button over the whole length of the UI which is labeled "+ Add Spatial Observer".
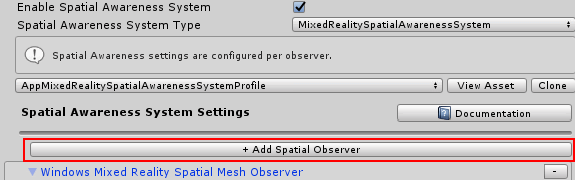
If you click that one, it will add a "New data provider 1" at the bottom, below the Display settings we just changed the previous step.
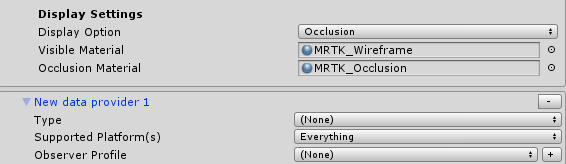
Select "SpatialObjectMeshObserver" for type

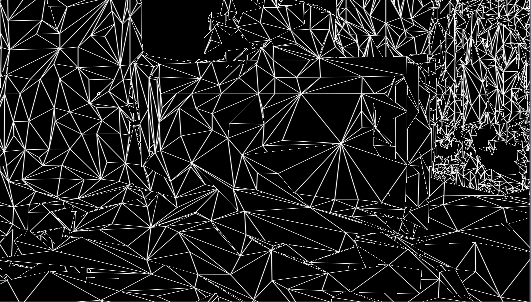
And if you hit the play button, lo and behold:
Basically you are now already where you want to be, but although the wireframe material works very well inside a HoloLens, it does not work very well in an editor. At least, that is my opinion.
Making the mesh more usable inside the editor
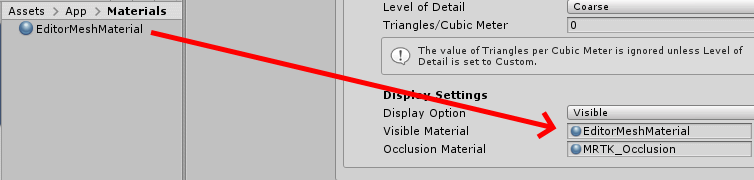
You might have noticed the SpatialObjectMeshObserver comes with a with a profile "DefaultObjectMeshObserverProfile" - I'd almost say of course it does. Anyway, clone that one as well. Then we create a simple material:

Of course using the Mixed Reality Toolkit Standard shader. I only change the color to RGB 115,115,115 which is a kind of battleship grey. You make take any color you fancy, as far as I am concerned. Set that material to the "Visible Material" of the Spatial Mesh Object Observer you just added (not in the material of the "Windows Mixed Reality Spatial Mesh Observer"!)
The result, if you run play mode again, is definitely better IMHO:

Using a mesh of a custom environment
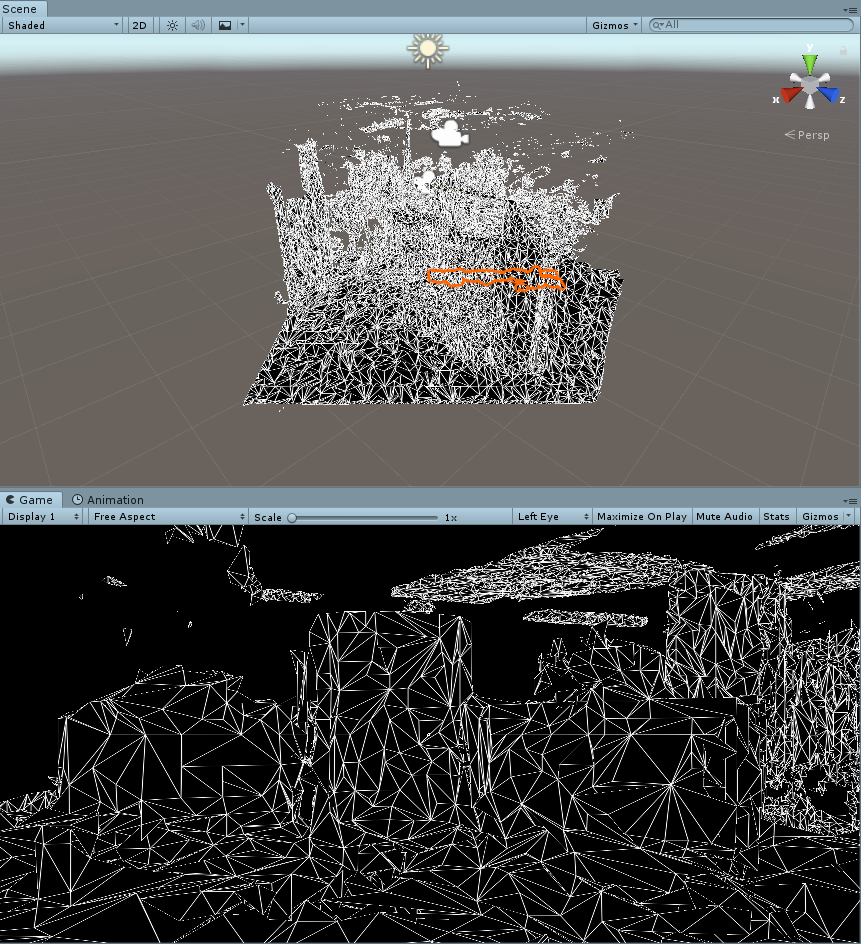
So it's nice to be able to use some sample mesh, but what if you need to the mesh of a real space? No worries, because just like in HoloLens1, the device portal allows you to download a scan of the current (real) space the HoloLens sees:
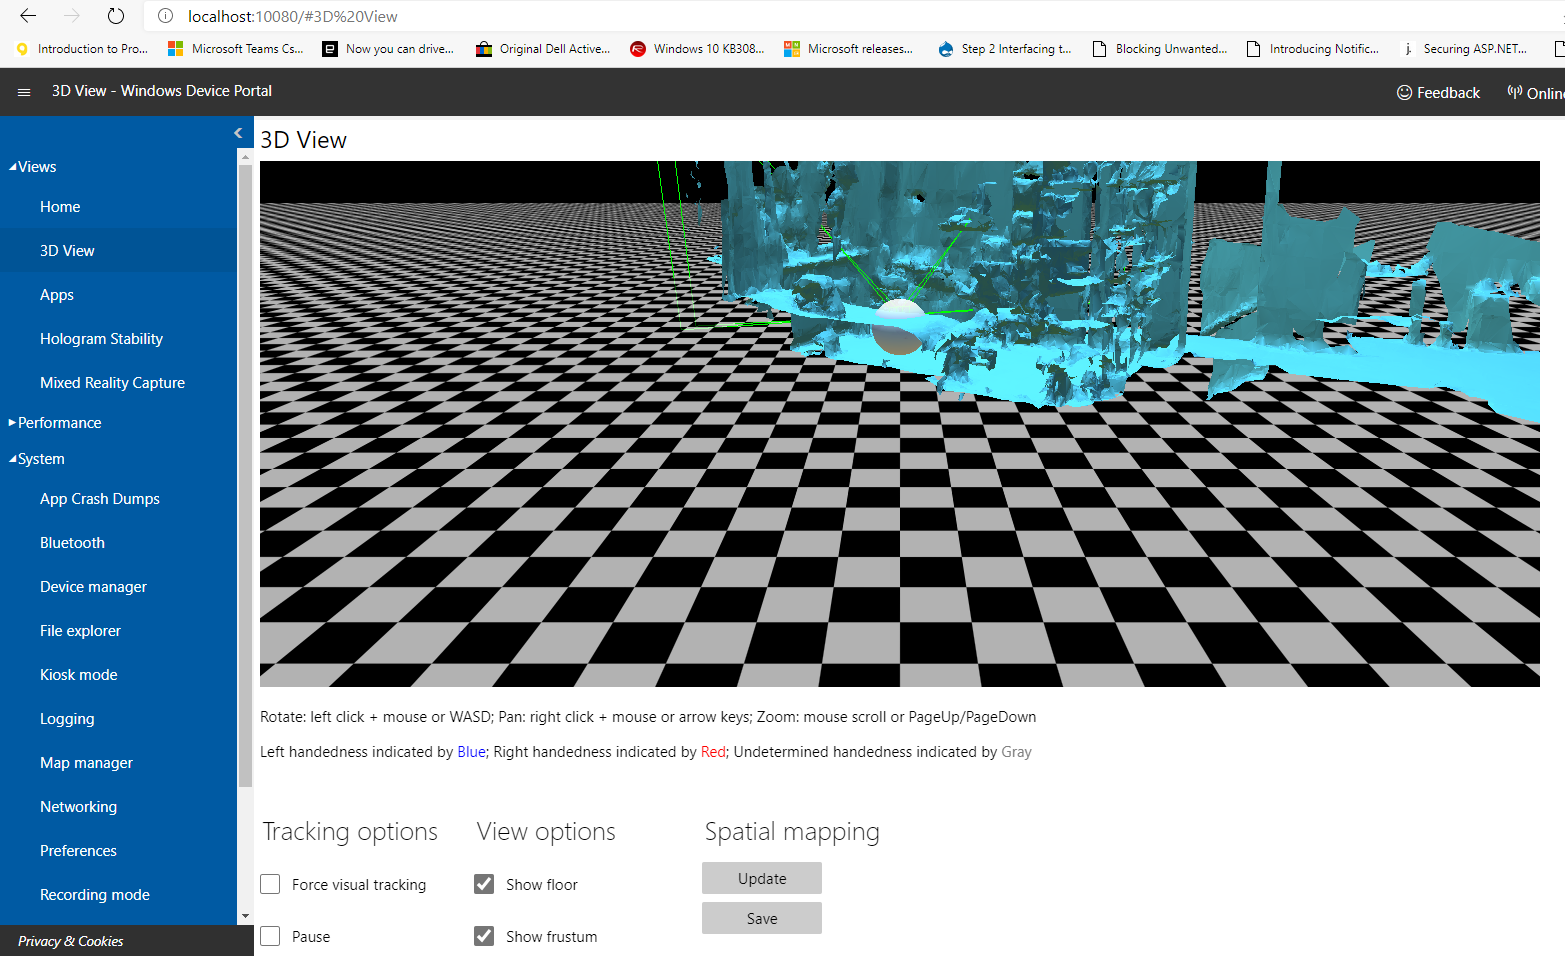
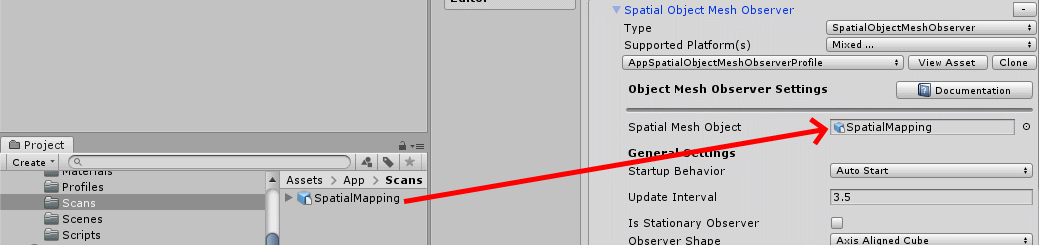
You can download this space by hitting the save button. This will download a SpatialMapping.obj file. Bring this into your Unity project, then drag it on top of the Spatial Mesh Object observer's "Spatial Mesh Object" property:
And then, when you hit play mode, you will see the study where I have been hiding in during these worrying times. It has been my domain for working for the past 2.5 months for working and blogging, as well as following BUILD and the Mixed Reality Dev Days. If you download the demo project, it will also include a cube that moves forward, to show objects actually bounce off the fake spatial mesh, just like a real spatial mesh.
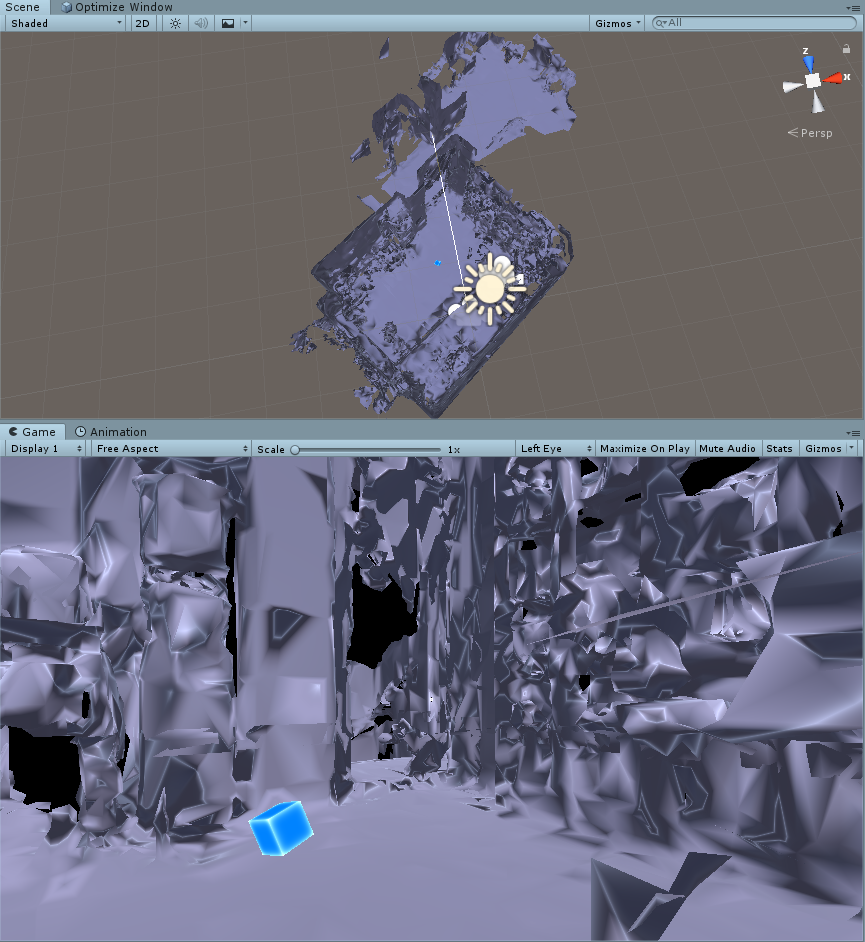
Note: if you compile and deploy this project to a HoloLens (either 1 or 2) you won't see this 'fake mesh' at all. It only appears in the editor. Which is exactly what we want. It's for development purposes only.
Conclusion
Using this little technique you can develop for interacting with the Spatial Mesh while staying inside the Unity editor. You will need less access to a physical HoloLens 2 device, but more importantly speed up development this way. The demo project is, al always, on GitHub