
 MVP Profile
 Try my app HoloATC!
  HoloLens 2
 Magic Leap 2
 Android phones
 Snap Spectacles
 MetaLense 2
 Buy me a drink ;)
 BlueSky
 Mastodon
 Discord: LocalJoost#3562
Controlling a Unity animation using HoloLens 2 hand tracking
The whole point of my previous two blog posts, in which I first described DIY hand gesture recognition, then some way to use that to move stuff along a multi point line path - was to actually lay groundwork for this blog post. Because what I actually wanted to achieve, was something like this:
The general idea
So what it looks like I am doing is moving a lever by grabbing it. What I am actually doing is almost the same as in the previous post - moving a point over a multi line path. The distance traveled actually correspondents to how far on the animation timeline the animation needs to be.
In this video where I turned on the run time debug it may become a bit more clear what is actually happening behind the curtains:
Animations, animators and animation parameters
In SampleScene2 you will find a prefab Lever1. If you select that in the hierarchy, then click Window/Animation/Animation you can see the actual animation. I have defined a simple animation called “LeverSwitch”. In this case a simple 24 frame animation that rotates the lever forward. The image shows it about halfway.
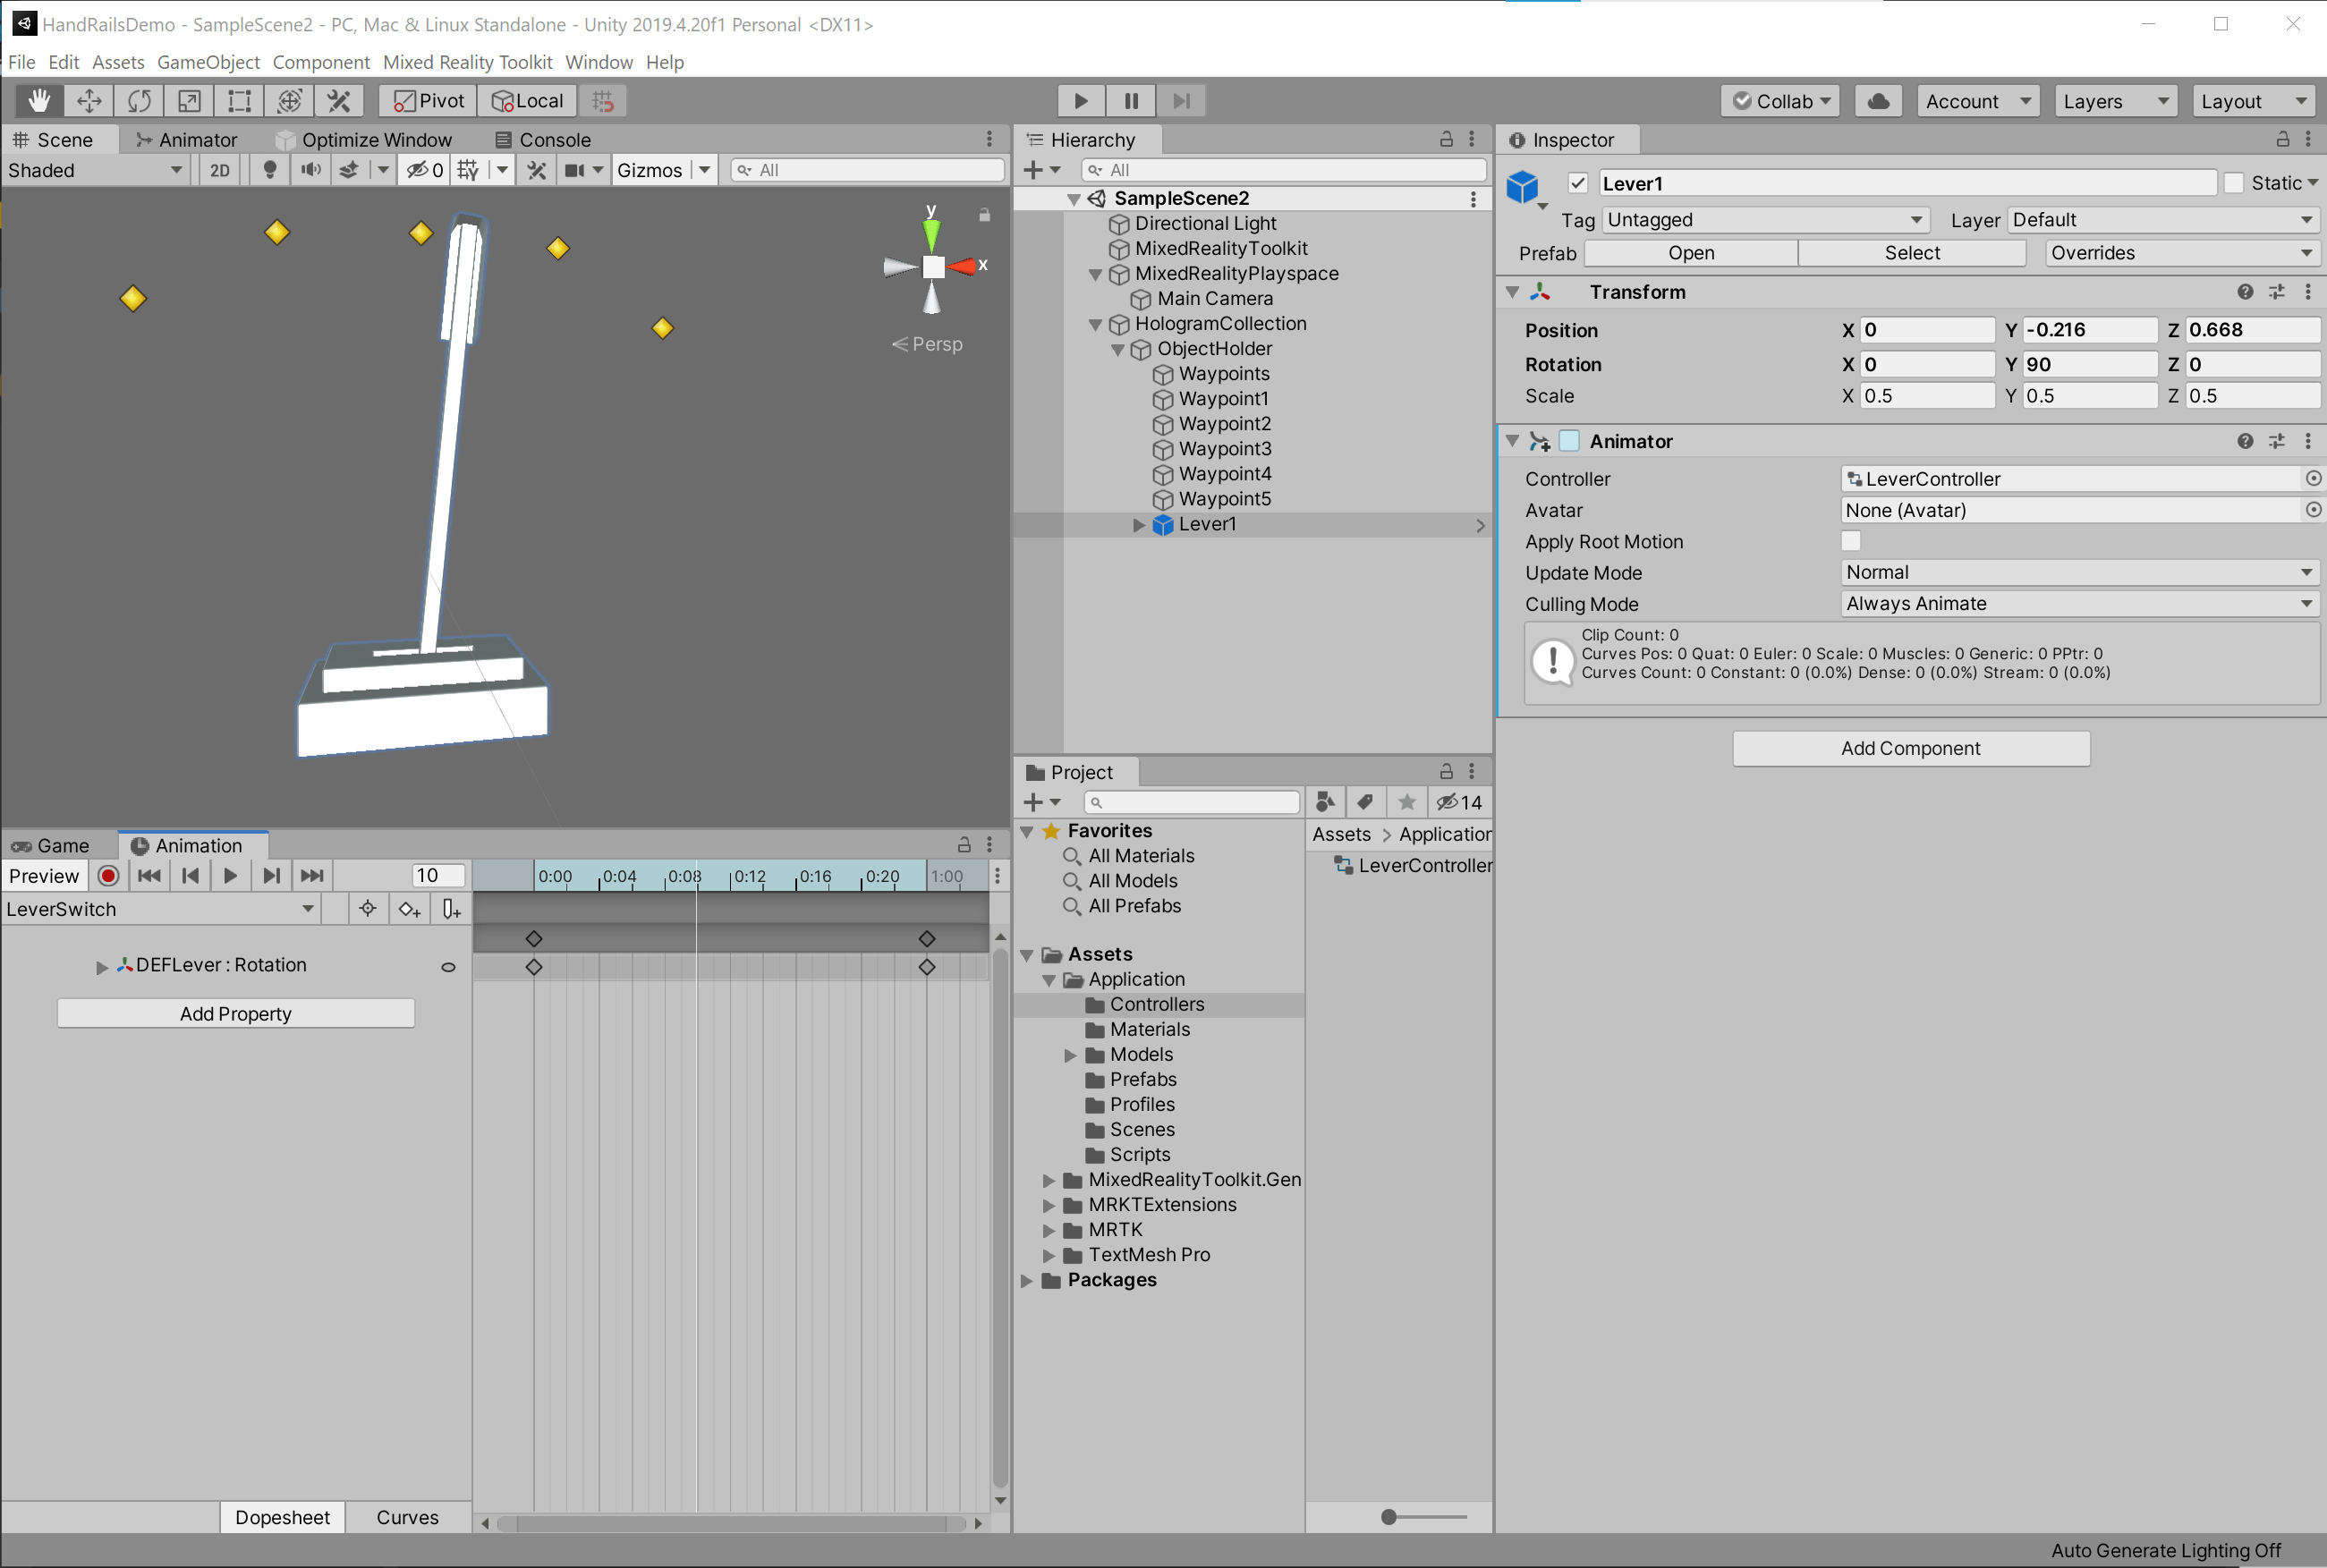
Notice the five way points that more or less show the arc the top of the lever should follow. This has nothing to do with the actual animation - this is the road I want the hand that moves the lever to follow.
You can also see there’s an animator LevelController. The file for that sits in Assets/Application/Controllers. This is the animated object’s state machine. If you open that file and click Window/Animation/Animator you will see this:

Important is that you click the tab “Parameters”. This is where you can set parameters to the animation.
Parameters can be float, bool, int and trigger. As you see, I have created float “MotionTime”. Interestingly, if you double-click the state “LeverSwitch” you will see that it actually controls the animation LeverSwitch.
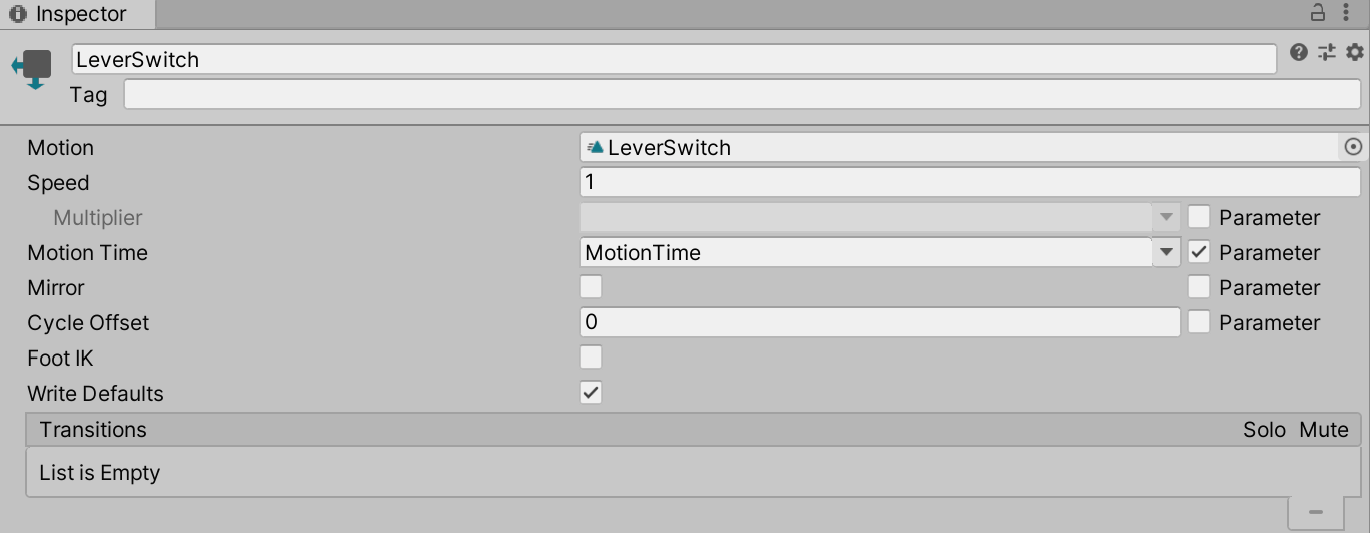
Don’t be fooled by identical names - the state LeverSwitch refers to the animation LeverSwitch. These are two different things and the names do not need to be the same. Notice, also, I have set the Motion Time of the animation to the “MotionTime” parameter. Now the fun thing of such a motion time parameter is that if you set it to 0 it will put the lever in the position it should have at the start of the animation, and if you set it to 1 it will put it in the position it should have at the end. Any value in between puts in a the corresponding position, to 0.5 will put if upright.
Now that we know this, we can actually interactively control an animation from code. And this is exactly what the next part is about.
Controlling an animation from code
With all the groundwork we did in the previous blog posts, controlling an animation is as simple as this:
public class HandTrackingAnimator : HandRailsBase
{
    [Header("Animation Settings")]
    [SerializeField]
    private Animator animator;

    [SerializeField]
    private string animationName;

    [SerializeField]
    private int animationLayer = 0;

    private static readonly int MotionTime = Animator.StringToHash("MotionTime");

    protected override void OnLocationUpdated()
    {
        var traveledLength = PointOnLine.DistanceTraveledAlongPath(
               WayPointLocations, CurrentIndex);
        var traveledFraction = traveledLength / TotalLength;

        if (!animator.GetCurrentAnimatorStateInfo(
                      animationLayer).IsName(animationName))
        {
            animator.Play(animationName, animationLayer);
        }
        animator.SetFloat(MotionTime, traveledFraction);
    }
}
This needs the animator, the name of animation - that is, the name of the state in the animator, that is, this thing:
And the animation layer, which can remain 0 now for the purpose of this blog.
We already had a DistanceTraveledAlongPath extension method that told us how far along the line we have traveled. Divide that the TotalLength of the path, and then we have a number between 0 and 1 that we need to apply to the animator.
This part activates the right animation if it has not already been activated
if (!animator.GetCurrentAnimatorStateInfo(animationLayer).IsName(animationName))
{
    animator.Play(animationName, animationLayer);
}
And then this sets the animation parameter value and puts the lever in the corresponding position
animator.SetFloat(MotionTime, traveledFraction);
Enabling run time debugging
The stuff above was basically the meat of the matter. For a simple animation, following a simple path like an arc, you can simply align the path with the animation using just the editor with the gizmos options I added in the previous blog post. If you need to align hand movements along a longer or more complex path, you might want to check in 3D - that is, looking from you actual HoloLens 2 - if the path you make the hand follow actually aligns with the path of animation. To this end, I have extended HandRailsBase with run time debugging options:
[SerializeField]
private bool drawRuntimeDebugObjects = false;

[Header("Runtime debug Settings")]
[SerializeField]
private GameObject runtimeDebugObject;

[SerializeField]
private Material wayPointLineMaterial;

[SerializeField]
private float wayPointLineWidth = 0.01f;
This allows you to specify whether or not run time debug objects should be drawn, what object show be used for the way points, what materials should be used for the lines and what the width of these lines should be.
This little method, which is now called from the tail end of OnEnable, draws the multi segmented line the hand should follow in the air:
private void DrawRuntimeDebugObjects()
{
    if (drawRuntimeDebugObjects && runtimeDebugObject != null)
    {
        var lineTemplate = new GameObject("DebugLine");
        lineTemplate.transform.parent = transform;
        var lineRenderer = lineTemplate.AddComponent<LineRenderer>();
        lineRenderer.useWorldSpace = true;
        lineRenderer.startWidth = wayPointLineWidth;
        lineRenderer.endWidth = lineRenderer.startWidth;
        lineRenderer.material = wayPointLineMaterial;

        for (var i = 0; i < WayPointLocations.Count; i++)
        {
            Instantiate(runtimeDebugObject, WayPointLocations[i],
                        Quaternion.identity, transform);
            if (i > 0)
            {
                var lineObject = Instantiate(lineTemplate);
                lineObject.GetComponent<LineRenderer>().
                    SetPositions(new[] { WayPointLocations[i - 1],
                                         WayPointLocations[i] });
            }
        }
        Destroy(lineTemplate);
    }
}
Which then shows like this:
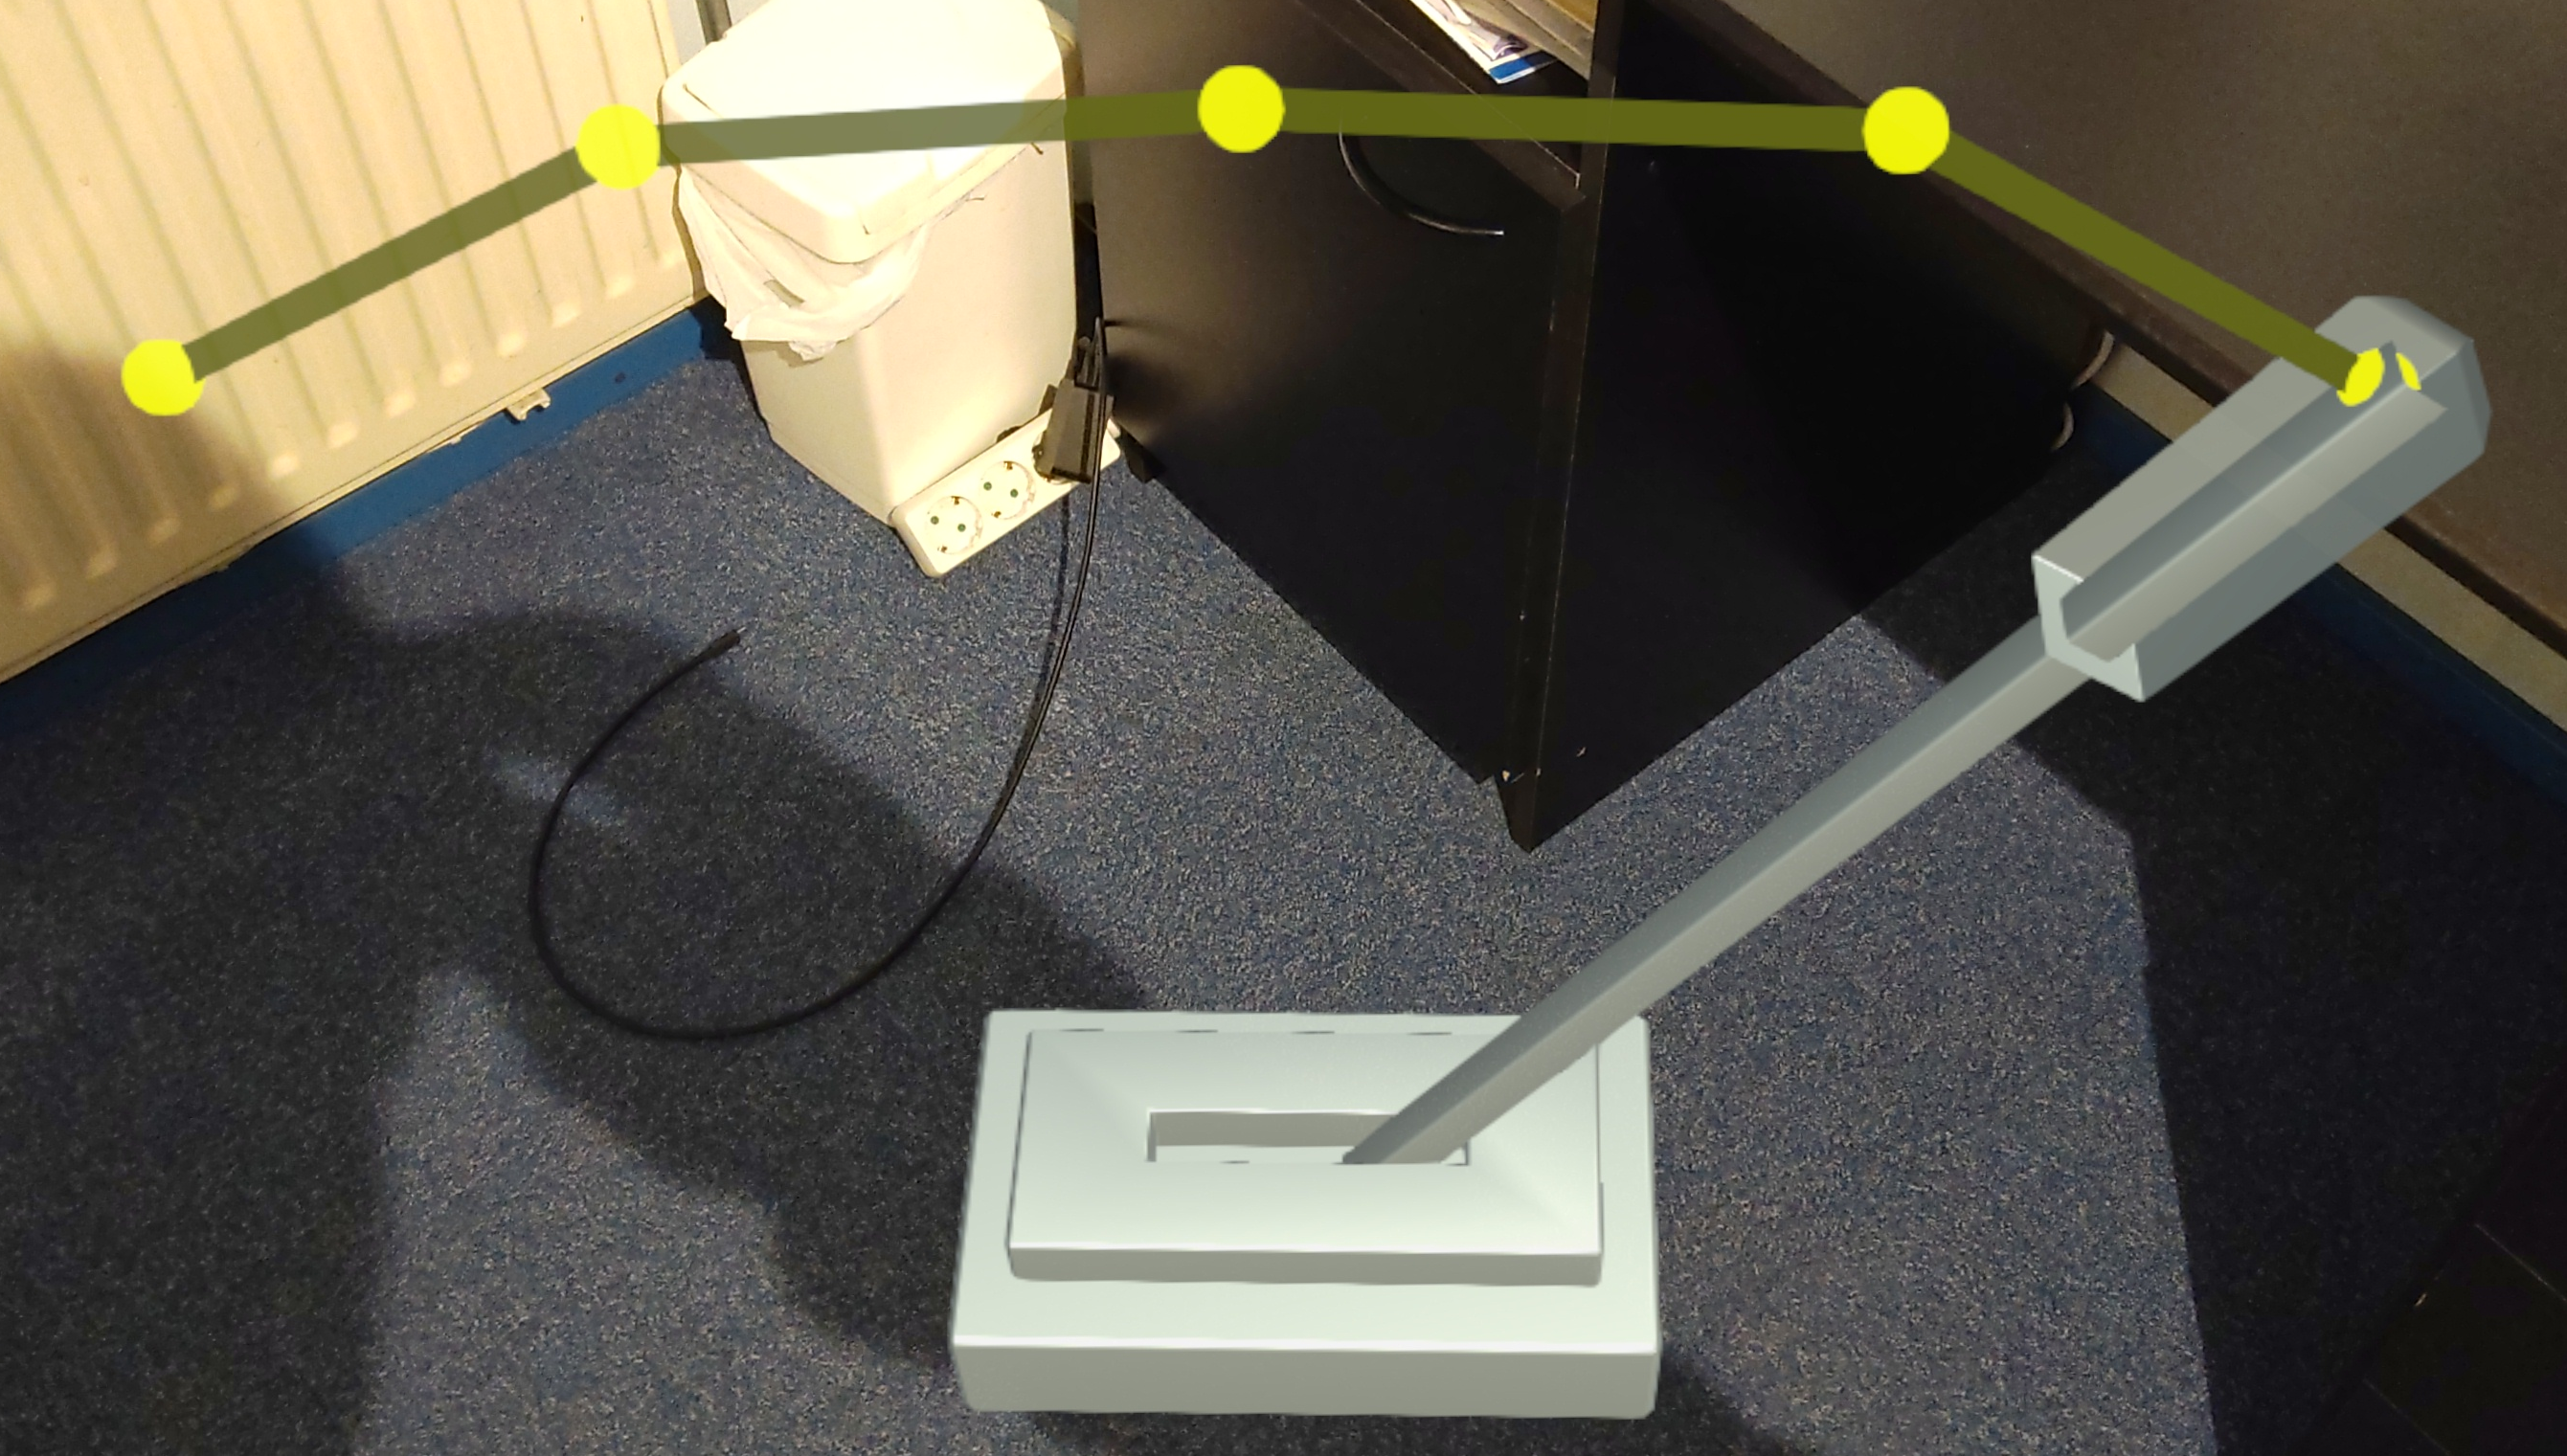
In the editor, it’s configured like this:
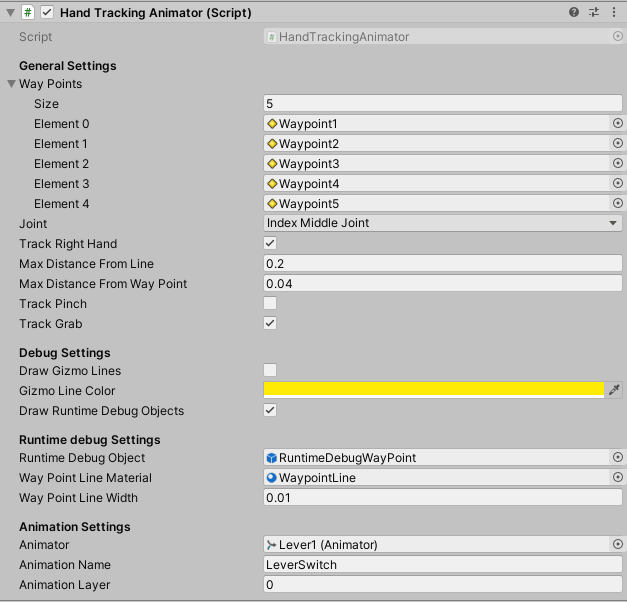
Note in the configuration above you can only move the lever by grabbing it - pinching does not work. If would want pinch to be included in the recognized gestures, simply tick the check box.
Final words & credits
I didn’t know you could actually control animations with a motion time parameter, and credits for showing that to me, as well as coming up with the idea of using a hand position to control animation progress in a simple 2-point-scenario go to my esteemed colleague Timmy Kokke aka Sorskoot. After that I went a bit berserk and greatly expanded on the idea to create a reusable standard solution for multi line segments.
You can download the actual finished project with all components here. The hand controlled animation sits in SampleScene2.