
 MVP Profile
 Try my app HoloATC!
  HoloLens 2
 Magic Leap 2
 Android phones
 Snap Spectacles
 MetaLense 2
 Buy me a drink ;)
 BlueSky
 Mastodon
 Discord: LocalJoost#3562
Manipulating holograms using the MRTK Hand Physics service
One of the great things that makes HoloLens 2 special is hand tracking, and the fact you can actually touch and move holograms. There are several nice components in the MRKT for advanced manipulations, but if you simply want to push holograms around, or want to do custom manipulations, the MRTK Hand Physics Service is your friend.
Necessary MRKT components
Using the Mixed Reality Feature Tool, I have installed the following components:
- Foundation (of course)
- Tools
- Standard Assets
- Extensions

The last one is critical, as that is where the Hand Physics service is located in.
Configuring MRTK, part 1
Whenever I do something special with hands, I make sure I change the Input Simulation settings, as this makes testing in the editor a lot easier. The default settings for the MRTK are a bit limited as far as gestures go:
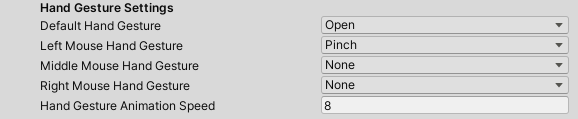
I like to set them to
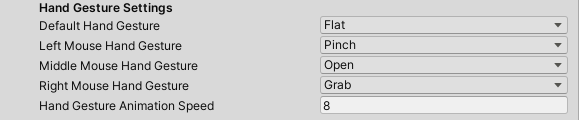
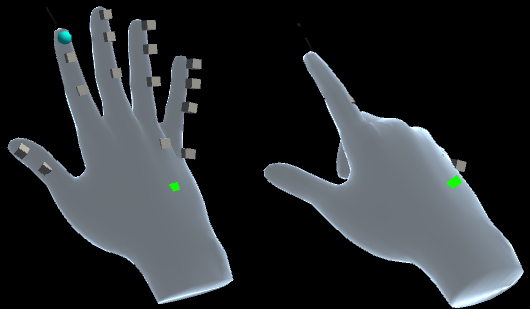
So your hand is default flat (shown right in the image below ) in stead of ‘open’ (shown left) which actually is more pointing, and makes it hard to simulate events from the separate fingers.
A simple object to manipulate
In the scene I have placed a simple cube, 0.2 x 0.2 x 0.2, at 1 meter before the initial position of the HoloLens when the app starts. I also added a rigid body to it with - importantly - gravity turned off. Yet, if I move my hand to it, it goes right through: nothing happens.
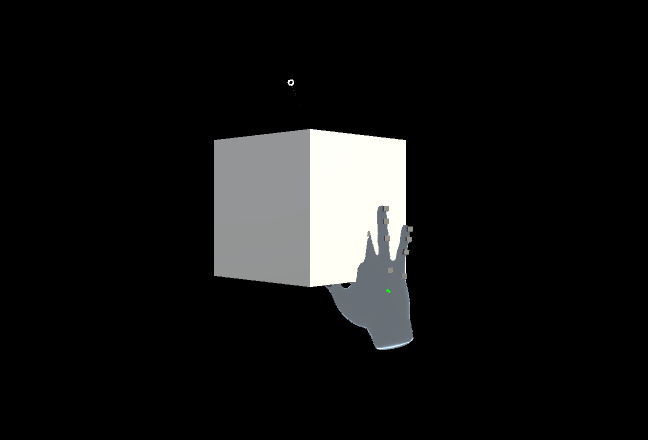
This is because there is nothing in the form of colliders attached to the hand - be in the editor or the HoloLens itself.
Configuring MRTK, part 2
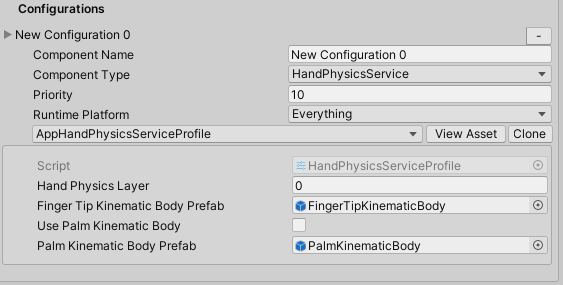
So going to the Extensions, after of course cloning the profile, add the HandPhysicsService like this
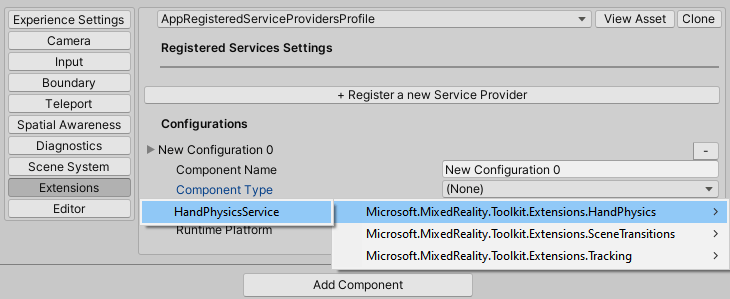
It will show up like this:
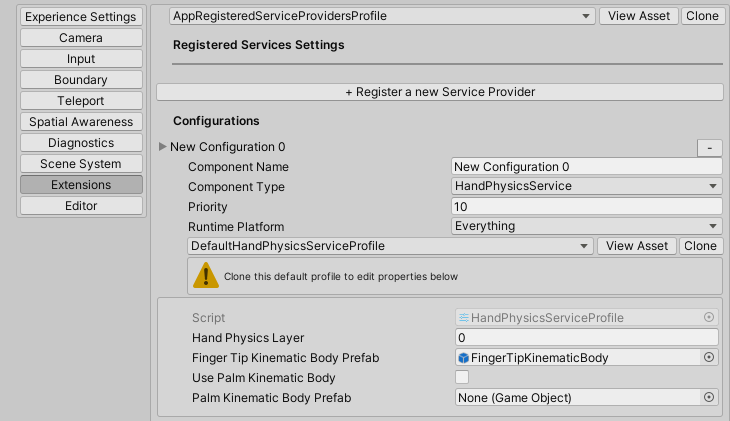
Now if you configure this, something very interesting will happen. If you bring up the simulated hand again, you will see a game object “Hand Physics Service” show up in your hierarchy. In that, you will see a game object with a small sphere collider, a rigid body and a ‘JointKinematicBody” script - for every finger (and thumb) tip.
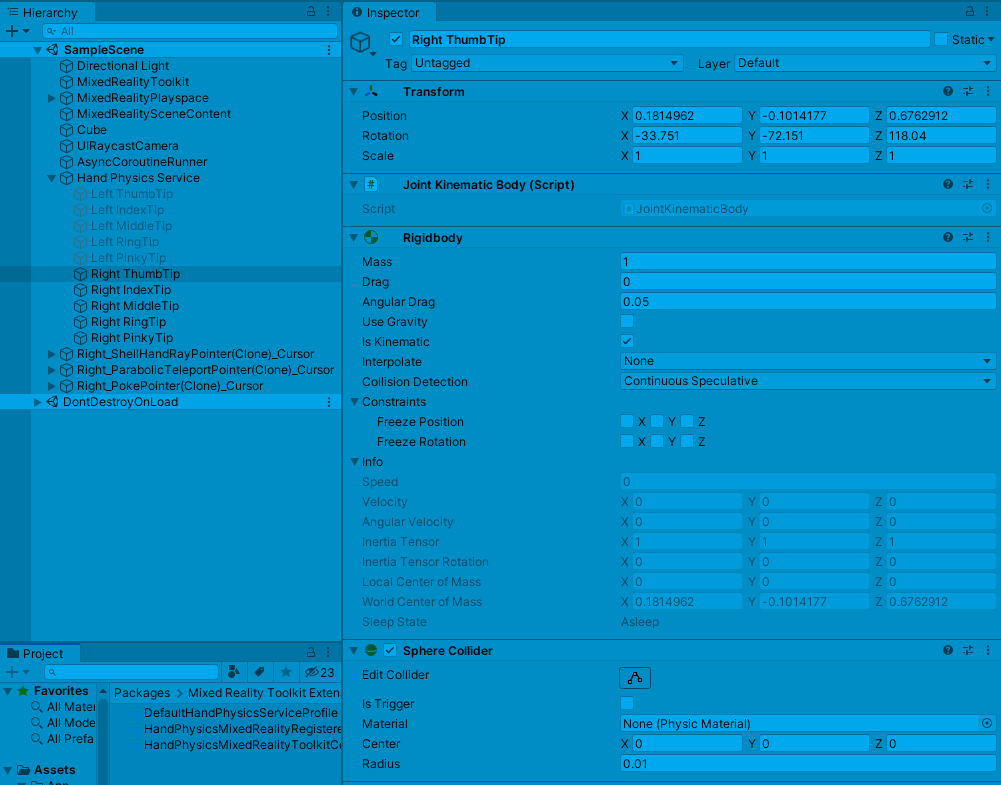
These game objects follow the finger tips, with the result that if you move your hand now:
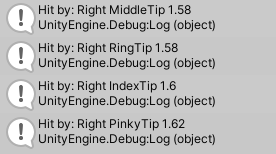
The object will move away. For good measure, I have added a little script to the cube that shows exactly by what it’s hit:
public class CollisionDetector : MonoBehaviour
{
    private void OnCollisionEnter(Collision other)
    {
        Debug.Log($"Hit by: {other.gameObject.name} {Time.time}" );
    }
}
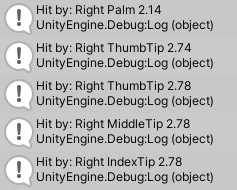
Resulting in, for instance, this in the Console window:
Hand palm triggered manipulation
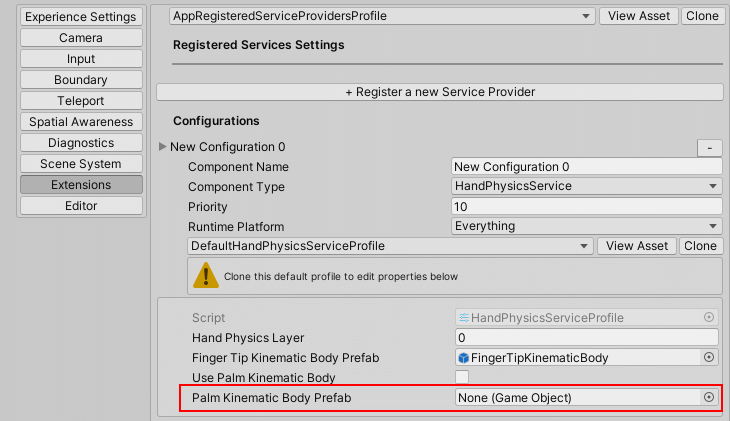
If you want add hand palm to be the contact area too, you can easily get this done by setting the Palm Kinematic Body Prefab in the Hand Physics Service Profile:
Beware because there is a caveat, that is caused by what I think is a bug in the MRTK. This UI enables you to change the DefaultHandPhysicsProfile directly, without clone. But this profile is part of the MRTK deliverable. If you click “View Asset”, you will end up in this folder: HandColliders\Library\PackageCache\com.microsoft.mixedreality.toolkit.extensions@71dc08f129af-1624820429747\HandPhysicsService\Profiles

Everything in your project’s “Library” folder are files generated by Unity from your sources - and the PackageCache just contains files extracted from the MRKT’s .tgz files that reside in the Packages\MixedReality folder:
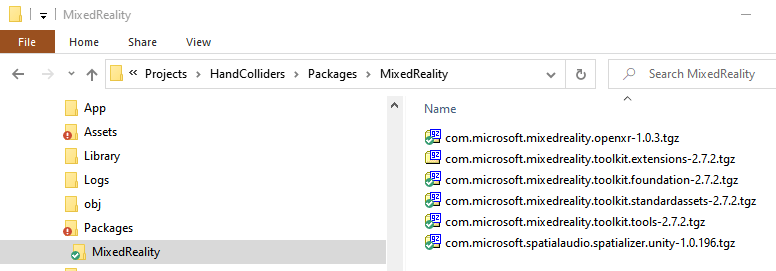
If you change the DefaultHandPhysicsProfile, this change will never appear on your co-worker’s PC when they pull sources from Git. Unless you commit the PackageCache folder as well, in which case I hope you love to solve a lot of merge conflicts, and maybe you should even reconsider your career path as a Unity developer :P. In any case it will be overwritten when the MRKT is updated.
Long story short: clone this profile before editing it. Then click the little dot at the right side the empty box next to that, which shows you this little window that by default does not allow you to select anything at all
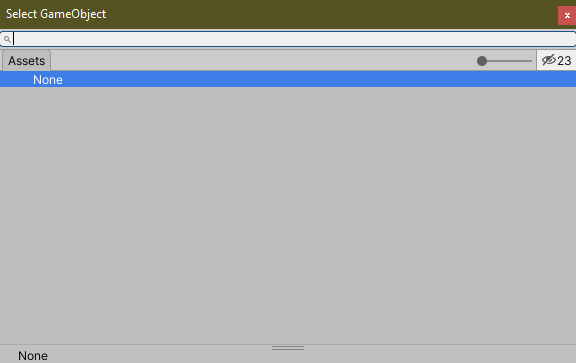
I am not quite sure why this is, but if you click the little crossed out eye on the top right it will show you the game objects you can select
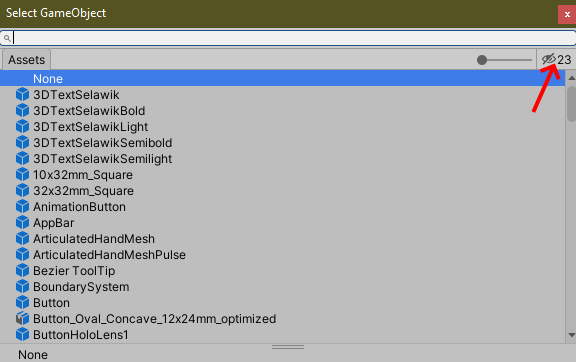
If you pay close attention, you can see the button background changes from light gray to a bit darker gray when you click it - while the icon still keeps showing a crossed out eye. But if you open this window from an empty box, the list is always empty and you need to click the eye button. I think the UI here could be improved a little, but anyway, if you click the eye it shows you a large number of game object you can choose from. Find “PalmKinematicBody” and select that:
and, for some reason you have to select this little check box as well:
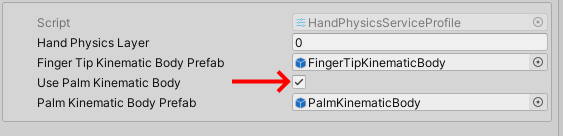
I am not quite sure why setting only the Finger Tip Kinematic Body prefab will activate finger tracking, but palm tracking needs to have a kinematic body and a checkbox, but that’s the way it apparently works. It has been like this for as long as I can remember using it.
And if you move the hand palm first to the cube, you should be able to see this in your log:
If you want just the palm to be a contact surface, then remove the Finger Tip Kinematic Body prefab from it’s box.
Final words
This is only a glimpse of what you can do using the Hand Physics service. This blog was merely meant to show it exists, how you configure it, and one of the cases you can use it for. A demo project can, as always, be found here.